


Making instruments with preschoolers: 20 DIY Musical Instruments for Kids to Make
20 DIY Musical Instruments for Kids to Make
Sharing is caring!
20.0K
shares
Bring the band alive at your home with these DIY Musical Instruments for Kids to Make and play! And they actually make music, too!
Did you know that babies can identify music before words? That’s probably the origin of lullabies and why we tend to speak to them in a sing-song voice! Nature has an answer for everything!
Benefits of Children Learning a Musical Instrument
How to make a musical instrument at home?
20 DIY Musical Instruments for Kids to Make and Play
1. DIY Hand Drum
2. Rainbow Paper Plate Tambourine
3. Rainbow Rainmaker Craft
4. Fringe Musical Anklets
5. Nature-inspired homemade Percussion Instrument – Musical instrument with nature
6. DIY Spoon Maracas
7. How do you make a homemade flute out of household items? – DIY Straw Pan Flute
8. Homemade Colorful Kazoo – make musical instruments with recycled materials
9. Yarn Wrapped Stick and Shell Rattle
10. Shoe Box Guitar – make a musical instrument guitar
11. Recycled Wood Xylophone- Make homemade instruments with different pitches
12. Popsicle Stick Harmonica
13. Bottle Top Castanets – make musical instruments with recycled materials
14. Tin Can Drums
15. Cardboard Tube Trumpet Craft –make a musical instrument out of paper
16. Bobby Pin Thumb Piano – Make improvised musical instruments
17. Mini Coconut Shell Tabla – make musical instruments for school project
18. Jingle Ring – Musical instrument with nature
19. Mini Lid Banjos – Make musical instruments from recycled household items
20. DIY Microphone – make musical instruments for kids
21. Paper Cup Damru – Turn paper cups into Lord Shiva’s Favorite Musical Instrument
Benefits of Children Learning a Musical Instrument
Playing music makes children smarter, nicer, and happier. Playing a musical instrument helps children benefit on almost every level: it enhances their cognitive skills while fostering creative thinking and their ability to focus. Loog guitars are specifically designed to be played again and again, providing a stimulating experience that allows kids to learn while having fun.
This love for music never really goes away, and if nurtured properly, you can raise kids to learn to appreciate good music. And how do you start that? By making some music of their own! Do we get an oboe? An accordion? Guitar Hero? Fill up a jar with rice and call it a day? Not a chance.
How to make a musical instrument at home?
Don’t worry, we’re not talking about expensive piano or cello lessons, unless that’s what you want, of course. Today we’re talking about homemade musical instruments! Here are 20 simple DIY Musical Instruments for kids to make and play and just liven up the atmosphere!
20 DIY Musical Instruments for Kids to Make and Play
1.
 DIY Hand Drum
One of the first musical instruments kids play with is a drum – even if it’s just banging on an upturned bucket! This DIY hand drum from Julep is pretty and fun to carry around and just go titter tatter on either side!
2. Rainbow Paper Plate Tambourine
This tambourine from Kids Craft Room not just sounds delightful, it looks great as well! The painting is a good exercise in concentration and patience and the bells give it that lovely sound.
3. Rainbow Rainmaker Craft
If you’ve got an unused cardboard roll tube lying around, you have got to make this simple craft! Mum in the Madhouse makes it look so easy, beans inside the tube – but it’s really the washi tape decoration that makes this one a winner!
4. Fringe Musical Anklets
Does jewelry count as a musical instrument? These fringe anklets from Giggles Galore sure do!! With pink felt, blingy sequins and little bells, this is every little girl’s dream! Just tie them on and dance away!
5.
 Nature-inspired homemade Percussion Instrument – Musical instrument with nature
We love using bits from nature to make crafts and this time we’ve used Gulmohar pods as a natural percussion instrument. It’s a lot of fun to paint on and decorate and you get a soothing, gentle sound out of it – just like Nature!
6. DIY Spoon Maracas
Have you seen those Latin American shows or movies where people gleefully shake maracas and sway their bodies? There’s something so fun about this instrument that you can’t help but move along! Maybe that’s why babies love rattles so much! Check out the instructions for this one from Oriental Trading.
7. How do you make a homemade flute out of household items? – DIY Straw Pan Flute
Ever fancied playing a pan flute? Well, you can make one yourself now!! Cultura Creas has a lovely pan flute DIY, complete with feathers and all! Translate the page for English instructions, and let the kids experiment with straws of different materials to see how the sounds turn out.
8. Homemade Colorful Kazoo – make musical instruments with recycled materials
Do you remember playing with Kazoos as a kid? Well, let’s relive those memories with our own kids with a bunch of homemade kazoos – in multicolor! ID Kids has the tutorial to make these – all you need are toilet rolls and tissue paper and a bunch of usual craft supplies you likely already have.
9. Yarn Wrapped Stick and Shell Rattle
When you’re out for a walk on the beach next time, be sure to pick up some driftwood and shells. You’ll thank me later, as you make this lovely musical instrument from Red Ted Art! Those shells bump against each other for a lovely sound reminding you of the harmony of the ocean.
10. Shoe Box Guitar – make a musical instrument guitar
This isn’t one of those guitars that look great but do nothing else – this one actually works! Use rubber bands on the shoe box and go ahead strumming away to your own tune! Check out the full video tutorial at Real Simple.
11. Recycled Wood Xylophone- Make homemade instruments with different pitches
Don’t throw away those strips and scraps of wood after a home project – you’ll need them for this xylophone from Borrowed Blessings! It’s amazing what some bring paint can do to trash. Use a sponge or felt-covered drumstick to keep the paint on for longer.
12. Popsicle Stick Harmonica
Sticks, toothpicks and rubber bands – very mundane household items that come together to create some beautiful melodies! Yes, music will happen when you make this harmonica craft from She Knows. Don’t forget to paint it in pretty colors of your choice!
13. Bottle Top Castanets – make musical instruments with recycled materials
These bottle top castanets are so fun – you can carry them around in your pocket and go clickety clack whenever you please! And the fact that they look like crocodiles only makes it better! Check out Red Ted Art to find out how to make these little instruments.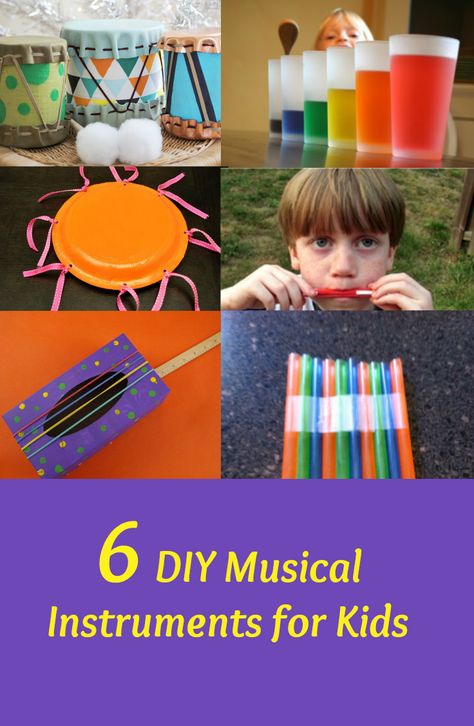
14. Tin Can Drums
Ready for some larger size drums? Then check out these cute ones form Mini Eco, designed to be perfect for toddlers! If you’re making a set, try out different materials besides balloon so that you get different sounds from each.
15. Cardboard Tube Trumpet Craft –make a musical instrument out of paper
You might think it’s impossible to make a trumpet at home, but Tea Time Monkeys proves otherwise! The ever versatile cardboard tube roll comes to the fore again, and combines with craft paper to create a simple trumpet that’s sure to delight the younger lot!
16. Bobby Pin Thumb Piano – Make improvised musical instruments
Yes, even bobby pins can create music, if you use them right! Thrifty Fun shows us how to use these pins on a wooden board to create your very own thumb piano. If you want to avoid the staple gun, you can use some really strong tape and stick the pins in place.
17. Mini Coconut Shell Tabla – make musical instruments for school project
Punekar Sneha has a genius idea of converting coconut shells into mini tablas – a popular Indian drum. They look so cute, they’d be perfect for Diwali! Don’t forget to take out the flesh first!
18. Jingle Ring – Musical instrument with nature
This adorable nature-themed tambourine-like instrument is the perfect addition to a May Day celebration or even just a day outside. Easy to make, you can find the tutorial from Buggy and Buddy
19. Mini Lid Banjos – Make musical instruments from recycled household items
Here’s a super cute craft that’s just begging to be made! The Craft Train recycles jar lids into little banjos with craft stick handles and loom bands for strings. Decorate with washi tape and embellishments and you’re done!
20. DIY Microphone – make musical instruments for kids
Yes, your child’s voice is also music, and a cool microphone will give her the confidence to let it out with vigor! I Heart Arts and Crafts has a tutorial for a super cute and extremely easy to make microphone that can be customized to your heart’s liking.
Bonus –
21. Paper Cup Damru – Turn paper cups into Lord Shiva’s Favorite Musical Instrument
A damaru is a small two-headed drum, used in Hinduism and Tibetan Buddhism. In Hinduism, the damru is known as the instrument of the deity Shiva. See how to make musical instruments with recycled materials
These DIY Musical Instruments for Kids aren’t just fun to make and play, they’re also a learning opportunity. Kids can learn about how ancient people made instruments with what they found in nature, and about how different cultures have different kinds of music. And yet, a good beat and a good rhythm will have anyone’s foot tapping – that’s the power of music to unite!!
Categories: Recycled Crafts, Craft Ideas For Kids, Kindergarten Crafts & Activities, Latest Posts, Primary school Kid Crafts & Activities
Tags: diy musical instruments, diy musical instruments for preschoolers, homemade musical instruments, how to make musical instruments for school projects, improvised musical instruments, musical instruments, musical instruments diy preschool, musical instruments made from recycled household items
Early Bird Offer to Join Club Artsy Craftsy & Become a Founding Member
27 Homemade Musical Instruments to Make With Your Kids (Using Recycled Materials)
Most of us buy musical instruments, but ever wondered how to make musical instruments with recycled materials?
If you have, you’ve come to the right place.
In this article, we’ve put together a list of homemade musical instruments made from recycled household items that you and your little one can make.
Not only is making recycled instruments fun, but it will teach them a little about living sustainably too (a win-win!).
Table of Contents
- Things to Hit
- Balloon Drums
- Bongo Drums
- Spool Drums
- Chinese Gong
- Paper Cymbals
- Things to Shake
- Pringles Can Shaker
- Plastic Water Bottle Maracas
- Paper Plate Maracas
- Easter Egg Maracas
- DIY Tamborine
- Tubular Bells
- Rain Sticks
- Music with Glasses and Bottles
- Xylophone
- Bottle Top Castanets
- String Instruments
- Rubber Band Guitar
- Mini Lid Banjo
- Homemade Brass Instruments
- Bracelet Bells
- Jingle Wand
- Washer Chimes
- Homemade Wind Instruments
- Card Kazoo
- Popsicle Harmonica
- French Horn
- Viking Horns
- Zampoñas (Panpipes)
- Homemade Didgeridoo
- Pianos and Glockenspiels
- Thumb Piano
- Copper Glockenspiel
- Summary
Things to Hit
Let’s start off our list of DIY musical instruments with some types of drums you can make from everyday household items.
Balloon Drums
Take any old tin, mug, or saucepan you have in the cupboard, a deflated balloon, and an elastic band. Cut an opening into the balloon at its widest point making a semicircle-shaped incision.
Now rinse the balloon with water, so that it sticks and stretch it over the top.
If necessary, tape the edges down to hold it in place, but an elastic band should do the trick. Get the kids to hit the balloon skin with a wooden spoon or chopstick to make a drum beat.
To jazz things up, have your kids paint the outside in bright colors for an extra fun look. More info…
Bongo Drums
Take two round crisp or coffee containers, with their plastic lids still in place.
Get the kids to decorate them using paints, crayons, stickers, or glitter to jazz things up a little. Next, put the containers next to one another and tie both together with string, making sure both are secure and don’t wobble.
Glue the string into place and wait for it to set. Children can play with the bongos using their hands, teaspoons, or chopsticks. More info…
Spool Drums
Kids swizzle these spool drums left and right, pretty looking things aren’t they! They’re way too complicated to explain how to make them here, check out the instructions here.
Chinese Gong
This is a fantastic way to get children involved in music from different cultures. To make your own Chinese gong, make two holes in a tin-foil roasting tray, making sure they lie about 2” apart from each other.
Next, take two pipe cleaners and feed each through a separate hole, making sure to twist them into a circle to seal them in place. You can place a cardboard wrapping paper tube or a stick through the holes and fasten it to a couple of chairs so that it hangs.
Finally, get the kids to decorate the gong using Chinese symbols and hit it with chopsticks or a wooden spoon to create music! More info…
Paper Cymbals
If you’re wondering how on earth you can craft some DIY cymbals at home, the answer couldn’t be more simple. Use pan lids!
Everyone has a pair of these sat in their cupboard and kids love to crash them together to create music. If you don’t want your pots and pans getting bashed around, why not try making a set of cymbals from two paper plates and coins around the edge? More info…
Things to Shake
If you’re looking to create something slightly less noisy than a set of drums, why not try making something your child can have fun shaking about? Here are some of our favorite DIY ‘rattle’ homemade instruments.
Pringles Can Shaker
Take an empty pringles container and cover the outer surface with paper or masking tape, making sure to leave space for the lid to attach properly.
Then get the kids to paint or draw around the outside with bright colors and to stick on some foam shapes to make the shaker look extra special.
Take off the lid and add a handful of dried beans or rice to the container, seal it again, and shake to enjoy! Different beans, rice, and pulses make different sounds, so try making a set with different fillings in each, so your little one can experiment with different sounds. More info…
Plastic Water Bottle Maracas
Find a couple of used water bottles and clean and dry them. Wrap masking tape around both and get the children to color them in or paint them with bright colors.
Now, fill the bottle halfway up with popcorn kernels, rice, or dried beans and secure the bottle top. Start shaking to enjoy!
Different sized bottles and pulses will create a variety of sounds, so why not try making a set of maracas in different sizes and letting your kids listen to the variety of music they make? More info…
Paper Plate Maracas
Take two paper plates and place them eating side down. Ask the kids to paint the side facing them and to add glitter or colorful cardboard shapes to brighten things up.
Let both dry and flip one over to expose the non-colored side. Place dried beans or rice onto the plate, then take the other paper plate and put it on top of the other. Carefully glue around the edge and leave to set.
Once dried, you have a fully sealed, paper plate maraca! You can try creating a set containing different fillings, so your kids can experiment with different sounds.
Easter Egg Maracas
Just when you thought Easter couldn’t get more exciting, we’ve thought up a fun way you and the kids can make Easter egg maracas as well as eating loads of chocolate.
To make these you’ll need some leftover plastic Easter egg shells, popcorn kernels or rice, masking tape, and plastic spoons.
Start by partially filling an egg with popcorn kernels and sealing. Next, take two spoons and tape them to either side of the egg, then tape the ends of the spoons together.
Last but not least, get the children to decorate the tape in bright colors, shake and enjoy! More info…
DIY Tamborine
Paint the non-eating sides of two paper plates in bright colors of your child’s choice. Allow them to dry, then stick on any fancy shapes and add glitter to make them extra fun!
Next, glue the edges of the plates together, so that both eating surfaces are enclosed and only the non-eating surfaces can be seen. Leave the glue to set. Then, use a hole-punch to create holes 2” apart around the edge on the plates and thread a piece of string with a bell attached through each. Shake and enjoy! More info…
Tubular Bells
This is a really easy way for younger children to make a fun instrument at home.
Get a cardboard tube, from either a pack of kitchen roll or gift-wrapping paper, and cover it in plain paper. Ask the kids to decorate it how they like, then pierce several holes in one end of the tube.
Feed some string into each hole and attach a bell. Now tie a knot to seal in place and repeat until all the holes have a little bell attached to them. Shake and rattle to enjoy! More info…
Rain Sticks
To make a rain stick all you’ll need is a piece of plastic tubing about 30cm long, some tin foil, rice or dried beans, and some tape.
To get things rolling, tape up one end of the tubing, making sure there are no gaps. Now feed a piece of tin foil into the tubing, this should ideally be the same length as the tube.
Next, fill the tube partially full with rice, dried beans, or beads and tape up the other end. Kids can turn the stick at 180 degrees and listen to the sound that the filling makes against the tin foil. More info…
Music with Glasses and Bottles
Xylophone
To create your very own DIY xylophone you’ll need a set of glasses or jars and a wooden spoon.
Fill each glass with different amounts of water, starting off with very little and ending with the glass nearly full. Ask the kids to gently hit the glass with a wooden to hear the subtle difference in notes.
Remember, glasses with less water will produce a higher pitch, whereas glasses containing more will have a lower pitch. So, you can either put them in order of pitch or mix them up if you’re feeling like being experimental. More info…
Bottle Top Castanets
Start off by flattening a few metal bottle tops with a hammer (this first part is for adults only). Next, cut out two wide rectangular pieces of cardboard and fold both in half, so that they look like a duck’s beak.
Then dab a bit of glue onto the jagged edge of the bottle tops and place onto both inside surfaces of the cardboard, so that they hit against each other when the card closes.
Now get the kids to join in by decorating the cardboard with paints, glitter, or sticks, whatever they like the best, and leave to dry. They can clap the castanets together to create interesting rhythms, or can even play two at a time using both hands if they feel extra creative! More info…
String Instruments
Rubber Band Guitar
Crafting a homemade guitar is slightly more complicated than the instruments we’ve talked about so far, but is just as fun and very rewarding.
You’ll need the following materials before you start: a medium-sized plastic bucket or pot, some large elastic bands (in various widths), cardboard, a wooden stick, tape, and glue.
Wrap the elastic bands around the bucket, so that they run around the opening and the tapered end. Try to stick to an ascending order; from thinnest to thickest as you go, then tape them all in place, so they don’t slip off during use.
Next cut a guitar shape out of a piece of cardboard, making sure to include a hole for the bucket and elastic bands to fit behind.
Paint the cardboard any color you like and leave it to dry. Next tape the bucket onto the back of the card, near the opening, and glue around the edges to secure in place.
Finally, attach the guitar’s stick neck using plenty of tape and glue at the top of the cardboard cut-out. You can glue some beads or coins to the end of the neck to create a set of fake tuners. Strum and enjoy the music! More info…
Mini Lid Banjo
The mini banjo works in a similar way to the homemade guitar we mentioned above, as you’ll be using elastic bands as strings.
To get started, get a jam jar lid and stretch four elastic bands around it. Try to use some thin and some thick, so that the sound varies when they are plucked.
Next, take some masking tape and secure the elastic bands in place, making sure they’re an equal distance apart. Now get a craft stick or a recycled ice cream stick and decorated in funky colors. Stick it onto the back of the lid with glue and leave it to dry.
For extra detail, you can glue some sequins onto the end of the stick, so that they look like tuning pegs. Strum your banjo when everything’s set and enjoy the music you create. More info…
Homemade Brass Instruments
Bracelet Bells
To make this instrument you will need some cotton pipe cleaners, three or four small bells, and some scissors.
To assemble, simply measure the width of the child’s wrist and a half in pipe cleaner and feed the bells through the pipe. After placing each bell, twist the chenille to keep them in place about 1 cm apart. Then wrap the remaining length around the wrist and twist the two ends together to secure in place.
The kids can now shake their hands to rattle their homemade bracelet bells! More info…
Jingle Wand
To make a jingle wand, take five or six individual pipe cleaners and secure them together at one end and ¾ of the way up the stem, using elastic bands and some tape.
At the free end, attach a small bell to each of the individual chenille pipes and secure them by twisting a small knot into the pipe.
Kids can play around with this instrument by shaking it around and making the bells ring. More info…
Washer Chimes
To make your very own set of musical chimes, you’ll need a stick or ruler, some string, some metal washers, glue, nail polish, and a spoon.
Tie a piece of string around each washer and then tie the other end around the stick. Make sure to attach the string at different points across the stick so they don’t bunch up, and secure them into place with glue.
Next, get the kids to paint the washers with bright or sparkly nail varnish and leave to dry. Children can now use a metal spoon to hit the washers and create music. More info…
Homemade Wind Instruments
Card Kazoo
For this instrument, you will need a cardboard toilet roll tube, a rubber band, wax coated paper, some paint, and a hole punch.
Get the kids to decorate the toilet roll tube how they like it, leave it to dry, and then punch a hole about 1cm from the end of the cardboard.
Next, attach the wax paper over the other end of the tube and secure it into place with a rubber band. Warning – Do not glue this in place! It needs to vibrate a little to make a kazoo like sound. The kids can now blow into the open end of the tube to make music. More info…
Popsicle Harmonica
To make your very own popsicle harmonica, you’ll need to get the kids to decorate two ice lolly sticks using a paint of their choice and leave it to dry.
Next, place a strip of paper between both sticks and secure together using a rubber band at each end. Now insert a toothpick in between both the rubber band rings, with one lying above the paper and the other below the paper.
Now you can blow into the harmonica or suck the air into it to make different sounds. Once you get used to playing, you can pinch the sticks together in different places to vary your notes! More info…
French Horn
Making a French horn is way easier than it looks, in fact, you only need the following three materials to make one: a piece of flexible piping about 56” in length, some craft shop pipe cleaners, and a funnel.
Fit the funnel into the pipe and secure with glue or tape (if the funnel is too big, you can cut some slits into the pipe to make it open up a little).
Next, curl the pipe around itself twice, so that the funnel and the mouthpiece are pointing upwards, twist pipe cleaners around the joints to keep everything in place. Blow into the hole and get tootin’! More info…
Viking Horns
To make your own Viking horn you’ll need 3 cardboard loo roll tubes, a party horn, tape, and some white paint.
To start with, cut a line through the entire length of one of the cardboard rolls and cut the fringe off the party horn. Now curl the card around the outside of the party horn, so that it tapers out at the other end and secure it into place using masking tape.
Next, take the other two rolls and fold them at one end so that they fit inside each other. This way, you can connect all three tubes with masking tape.
Now, tear some plain paper into strips and cover the horn with them using water mixed with glue. Leave to dry and blow into the horn before battle commences! More info…
Note: If you’re into pottery, you could sculpt one of these out of clay. You’d probably need a decent pottery wheel for beginners, but you’d end up with a way better and louder Viking horn.
Zampoñas (Panpipes)
If your kids fancy making a set of their very own panpipes, you’ll need to get your hands on a few plastic straws (wider is better), some glue, a piece of card, and some scissors.
To begin, cut out a rectangular piece of cardboard and paint both sides in bright colors and glitter. Next, take eight straws and cut them into different lengths, glue or tape them onto the card rectangle according to ascending order of length.
Now you can play the panpipes by pointing the ends of the straws at the floor and blowing across the tops. More info…
Homemade Didgeridoo
To create your own didgeridoo, get a piece of PVC pipe (this is the sort of pipe you have connected to your sink for drinking water) or a cardboard tube and get the kids to paint and decorate it how they like.
Playing the didgeridoo can be slightly tricky as it requires some extra technique. To get a good sound they should relax their lips and blow a loose raspberry. They should eventually get a rumbling note from the instrument called the drone.
If your kids find this hard, make sure they aren’t pressing the end against their lips too firmly or loosely as this can stop the sound from forming properly. More info
Pianos and Glockenspiels
Thumb Piano
Of course, it’s quite hard to recreate an entire piano at home from scratch, but there’s a way to do it on a smaller scale from a few simple materials.
This definitely requires an adult’s assistance during its assembly, so make sure you’re around to help the kids make this one. And once they’re done playing with it, you can use it to hand your coats on!
Copper Glockenspiel
This is probably the most complicated instrument we’ve included in this article as it involves using a hammer and saw, so make sure you’re around to carry out the difficult bits. Here’s how you make it.
Summary
We hope you’ve enjoyed this read and have plenty of fresh ideas to inspire your kids with.
Remember, there’s no right or wrong choice here, all are super fun to play and can be used to make interesting rhythms or melodies. But saying that, some of the instruments, for example, the balloon drums, Easter egg maracas, and bell shakers are far easier to make than others, so are probably most suited for younger children.
On the other hand, the copper pipe glockenspiel, thumb piano, and homemade guitar are great ways for slightly older kids to learn about music and DIY craftwork.
With so much choice here, you could even make several, get the children to create a band name (another fun activity), and before you know it, you might have the next child prodigy on your hands!
Happy music making! 🙂
25 Easy DIY Musical Instruments
Life is more fun with music! What if you and your kids can make them on your own with simple materials at home? Check out these easy and fun tutorial on DIY musical and homemade instruments for you and your kids!
Hop on to some musical day with these super easy DIY musical instruments
These homemade music instruments like easter egg maracas, pan flute, popsicle stick harmonica, and paper plate tambourine are waiting! Get the band together, it’s time to jam!
Easy Musical Homemade Instruments to Make and Play with Kids
1.
 Super Cool and Easy to Make Banjo
Your young rocker kid is going to love to add this paper plate banjo craft idea by Parents to their DIY band! This is super easy to make, add stickers and beads and your kiddo will instantly turn into a rockstar!
This cool DIY banjo is so easy to make!
2. Easy Bass Drum for Your Kiddo
These duct tape drum ideas from Journey into Unschooling are about as close as you’ll get to having that deep bass beat in your DIY band! Your kids will surely love beating these craft sticks all-day long!
This simple bass drum will add cool sound to the DIY band!
3. A Cool DIY Cardboard Guitar
This cardboard guitar idea by Pink Stripey Socks is absolutely fantastic with a twist! Forget playing it, your kiddo might want to just display it in your home!
Isn’t this DIY cardboard guitar lovely?
4.
 Complete the DIY Percussion with Castanets!
These castanets crafts from Angela Krueger are perfectly fun for the little percussionist with tiny fingers! They’re made from jar lids! Add some lovely music to your kid’s DIY band!
These small yet cute castanets will add life to your DIY band!
5. Simple Egg Shakers for Your Kid’s DIY Percussion Band
These egg shakers ideas from Mama Smiles are super easy to make and so necessary for any little band! Your little rockstar will love making these easter eggs instruments and shaking them all day long!
These egg shakers are so adorable your kids will love making them!
6. Add a Chicken Sound to Your Kid’s DIY Band!
This musical instrument that uses a thread from All For The Boys sounds like a chicken in a cup. Seriously. Why not try to add a chicken sound to your band?
A chicken in the band and in a cup! Awesome!
7.
 Make Cute Castanets for Your Kid’s Band
Click-clack those clackers with these cute monster castanets crafts from Krokotak! Instruments also need to look cool, right? Your kids will surely love these cute castanets fun-a-day!
A crocodile castanets will sound and look so good in the DIY band!
8. Easy DIY Can Drums Your Kiddo Will Love
The percussion line with be jumpin’ with this easy coffee can drum idea by Kids Activities Blog! Your kids will love creating those drum sounds for as long as they like!
Add colors and life to your DIY band with these super easy coffee drums!
9. A Super Easy Box Top Finger Strummer
Tiny tots with love to twang with this finger-strummer idea from Teach Preschool. Know what’s amazing? This is actually made from a box top and a number of rubber bands!
A super easy musical instrument perfect for your toddler!
10.
 Make this DIY Saxophone Right Inside your Home!
Does your kid want an instrument that sounds like a saxophone? This Membranophone craft from Exploratorium is exactly what you’re looking for! A perfect addition to your kid’s DIY band!
Grab some simple materials and make your kid’s very own saxophone!
11. Jangle Ankle Bracelet for Your Little One!
Your baby is going to dance to the music and add some awesome sounds with this cute jangle ankle bracelet idea by Two Daloo! Who said toddlers can’t be a part of the band?
This jangle anklet is super cute your toddler will love it!
12. A Simply Creative Popsicle Harmonica
A couple of popsicles sticks, some rubber bands, paper, and toothpicks are all your kid needs to make this cute little harmonica! This simple yet crafty idea from Housing a Forest is o cool you’ll play it all day long!
Add some beautiful music with this DIY harmonica.


13. Cool Strumming Instrument From Bobby Pins
Your kids will absolutely love making and playing this awesome bobby pin strummers instrument by Pi’ikea Street! Twang it and be a beautiful part of the DIY musical band!
Bobby pins and tape make the perfect strummer!
14. Super Easy DIY French Horn For Your Kiddo
Blow your own horn with this DIY french horn idea by Savvy Homemade! Your kids will have genuine fun making and playing this cool member of the DIY band!
Kids of all ages will fall in love with this DIY french horn!
15. Rain Sticks Shaker in the DIY Band!
Shake shake shake! Your little one will love to shake those rain sticks instruments from Danya Banya and make fun music! The shaking has never been this fun!
These rain shakers are super cool and colorful!
16.
 Cool Xylophone Made Out of PVC Pipes
This PVC xylophone craft by Frugal Fun For Boys will take a little more time to make but the results is so worth it! Your kids will definitely fall in love with playing this instantly!
This is the perfect xylophone for your kid’s DIY band!
17. Add Sand Blocks for Your Kid’s DIY Band!
Whether you know it yet or not, every band sounds better with the sand block! This creative idea by Fairy Dust Teaching lets your kid’s DIY band create the best music in the house!
Add some pretty sounds in your kid’s band from sand blocks!
18. A Kazoo Will Add More Fun in Your Kid’s Band
Your kids will love making and having fun with this musical instrument from The Joys of Boys. Kazoos are the kind of lip-buzzing fun that young musicians live for!
Add fun musci to the band with colorful kazoos!
19.
 Easy Water and Bottle Xylophone…with Colors!
Do a deer, a female deer, re a drop of golden sun! Your kiddo will love singing the rest on their own after you make these colorful musical plastic bottles from Life With Moore Babies!
More color, more fun, more music for your kid’s DIY band!
20. Painted Sticks and Button Shakers
These painted sticks instruments by Two Daloo are as fun to make as they are to play! They’re super easy to make and too colorful to resist!
Paint and shake and add music to your kid’s band!
21. Easy DIY Toilet Paper Xylophone
Some paper towels or wrapping paper rolls are all you and your kids will need to make this DIY xylophone idea from The Inspired Treehouse! The sound will definitely surprise you and your kiddo!
Grab some toilet paper rollls and rubber bands to make these DIY xylophones!
22.
 Super Easy DIY Rhythmic Shaker
Your kiddo is sure to love shakers! Ribbons don’t change the sound of this rhythmic shaker from How Wee learn, but they sure do make it pretty!
Rhythmic shakers will add more fun sound in your kid’s band!
23. Easy Singing Straws for the DIY Band
Your kids can take their band on the road with these easy singing straws ideas from Handmade Charlotte! It’s too cute and too colorful to miss!
Simply irressistible musical straws are on the way!
24. Twang the Fun with Cross-stitching Frame and Rubber Bands
Your kiddo will sure to love more twanging fun with this DIY strummer idea by HelloBee using a cross-stitching frame and rubber bands! Twang the music all the way!
Create fun music with this cute and easy to make strummer!
25. Create a Lovely Tambourine for your Kid’s Band
No band is complete without a tambourine. This lovely tambourine version by Buggy and Buddy will surely add rhythm and fun to the band! Play that tambourine, man, play it!
This tamboutine is just too cute to create and play!
More Fun Crafts and Homemade Instruments from Play Ideas!
- The ‘rusty orange slices,’ among other things such as homemade instruments, are supposed to protect people from lightning. Check it out here!
- Here are some homemade instruments and Halloween sensory activities created for the holiday. Ready, set, party!
- Audacious beginners can also play around with fairy crafts and homemade instruments!
- There are many outdoor activities kids can do to learn about the weather. Try these fun experiments and make your own homemade instruments.
- Camping, hiking, fishing, and hunting are great ways to enjoy tasty food and the great outdoors. But sometimes you want to create some more-subtle noises. Make your own percussion, homemade instruments, and other noisemakers here!
- See how to create several instruments out of common household items. Also, find out what a PINCH POT is and how to create your own!
- Wind chimes can add a calming touch to any backyard. Learn how to make homemade instruments, like flutes and chimes, here.
 Also, find out what a PINCH POT is and how to create your own!
Which fun DIY musical instrument do you want to try with your kids this weekend?
Easy to Make Instruments for Preschool Music Activities » Preschool Toolkit
Homemade instruments provide opportunities for preschoolers to enjoy creative play with music and movement. Dance, tap, shake and clap along with these simple musical instruments that are easy to make and fun to at home or in the classroom.
Privacy and Disclosure
for information on cookies and affiliates
These instruments are fun to make for a school project or to involve the family in music activities. The instruments are made with simple materials including everyday craft supplies, household items, and recycled packaging.
Instruments can help kids learn basic music terms and applications such as rhythm and beat, while also supporting fine motor and gross motor movements.
Related article: Benefits of Music and Movement
This roundup has you covered with lots of shakers as well as string, percussion, and wind options. A few printable activities have been included for more hands-on fun and learning with music.
Get ready to shake, rattle and roll with fun instruments you can easily make.
Shakers
This paper plate tambourine from Team Cartwright can be decorated with stickers or markers.
A rainbow tambourine from Red Ted Art is perfect for a spring theme with preschoolers.
Create fun sounds with a noisemaker made with ribbon and bells from The Craft Train.
More bells mean more fun with a hand held music maker with bells from Craft Bits.
A national holiday can be celebrated with us at Preschool Toolkit by making a noisemaker like this Canada day shaker with bells.
Explore the sounds of chapchas made by Crafty Moms Share.
Add recycled materials to the sensory bin to make instruments like this plastic containers sensory bin from Fun A Day.
Make music in the sensory bin with a musical egg sensory bin from Taming Little Monsters.
Plain cardboard tubes become cardboard tube shakers with this craft from The Craft Train.
Plastic eggs turn into fancy egg shakers with these instructions from Mama Smiles.
One of my favorite instruments is these long rain sticks made by Gift of Curiosity.
These cylinder rain sticks by Danya Banya are another version of this popular instrument.
Get the music started with maracas. These egg maracas from Crayons and Cravings are a fun start.
Sixth Bloom explains how to make maracas with a tutorial.
Celebrate a special holiday with this maraca craft for Cinco de Mayo from Artsy Momma.
At Preschool Toolkit we shake things up with shakers made from detergent bottle tops.
Recycle an everyday household item like Picklebums did to make cardboard tube music shakers.
Explore international culture with a Hawaiian musical shaker from Crafty Moms Share.
Percussion
Instruments made from natural materials offer unique sounds like seed pod percussion found at Artsy Craftsy Mom.
X is for a xylophone activity at Crafty Moms Share.
Explore music notes will help from Preschool Toolkit by making a musical scale with mason jars .
Drum-diddy-drum with a snare drum from Spark and Pook.
Recycled materials can be used to make tin can drums like these from East Coast Mommy Blog.
Make a quick and easy instruments like these 5 minute drums from Red Ted Art.
Learn about a new instrument at Learning 4 Kids with a den den drum .
Add crashing cymbals to the band with this craft from Crafty Moms Share.
This dinosaur castanet from Learn With Play at Home adds music to a dinosaur theme.
Recycle bottle tops to make these bottle top castanets from Red Ted Art.
Wind – String – Musical Activities
Wind
Practice the harmonica with this craft from Kitchen Table Classroom.
Make your own pan flute with instructions from Buggy and Buddy.
A flute from J Daniel 4’s Mom s a fun instrument to use to make music.
The simple kazoo made by Buggy and Buddy never goes out of style.
String
Pluck the strings of this banjo with jar lids craft from The Craft Train.
Strum along with this guitar craft found at Red Ted Art.
Explore the sounds made by a homemade guitar with rubber bands from Laughing Kids Learn.
Printable activities
Play a music themed I Spy game with this I spy printable at And Next Comes L.
Move with the rhythm in a rhythm listening game from Let’s Play Kids Music.
Instruments are fun to make with play dough with these play dough instrument cards you can print from Preschool Play and Learn.
My Picks
Enjoy more musical fun with Music on Pinterest
10 Easy-to-Make Homemade Musical Instruments
Easy-to-Make Homemade Musical Instruments
Click here for FREE music lessons:
When you think about bringing music into your homeschool, do you think of the high price of musical instruments and private music lessons? Well, you do not have to worry about that once you read about these 10 DIY Easy-to-Make Homemade Musical Instruments you can make with your kids! Combine it with the Music in Our Homeschool Plus membership (only $8/month), and you’re set!
Many of these musical instruments are easy enough for your children to make with very little help from you! Recycled materials help to keep the cost down so that every child in your family can have their own musical instrument.
(All photos, descriptions, and links below are used with permission. Affiliate links are included.)
Egg Maracas Homemade Musical Instruments
It’s pretty easy to make egg maracas with your preschoolers or elementary kids using Easter eggs. Be sure to watch Sixth Bloom’s step-by-step video at the end of her post, and read about the musical game they played and loved.
Supplies needed:
- Plastic Easter eggs
- Filler such as dried beans, rice, birdseed, popcorn, sand, salt, sugar, or beads
- Plastic spoons
- Tape such as Duct, Washi, or masking
A fun activity to do with egg shakers is to make two eggs with the same filler. So, make two with dried beans, two with rice, two with salt, and two with beads. Then, kids can shake them to find the matches! This really helps them refine their listening skills.
I lead a Family Workshop on Percussion Instruments and Making your Own Homemade Musical Instruments in the Homeschool Sisterhood Membership.
Slapsticks
Grab a handful of jumbo craft sticks and create slapsticks. Use pipe cleaners, yarn, or rubber bands to hold the sticks together while slapping them together for a fun percussive effect. Change the sound by rubbing or scraping in various ways for more musical exploration just as There’s Just One Mommy shares.
Supplies needed:
- Craft Sticks
- Pipe cleaners, yarn, or rubber bands
A famous composition that uses a real slapstick is “Sleigh Ride.” See a fun 15-Minute Music lesson on “Sleigh Ride” here.
Pan Flutes
After building their own pan flutes and exploring the science of sound, children will then have the opportunity to write their own songs and record the notes for those songs on the free printable recording sheet that Buggy and Buddy offers.
Supplies needed:
- Straws
- Cardstock
- Double-sided tape
- Metallic Sharpie markers to decorate the cardstock (optional)
I love how this activity helps kids understand pitch related to size. The straws are cut to various sizes, so students learn that the longer straws have a lower pitch and the shorter straws a higher pitch.
Sound Jars
Allow your children to explore a variety of sounds by making sound jars. The Keeper of the Memories shares how her family made shaker-style jars with her children.
Supplies needed:
- Small see-through jars such as canning, baby food, water bottles, or spice jars.
- Filler such as dried beans, rice, birdseed, popcorn, sand, salt, sugar, buttons, or beads
- You can also fill with small jingle bells
Another option is to add a liquid to some of the jars with the fillers so kids can discover how that changes the sounds.
Ankle Bells Homemade Musical Instruments
Creating sets of ankle bells made with different materials or in different sizes and shapes will allow kids to experiment with the different sounds they are creating as they dance. You can learn more about these types of bell instruments of India written by Kid World Citizen.
Supplies needed:
- Felt – approximately 12 inches by 3.5 inches
- Small strip of Velcro
- Jingle bells such as these
- Needle and Thread
How fun to make lots of different types of these ankle bell instruments with various types of bells or other objects such as seashells, pasta shells, or large buttons!
Beaded Jingle Stick
Let your stick loving child make a beaded jingle stick like Danya Banya using yarn, beads, and bells. Your child can create a simple beaded design or something more complex using their fine motor skills.
Supplies needed:
- Y-shaped stick
- Large jingle bells
- Small jingle bells (optional)
- Beads
- Yarn, string, twine, or pipe cleaners
Be creative in stringing different items or arrangements of bells to get a variety of sounds!
Guitar
Grab some recyclables such as rubber bands, a sour cream container, and cardboard to create your very own crafted guitar. Red Ted Art shares step by step how to make this play instrument.
Supplies needed:
- Round plastic container (such as sour cream or shredded parmesan cheese)
- Rubber bands (best to have a variety of sizes and thicknesses)
- Cardboard
- Stick
- Beads (optional)
- Tape or hot glue gun
Stretch the rubber bands tighter for a higher pitch and looser for a lower pitch!
Rainstick
Have you ever made your own rainstick? Your child will love this activity and the wonderful results that a rainstick can make. School Time Snippets shares how to use flat-headed pins to make a great tinkling sound!
Supplies needed:
- Paper towel tube
- Straight pins
- Duct tape (or masking tape)
- Filler such as rice or dried beans
- Decorative items such as stickers
Another option for slowing the flow of the rice through the tube is to put pipe cleaners inside the tube.
Cardboard Flute DIY Musical Instrument
It’s fun to create a homemade instrument like this cardboard flute from JDaniel4’s Mom.
Supplies needed:
- Paper towel tube
- Scissors
This is a fun craft to act out 11 pipers piping in the “Twelve Days of Christmas” song!
Drum Kit Musical Instrument
If you have an aspiring drummer in the house then you will want to create a homemade drum kit that even your toddler can enjoy just like The Train Driver’s Wife.
Supplies needed:
- Metal cans or canisters such as from oatmeal, formula, or coffee
- Metal cake pans
- Paper towel holder to hold your “cymbal” up high
- Sticks
- Felt, Duct tape, stickers, etc.
You can even shop at Good Will to find some baking pans if you don’t want your actual baking pans to get all beat up!
Includes a supply list for making the above homemade musical instruments.
Find these pages in it:
- Circle the Percussion Instruments
- Write the names of the Percussion Instruments
- Color Percussion Instruments
- Supply list for homemade musical instruments
Here’s a Freebie
Related Posts:
- 15-Minute Music Lesson about Instruments Around the World
- Meet the Instruments Bingo
- Review: Small Percussion Instruments and Drum Instruction Book
- 5 Easy Ways to Use Music to Beat the Homeschool Blahs
42 Splendidly Creative Homemade Musical Instruments
Do you know what is perfect for a rainy day? A playdate? Any sick day? Or a just-about-an-anything day? Homemade musical instruments!!
If you are just not sure what to do with the little ones, making a homemade musical instrument band is always the answer. There is so much fun to be had and amazing memories to create as well.
I originally wrote this post on DIY musical instruments a few years ago, so I thought I would share it again, as it really is a classic kids’ activity. I hope you like it!
Just before we get started—since I know you love finding new learning opportunities for your little ones—grab my free 20 Deep Learning Activities Found in Everyday Life ebook! When we open our eyes to everything around us, slow down and invite our children into our world, the learning opportunities are endless! Grab your free copy right here:
With the weather turning chilly, we are finding ourselves inside more often. More indoor play, reading, art, and far more crafting too. In fact, I am trying very hard to pick up knitting once again (and when I say once again, I mean from when I was about 8 years old). I have successfully knitted 2 hats (and unsuccessfully knitted a ton of other… ‘things’).
The kids have also found themselves creating a lot more. And, new to us, there has been a lot of crafting homemade musical instruments. The boys have always loved to dance (or run with their arms flailing) to music, but have only just begun to show an interest in creating the music themselves.
With a looooonnnng winter ahead, I thought it would be a good idea to stock up on some ideas for homemade musical instruments. And well, I kinda got carried away… So I bring you:
(May contain affiliate links – thank you for your support)
Instruments for Shaking
Rhythmic Shaker – This was the activity that started the fascination with DIY musical instruments for my boys. A classic really, but with a neat twist!
Sensory Bin Shakers by Fun-a-day – Such a lovely way to extend on a sensory bin.
Paper Plate Tambourine by She Knows – A classic activity with some weaving too—a great way to practice fine motor skills while creating homemade instruments! A paper plate, some jingle bells, and yarn or string are all you need.
Jingle Bells by Chasing Cheerios (link no longer available) – Such a lovely musical instrument for little musicians! These little jingle bell sticks are perfect for holiday preschool concerts.
Ankle Bells by Mini Eco – I think that this knitted project is just what my daughter Madeline has been looking for to create homemade Christmas gifts for her brothers! The colorful yarn is gorgeous too.
Recycled Instruments for Shaking!
Fancy Egg Shakers by Mama Smiles – We love this classic homemade musical instrument for kids! A great way to reuse those plastic Easter eggs too.
DIY Rain Sticks by The Imagination Tree – My little ones would love creating this version of a rain stick. Any craft that involves a hammer is right up their alley!
Maracas by What’s up Fagans – What a simple, creative idea! Another great way to use up those plastic easter eggs. A whole class set would be simple to whip up.
Whisk Maracas by ALLterNATIVE Learning – I love that you can make this for your little ones in a matter of moments, perfect for in the kitchen when making dinner too.
Cardboard Rattle Drum by Pink Stripey Socks – This is a neat instrument for preschoolers to explore!
Rainstick by FSPDT – I used a rainstick in my Kindergarten classroom as a way of getting little ones’ attention and preparing them for transitions, but it also makes a unique homemade musical instrument!
Instruments for Plucking or Strumming
Kalimba Musical Instrument by Herding Cats George – A paper plate (and we all know my love for a good paper plate craft!) and some popsicle sticks make this craft perfect for using what you have on hand.
Nutshell Musical Instrument by Artists Helping Children – Now this is an easy homemade instrument! A nutshell, a rubber band, and a stick are all your little one needs to get rocking.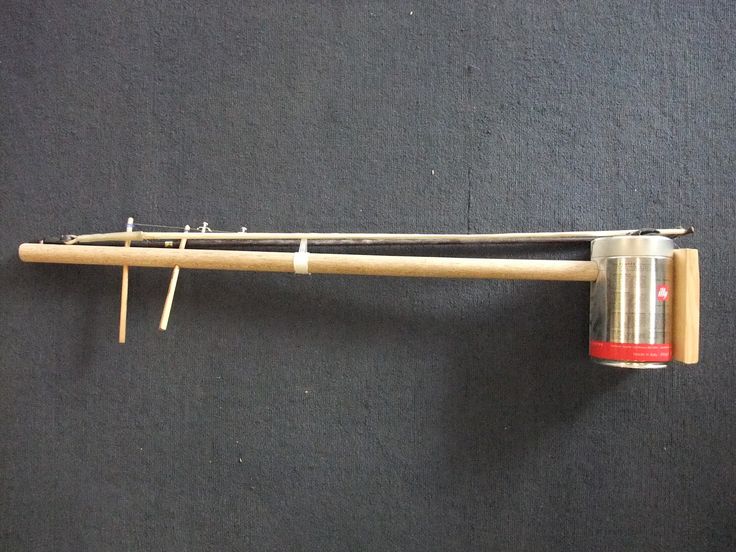
Pin Strummer by Piikea – This one was new to me, but looks so simple, interesting, and inviting I can’t wait to give it a try (or should I say a DIY) with my kids.
Matchbox Guitar by Martha Stewart (link no longer available) – Incredible homemade musical instruments AND fantastic for fine motor skill development. Can’t beat it! (Really, you can’t—you are supposed to strum it.)
Cup Drum also by Play, Sing, Laugh (link no longer available) – This one will be a neat one to try! Also great for developing a pincer grip.
DIY Strummies by Teach Preschool – Some rubber bands, a box, some creativity, and you are good to go! This activity was an extension to a book—a really neat one, too!
DIY Wooden Instruments by Hello Bee – These are perhaps more adult-made, but simply gorgeous—and durable too!
Baby Guitar by House of Burke – Starring Rockstar baby Kingston and supplies you already have!
Noisemakers by FSPDT – sometimes it is the simplest of things that spark the most creativity in my little ones – these simple shakers are great musical instruments!
Homemade Musical Instruments for HITTING and BANGING!
Rainbow Xylophone by And Next Comes L – Nothing quite as inviting as playing with rainbow colours on a dull winter’s day! This craft will be tucked safely up my sleeve until February, I do believe. (Do you remember me whining about February last year?)
Steel Drums by Sugar Aunts – This post is all about a Rockin’ Drum Birthday Party—loads of ideas for homemade drums and more!
Wooden Xylophone by In Lieu of Preschool (link no longer available) – What a neat idea! I love the trick of using colours to help teach little ones to play music.
Rainbow Water Xylophone by Still Playing School – Another classic homemade musical instrument with a twist! What a neat idea to add some food colouring… and a light table!
Bop-o-phone by My Musical Magic – Homemade musical instruments, in general, are great to brighten dull days, this bop-o-phone looks like it would brighten even the darkest, greyest of winter days!
Outdoor Musical Instruments (also great for HITTING and BANGING!)
Pot Bell by Play, Sing, Laugh (link no longer available) – We have a few terra cotta pots leftover from the summer that could be put to good musical use this winter.
Melody Pole by Timotay Playscapes (link no longer available) – Because even in the winter, we will be outside every day!
Disc Cymbals by Happy Hooligans – So simple, fun, and creative! And I bet they are a nice quieter alternative to some homemade cymbals.
Balloon Bongo Drums by Kids Activities Blog – Such a neat idea to use balloons for the drum surface!
Wrench Xylophone by De Tout et De Rien – This has my Sammy’s name written all over it. I will have to wait for a weekend when our wrenches will not be needed for a while. I have a feeling after we make this we won’t be able to wrench (?) for a few weeks.
The Most Creative DIY Musical Instruments for Kids!
Tubaphone by Play, Sing, Laugh (link no longer available) – Well, just look at it!! I am surprised I am still sitting here writing and not creating one of these myself right now!
Den Den Drums by Learning 4 Kids – I had never thought to use a wooden spoon for a drum—such simple creativity!
French Horn by Savvy Homemade – Bet you have never seen a french horn quite like this one! For us, it will require some supplies we don’t have at home—like a funnel and corrugated pipe—but it just might be worth the trip!
Chicken in a Cup by All for the Boys – Learn something new every day, right? Who knew this was a thing?!
DIY Didgeridoo by Two-daloo (link no longer available) – Because some days you just need to make a Didgeridoo. Not sure what a Didgeridoo is? Well, today is the day to find out friends!
Coconut Shell Instruments by Two-daloo (link no longer available) – This one is such a unique idea! What a fun way to explore sound.
The EASIEST Musical Instruments to Make
Aboriginal Clapping Sticks by Laughing Kids Learn – A wonderful homemade instrument to practice rhythm and beat.
Banging Wall by SouleMama – Such a lovely, open-ended invitation to create music, from my favourite blogger of all time!
Singing Straws by Krokotak – Now this one looks awesome! Take a few straws and tape and you have quite the creation.
Popsicle Stick Harmonica by Housing a Forest – We have already tried this homemade musical instrument and it is the ideal blend of simplicity and fun! Just grab some colored popsicle sticks and rubber bands, and you’re set.
Jingle Bell Ankle Bracelets by Twodaloo (link no longer available) – Put these little gems—made with painted wooden beads and jingle bells—on your ankle and just TRY to walk normally 🙂
Cardboard Guiro by Tiny Tapping Toes – I simply love how big this musical instrument is! Perfect for little ones who need to burn off some energy (also known as my kids… always).
Those are enough homemade musical instruments to keep us busy all winter—and hopefully for you and yours too!
I tell you friends, if you are ever not sure what to do with your preschoolers on a rainy day, or if a playdate is going awry, or if it’s a snow day for the big kids… homemade musical instruments will be your saving grace.
Here’s hoping Mama doesn’t get a headache!
P.S. Don’t forget to grab your free ebook!
You’ll also love these How Wee Learn best-sellers:
50 Perfect Crafts for 2 Year Olds!
The Ultimate No Cook Playdough Recipe
43 Quiet Time Activities for 2 Year Olds
Save
Save
Save
Save
Save
Manufacture and use of children’s noise instruments in work with preschoolers | Educational and methodological material:
State budgetary educational institution
“School No. 1874”
1874”
Workshop for teachers
“Production and use in work with preschoolers of children’s noise instruments”
prepared:
Musical Director
Rybalko Natalya Alekseevna
Moscow
January 2022.
Purpose:
Formation of interest in music in the process of manufacturing and through a game of homemade noise musical instruments.
Tasks:
– To broaden the horizons of children based on familiarity with musical instruments, their structure and sound.
– To promote the formation of skills in playing musical instruments.
– Develop an interest in music-making through the use of homemade noise musical instruments.
– Develop children’s creativity in making noise musical instruments.
Musical instruments for children always remain wonderful, unusual and attractive objects that you really want to play. Children’s music-making is an active type of activity, during which the individual features of each are clearly manifested: the presence of will, emotionality, concentration, imagination, independence. For many, this type of activity helps to open the spiritual world, overcome shyness and stiffness.
Now there is a huge selection of children’s musical instruments in stores. But not everyone can get these toys. Yes, and there is no need for this. After all, the child grows and develops so quickly, the old toys cease to satisfy his cognitive needs. And the need to update them is growing every day.
There is a good way out. You can independently design toys and over time update and modify them.
We are talking about noise instruments. For the first time, noise instruments were introduced into the system of teaching children music by Carl Orff. The main idea of K. Orff is that all children, regardless of talent or predisposition to music, should join it. Traditional learning to play a specific instrument, in his opinion, greatly limits the child, deprives him of the opportunity to improvise. Children need to be taught to play not complex musical instruments, which take years to master, but simple ones.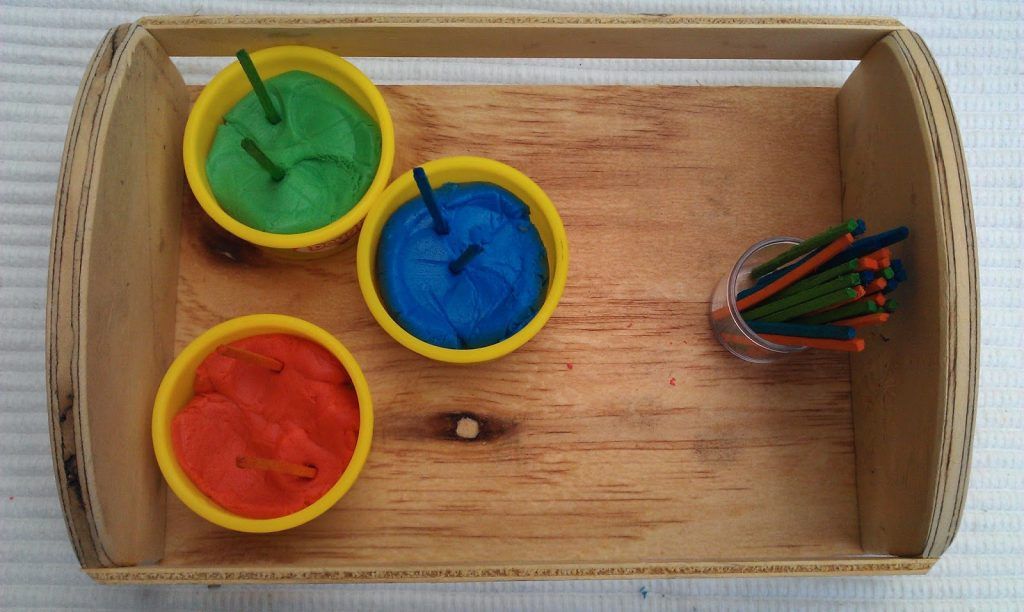 Children perceive musical preschool education according to K. Orff easily, because music becomes more accessible through simple instruments.
So, noise instruments. What is noise? Noise is random, non-periodic vibrations of a sounding body. Unlike musical instruments, noise instruments do not have a precisely defined pitch. Noise sounds include crackling, rattling, creaking, rustling, etc., and noise orchestral instruments are devices for producing noise that create a certain rhythmic and timbre flavor.
List children’s noise instruments! These are a drum, cymbals, maracas, rattles, a tambourine, a triangle, castanets, spoons, rattles, etc.
Noise instruments are easy to make. It doesn’t take much to do this – a desire and a little imagination!
Making noise instruments is an interesting and enjoyable job that:
– arouses children’s interest in playing noise and musical instruments;
– unites children, developing communication skills in a team;
– expands children’s knowledge about the world of sounds and musical instruments.
It has been proven by practice that children who were closed, thanks to playing home-made musical instruments, become liberated and open from different sides, become more sociable, active, emotional.
Playing homemade musical instruments, children understand that everything around us sounds, and every sound can become music. You just have to try to listen to this music. This is the first step towards elementary music making.
CREATION OF NOISE INSTRUMENTS.
“Shurshunchiki”
Colored plastic “kinder surprises” are filled with beans or peas, rice or buckwheat, small buttons or beads. It turns out home-made rattles – “rattles” with a variety of timbres.
“Shaker”
You can also fill tins of coffee and drinks with small bulk items.
Shaker (from English shaker – “to shake” – shake). It is a closed container made of solid material, partially filled with small loose contents (coarse sand, shot, beads, plant grains, etc.). Shakers come in a variety of sizes, shapes and designs, they can resemble a bar cocktail shaker, have the shape of a ball or egg, etc. ; a rainstick can also be used as a shaker. In amateur conditions, the role of a container is often played by aluminum cans of carbonated drinks.
“Rain Noise”
Or a rain stick, a rain flute or just rain.
The Rhinestick was supposedly invented in Latin America and used in rites to bring rain.
You will need:
– long narrow cardboard cylinder (for example, from foil).
– pack of toothpicks,
– grits,
– awl,
– wire cutters or sharp scissors,
– glue (glue gun), paper and scissors for decorating the finished tool.
Production plan:
Step 1. Take an awl and a foil tube and pierce one hole near the edge of the cardboard roll with an awl. Insert a toothpick into this hole until it stops against the opposite wall of the cylinder.
Step 2. Step back 1-2 cm and make a new hole and stick a toothpick into it as well. Next, make holes in a spiral of our cylinder. The spiral passes inside the entire cylinder and forms barriers in it, through which the cereal will pour, making a noisy sound. It turns out that as if inside our cylinder there is a spiral staircase made of toothpicks.
Step 3. Here is the finished spiral inside the cardboard roll. Take wire cutters or sharp scissors and cut off the excess ends of the toothpicks from the surface of the cylinder.
Step 4. Glue one end of our cylinder – tube. Wait for the glue to dry.
Step 5. Place the tube with the sealed bottom down. And pour cereal into it. Listen to sound. Close the open end with the palm of your hand (so that the grits do not spill out) and turn the tool very gradually upside down. Now you can seal the second hole in our pipe – the base.
Step 6 Decorate our rain noise. It can be pasted over with paper, cloth, cord, painted with gouache and varnished on top.
“Drum”
Empty mayonnaise bucket, string or tape, colored paper (preferably self-adhesive, stickers to decorate the drum).
“Whispering Clock”
A thin rubber band (according to the size of the wrist) is pulled through the lid of the matchbox. You can put seeds, cereals, etc. in the box. Putting the “watch” on your hand, you can shake your hand to “wake up” the instrument. This instrument is also convenient to use as a reference point (right, left side) when performing musical and rhythmic movements.
“Maracas-transformers”
Various fillers are poured into jars of chips: cereals, seeds, peas. Get maracas. If you play on the lid of the maracas with your hand or stick, then it “turns” into a drum.
USE OF NOISE INSTRUMENTS.
Noise musical instruments can be used in musical games and exercises, in speech games and in an orchestra. They help children in their independent activities, in creative improvisations.
Noise makers are a very exciting activity.
Playing along with noise instruments when telling even the simplest, long-known fairy tale will open the world of creativity and fantasy to the child. It does not require special training at all. In such a fairy tale, the text is composed in such a way that after one or two it is possible to depict something with noise (noise instrument). Playing the instrument seems to illustrate the text. Children can be helped by indicating the time of sounding (introduction) with a look or gesture.
Fairy tale-noisemaker “WINTER IN THE FOREST”
In autumn, mice ran through the forest from morning to evening, collecting food for the winter
(run their fingers on the drum)
And the squirrels jumped along the branches, collecting cones
(castanets)
And now snowflakes began to fall from the sky
(bells)
Snow covered the earth with a fluffy white blanket and traces of small paws were visible in the snow
(run their fingers along the drum)
minks and made their nests out of grass
(rustling paper or a bag)
Everyone had a lot of food: squirrels gnawed nuts, and mice delicious seeds (maracas)
DIY musical instruments for kindergarten
A huge contribution to the development of children is made within the walls of the kindergarten. And music is an important part of it. In music classes, preschool children learn to recognize sounds, sing and dance, and learn about new musical instruments. Returning to the group, they most often go about their own business: draw, play with dolls or cars, assemble pyramids or constructors. But why don’t you make DIY musical instruments for kindergarten? Children will be able to play a real instrumental ensemble, and at the same time develop their fine motor skills.
A little theory about homemade musical instruments
The process of creating musical instruments with your own hands is quite painstaking and sometimes requires materials that are not quite usual for kindergarten: plastic bottles, cans, rubber bands for money, buttons, and so on and so forth. Involve your parents – for sure, in every house there are such things that are no longer needed. Explain that the guys will develop creatively in the process of needlework and then show off their inventions at the next matinee.
Let’s note the main points that are worth considering:
- The sounds reproduced by homemade musical instruments most often have nothing in common with those produced by real ones. Your task is to show that you can extract different sounds from improvised means. You will improvise. And it would not hurt to convey the appearance of real instruments too: decor, shape, accessories like a shoulder strap.
- Handmade toys often break. Do-it-yourself musical instruments for kindergarten are no exception. Immediately tell the children about the fragility of the products, their special value for your group (after all, they will remain as a memory of each of the kindergarten students).
- All materials must be hypoallergenic and safe.
- Try to come up with tools that the child could make on their own, especially if we are talking about a preparatory group. It is also better to define the concept initially: these will be the same products for each child, or preschoolers will make tools with their own hands in groups – each group has its own instrument.

Playing music and playing it even in this form will benefit children. Perhaps some of them will discover a real talent or awaken a desire to enter a music school after kindergarten and already there seriously engage in their hobby.
Do-it-yourself musical instruments for kindergarten
Here are a few small workshops on creating interesting and unique musical instruments. You will see, everything ingenious is very simple.
Drum
Any metal or plastic can that is hollow inside can become a drum. You won’t find them in kindergarten. But you can ask your parents to bring old plastic jars from mayonnaise, jam or barbecue. For a variety of sounds, you can take jars of different sizes and wall thicknesses.
Absolutely any sticks are also suitable. It is important that the tree (if you choose it) cannot injure the hands of children, that is, it should be covered with a special varnish. For example, this role can be played by sticks intended for eating dishes from Japanese cuisine.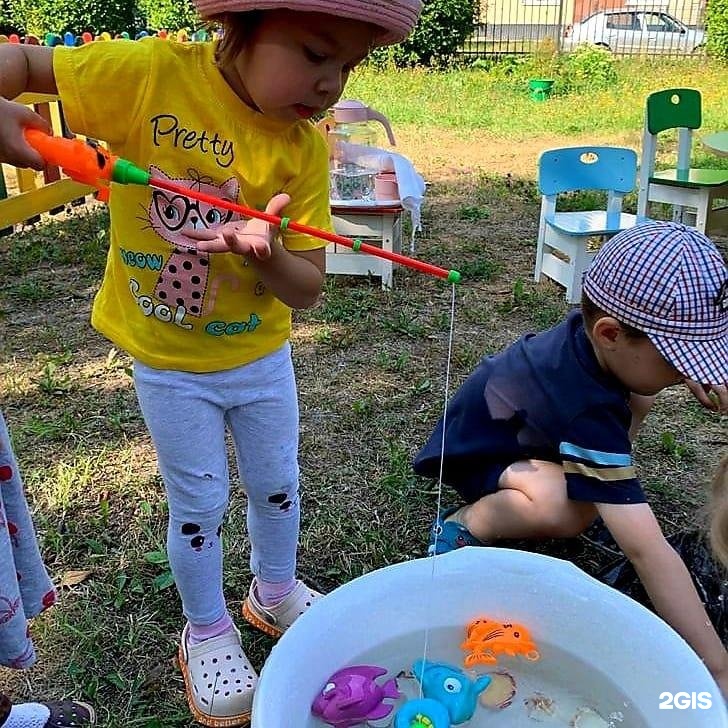
Wooden Xylophone
Do-it-yourself musical instruments for kindergarten are made from a variety of materials! If there is an extra plinth, then you can even make a tool out of it. It is enough to cut it into equal segments 10-15 cm long and fasten it with screws loosely to the base daughter. The base must be processed so that the children do not get splinters. Pieces of the plinth are placed in the same position one under the other.
To produce sound from this handmade musical instrument, a child slides any wooden stick from top to bottom. The more solid the stick, the louder and richer the sound will be extracted.
Gusli
The basis can be a shoe box, in the lid of which a circle is neatly cut out slightly offset from the center. Elastic bands for money are wrapped around it or screwed so that all the “strings” pass over the hole. So that the rubber bands do not lie on the surface and can make a sound, they need to be supported with something.
Pencil can be used as a support. However, if you want to raise the “strings” higher, then it is better to make a triangular structure with your own hands, because, as you know, it is the most reliable. Now you can play.
Cookicle
This wind instrument is made from ordinary straws, which are usually offered to children for drinks. It is better not to take those tubes that are attached to juices, because they are small and have a spring for bending in the most inappropriate place. And so, several tubes of the same diameter are taken (they can be replaced with anything: “cases” from pens, sticks from balloons, etc.).
Further, from one of the edges, the second tube is sawn off from below by 1-1.5 cm. The third tube is sawn off twice the distance. Each subsequent one is similarly sawn off so that a kind of uniform ladder is obtained. Then a wide adhesive tape is taken, and the tubes are placed exactly along the edge on it. Then you need to glue it on the back with tape.
If you get a large musical instrument, then it is better to glue 2-3 tubes separately with small adhesive tape, and only then all together. Do-it-yourself lower holes for a musical instrument for kindergarten need to be closed. This can be done with plasticine, cut off pieces of eraser, or even chewing gum.
Analogue of the triangle
To recreate a subtle sound from the contact of a metal stick with another metal object suspended in the air, you can take an idea from this musical instrument. For manufacturing, you will need 2 metal tubes, one of which will be hung on any impromptu handle for strong threads. Another child will strike and make a pleasant sound.
Maracas
For making your own maracas for kindergarten, any hollow oblong container that can be filled with granules, cereals or larger objects can be used. The easiest option is to take a simple pencil, pierce a Kinder Surprise plastic egg with it and fix it. Peas or rice are placed inside, depending on the desired sound at the output.
Another option is 0.5 ml plastic bottles. Inside you can put unnecessary buttons or the same cereal. Of course, to make the musical instrument realistic, the bottles should be painted, preferably with acrylic paint, to be sure. With filled plastic eggs, you can do the other way: take small plastic spoons and attach them on both sides so that the tips of the base touch. In principle, spoons can be put on glue, but for beauty they can be glued around the perimeter with colored tape.
Those musical instruments that children will make for kindergarten with their own hands will allow them to learn to improvise with sounds, to understand the world through play. After all, even in the store, children are more attracted to those toys that are able to make some sounds, words, glow. Remember that almost everything that surrounds us can become a musical instrument.
For example, take an ordinary empty cardboard box. It is enough to knock on it with your hands or sticks – and this is already a drum. Everything that can be filled with something and moved from side to side is a potential maracas. Do-it-yourself musical instruments for kindergarten are a potential source of individual sounds for staging fairy tales. A loud knock is a clap of thunder or the roar of a wild beast. Paper rustles – it’s the wind blowing or autumn leaves falling. Music around us.
How to introduce musical instruments to preschool children in kindergarten. DIY musical instruments Maam DIY musical instruments
Making tools with your own hands is not so difficult, and even more interesting is to invent new ones. Here are the tools from our home collection.
Drumsticks:
And here are the homemade drums themselves
:
This is shakers (noise makers)
:
Tone blocks (icicles)
:
String:
Just a “tool”
. It was in the village. There was nothing to do. We decided to “make music”. Everything is very simple here. Bottles with different volumes of water hang on strings, so the sounds turned out to be different. Of course, she didn’t hit the notes, but she tried very hard.
“Almost bells”
. We can’t find a name for the instrument. Tambourine – too menacing. Bells? Hmmm… no. In general, this is such a wide ring (10 cm in diameter), in which threads with bells are stretched “in the tummy”. It rings so gently … There are a lot of blanks, but so far I have painted only two. I decided to combine business with pleasure: to make an instrument and immerse myself in the beauty of folk patterns. A test of the pen, so to speak …
“Ratchet” or “drynchalka”
. I don’t know how to call it, but we got such a musical instrument from colored pencils and ribbons. It is played with a wooden bamboo stick.
Trerrren from top to bottom or from bottom to top, like the teeth of a comb.
Kolobubiki.
This daughter came up with the name. And I don’t even know what to call them. Bells? chimes? Bells? In short, there are kolobubiki :))) Probably because they have both bells and bells. The base is a birch stick (15 cm long and 1.5 cm in diameter). Mezen painting (acrylic paints + black gel pen + varnish).
And finally, my favorite… rain music
(rain stick, rain flute). I could not resist and made for my collection of home tools.
And here is a small MK:
Materials:
tube (cardboard, from a plant, any),
pencil (draw holes),
screwdriver or drill (drill holes),
toothpicks,
rice or any other filler (food for parrots, grain, etc. ),
),
wire cutters (to break off toothpicks),
decor materials (I have aracal, twine and burlap).
Draw dots on the tube in a spiral. We drill holes with a screwdriver.
Insert toothpicks.
Inside is a maze of toothpicks.
Bite off the excess with wire cutters, close one end, add rice, close the other end.
We decorate. I pasted over the tube with arakal, and covered the ends with burlap.
So our musical instrument is ready.
Irina OLEKHNOVICH
To use the preview of presentations, create a Google account (account) and sign in: https://accounts.google.com
Slide captions:
Children’s musical instruments. with your own hands. Musical director Verchenko M.P. MKDOU Kindergarten No. 2
Musical instruments for children always remain wonderful, unusual attractive objects that you really want to play. After all, an instrument for children is a symbol of music, and the one who plays it is almost a magician. In the process of playing the instruments, the individual features of each are clearly manifested: the presence of will, emotionality, concentration, imagination. For many, this type of activity helps to open the spiritual world. Overcome shyness and stiffness.
So what is noise? Noise – random non-periodic vibrations of a sounding body. Unlike musical sounds, noise does not have a precisely defined pitch. Noise sounds include crackling, rattling, creaking, rustling, etc., and noise orchestral instruments are devices for producing noise that create a certain rhythmic and timbre flavor.
Now there is a huge selection of children’s musical instruments (DMI) in stores, but not everyone can buy these toys, and there is no need for this, because the child grows and develops so quickly. And the old toys no longer satisfy the cognitive needs of the baby. And the need to update them is growing every day. There is a good way out. You can independently design toys and over time update and modify them. A hand-made tool will help you teach your baby to work together. Not so much is needed for designing – desire and a little bit of fiction! So, I suggest you show a little imagination!
Musical mittens
We take old mittens and unnecessary buttons
We decorate mittens with bows on the back side
We admire the finished work
maracas It is always mysterious and desirable to study the insides of instruments. To satisfy your child’s curiosity. I propose to make a maracas, a noise instrument common in South America. A real maracas is an empty pumpkin, inside of which peas are poured. We will make a maracas from a small plastic bottle or a kinder surprise case.
Pour buckwheat or rice or semolina into a case or plastic bottle (the volume of the instrument depends on the groats), close the lid …
And … the maracas is ready!!! You can put peas, bells, beads, coins, etc. in a larger bottle. You can experiment and pour a variety of “sounding” small objects into iron boxes from under sweets and candies. Then the sound will be louder. Or in wooden or cardboard boxes of different sizes and volumes. If the child is still very small, then the opening parts of the instrument must be securely sealed, for example, with adhesive tape.
drum To make a drum we need: Mayonnaise jar; Semolina or sand; used markers; Case from kinder surprise; Filler for sticks (beads, small buttons, beads or any cereal).
Making the drum body and rattle sticks: Take a mayonnaise jar – this will be the drum body. Pour a 1 cm layer of semolina or sand inside the jar (to slightly muffle the sound of the drum). Close the lid tightly. Take two used felt-tip pens. Open the case from Kinder Surprise, in one part make a hole smaller than the thread of the felt-tip pen body. Put a marker in the hole. We fill the case with beads or cereals, close it. We decorate the drum with colored paper. The drum is ready to use!
harp We will need: Stationery rubber bands for strings; Juice pack 1-1.5 l – for the resonator; Two sticks (pencil) – for the thresholds. Pull the elastic bands over the bag along the length. Place a stick under the elastic strings – they will rise. Place the second nut under the “strings” parallel to the first or at an angle to it. The tuning of the instrument can be adjusted in two ways: by selecting elastic bands of different thicknesses (the thicker the elastic band, the lower the sound), or by changing the angle between the thresholds. In this case, the length of the sounding part of the string will change, since that part of the elastic band that is stretched between the nut sounds. With the same thickness of strings, a shorter one will give a higher sound. Play the harp, either by plucking the strings in turn, or by running your finger over all the strings at once.
Ratchet
Making musical instruments with your own hands is a useful and exciting activity. There are no clear rules and laws, so any idea easily turns into reality: paint, tie, stick, pour, pour, sew, experiment … The main thing is to make music together, then it will bring a great creative mood to both the baby and you!
Do-it-yourself musical instruments for children are not a utopia, but a reality.
 The sound quality of crafts, of course, cannot be compared with a studio instrument, but playing with them is interesting and fun. Top ten creative chart at your service! Which of the suggestions would you like to repeat exactly?
 MARACASSES FROM PLASTIC EASTER EGGS
Everything is very simple: we buy decorative Easter eggs in the store, make holes in them, pour pebbles inside, attach a couple of plastic spoons to them with adhesive tape – and your child is ready to dance hot Latin dances! There-pam-pam-pam!
DRUMS (OR CYLINDRICAL JARS)
Take a round tea can, remove the lid and stretch heavy paper over the opening (attach it to the can with a rubber band). The drum is ready! It is best to tap on it with a pencil with an elastic band at the end.
Have your child compare the difference in sound between thin and wide cans and between paper, foil and leather membranes. From a young drummer, he becomes an aspiring experimental physicist!
WASHERS TURN INTO BELLS
Take metal washers of different diameters. Tie each of them to a colored thread. Wrap the ends of the threads around a long ruler, fastening them with tape for reliability. Hang the ruler by the twine attached to the edges from a chandelier or doorknob and enjoy the melodic overflow!
GUITAR (NEE – A BOX OR PLATE)
Everything is simple to disgrace: we describe a circle on one of the walls of the box and cut a hole in it. We stretch elastic bands over it – if the box is small, they can be thrown over its entire perimeter. If you want to make a large instrument, then make small holes in the box, cut the elastic bands, thread the ends into the holes and tie them inside into three or four wide and thick knots. The neck will serve as a piece of wood. Play the strings and enjoy the effect!
BURNER (formerly known as a ROLL OF CARDBOARD)
This craft is unparalleled in its ease of execution. We take a cardboard one, pierce a series of holes in it (you will need an awl), close one of the ends with thick paper, fastening it in place with an elastic band (we did a similar job in the case of a drum). The kid blows inside the forge and is planted with the resulting effect!
GLASSES WITH WATER
Six or seven glasses, bags of food coloring, and water – all the notes you need have taken their places on the musical palette. This piano is best played with a wooden spoon.
BALLET
Once again, our friend, the paper roll! We make holes in it and thread bells into them (you can rip them off from old toys or buy a ready-made set in a hardware store). The mallet is ready!
NOISE MAKERS (IN THE PAST LIFE, TIN CANS)
We buy a can of soda, pour a sweet drink into a glass, pour a handful of beans inside, cover the noise maker with foil on an elastic band – musical instruments for children with their own hands cannot do without it – and we rattle in your pleasure! A minute of work – hours of rhythm and knock!
THE BEST HORMONA – A PAIR OF COMBS
For this work we will need combs of different colors and wax paper. We fasten the scallops to each other with two strips of paper, use twine for reliability – that’s the pocket organ. It is necessary to blow between the teeth – the sound will be high and thin.
CYMBALES (THEY ARE A PAIR OF LIDs)
We tie a pair of lids with a rope … yes, you read that right, the work is completed. Not sure if every parent can handle more than five minutes of playing these cymbals, but let’s face it, the original idea is brilliant in its simplicity.
We wish you to fill every minute of your life with the harmony and sound of the heavenly spheres. for children with their own hands will help you with this!
Even without special musical education, without mastering the methodology of teaching to play professional musical instruments, you can instill in children an interest in beautiful melodic sounds, fill the house with noisemakers and rattles with music and children’s laughter. We will show you how to make simple tools with your own hands.
Playing musical instruments contributes to the development of the child’s creative abilities, the manifestation of his emotionality. Experts note that children’s music-making at the age of one and a half to three years actively develops thinking, auditory perception, develops the child’s ability to take initiative and independence. For many, this helps to overcome shyness and stiffness.
We do not take serious music lessons yet, let’s talk about simple toys that you can make with your own hands to entertain the kids, teach them to beat the rhythm, and just make some noise and rattle to your heart’s content.
Baby’s first toy is a rattle. Make it easy. Choose a light and easy-to-hold plastic bottle and fill it with cereals, buttons, beads, etc. Be sure to check for strength, the child should not “gut” the contents – this can be dangerous. The sound should not be sharp – the child may be frightened. Toddlers are attracted to everything bright, so take care of the decor, but keep in mind that the toy will end up in the baby’s mouth.
Bells have a melodious sound and can be bought in fishing shops. Instruments with bells and bells will appeal even to kids. The sound of bells can accompany songs and dances.
www.maam.ru
The tool is easy to hold by the stick. To attract attention, you can make the base of the toy in the form of a head of a man, an animal, etc.
fastory.ru
If you don’t know how to sew at all, try to do something even simpler: attach bells to a cardboard tube. Its length should be comfortable (so that the child can wrap his hand around it), and the inside can be painted in a bright color to attract the attention of the child.
www.maam.ru
The tinkling velcro bracelet can be put on the baby’s hand. By the way, it is very convenient during a walk – you will always hear where your baby is when there are a lot of kids nearby.
If Velcro is not available, make a musical bracelet with an elastic band.
mamhelp.ru
Castanets are excellent for training coordination and motor skills, especially if both hands are involved. You will need matchboxes and walnuts. The larger the shells, the lower the sound. The difference in pitch will be clearly visible if the nuts differ in size by 1.5-2 times. You can make different sounds for the right and left hands.
fastory.ru
You can make a harmonica in minutes from popsicle sticks. Place a sheet of paper between two sticks. If you want to make sticks colored, remember that the paint must be safe, because. will come into contact with saliva.
krokotak.com
For the development of speech it is very useful to blow, whistle, etc. Make a useful musical instrument from straws for a cocktail – a flute. Tape will help secure the structure.
www.maam.ru
Long forgotten curlers. Why not a noise maker for a music lover? Attach them to a stick or pencil and hand them to your baby.
www.maam.ru
You can do the same with old unnecessary keys. Will ring hoo!
yarmama. ru
ru
Tired of stepping barefoot on pencils and felt-tip pens scattered around the house? Make a musical instrument out of them. Tttrrrrren top down and bottom up…
www.maam.ru
Unused discs and beads to help you build a ratchet. Do not forget to leave eyelets at the ends of the cord so that it is convenient for the child to hold the instrument.
www.maam.ru
Who would have thought that bursting balloons would still be useful. Pull them over the jars – and the drums are ready!
Maracas can be made from any container. Inside, try to pour various cereals, beads – the sound will be different.
yarmama.ru
The sound of rain is a peaceful and soothing sound. Making a musical instrument with a similar sound is not difficult. Peas or other cereals are poured inside the hollow tube.
yarmama.ru
To make the instrument sound for a long time, you need to organize obstacles from toothpicks, then the cereal will pour more slowly. Holes on both sides are securely sealed.
fastory.ru
You can please a young guitarist with such an instrument. The strings will be “louder” if they are made from a thick line.
www.tavika.ru
Or maybe not a guitarist, but a harpist is growing up with you?
fastory.ru
In a city apartment you can’t afford what you can in a country house. Make a musical wall out of old crockery for kids and they’ll love it!
To make musical instruments and, most importantly, to give them into the hands of children, you need courage and patience, because, most likely, you will have to listen to sounds that are far from harmony. But, however, no one doubts the benefits of musical toys – they attract the attention of babies, develop hearing, a sense of rhythm. A home orchestra in general can become a tradition of family evenings and holidays.
hatyushchenko olga
Surely you already play various musical games with your kids
, read them musical fairy tales
, listen to beautiful music
. In the meantime, the baby still does not go to musical
school and does not play a real musical instrument there
, you can make simple DIY children’s musical instruments at home
from the most improvised materials.
Of course, now the store has a huge selection of toys musical instruments
, but the manufacturing process will not leave the child indifferent. In addition, if you notice, children love to play a homemade drum from a pan with more pleasure than a ready-made toy drum. So let’s get a little creative and see what we can come up with.
Baby
playing music is an active activity in which the thinking of the baby is improved; develops the ability to take initiative, independence. And most importantly, his emotional sphere is enriched – a kind of immunity from life’s failures. After all, emotions make it possible to evaluate ongoing events in terms of their significance for each of us.
The child grows and develops so quickly, and the old toys no longer meet the cognitive needs of the baby.
You can start with the simplest – the drum.
It can be made from a mayonnaise jar. Paste the jar with colored pictures, make holes on the sides and thread the colored ropes. For drumsticks, you can use any sticks, either wooden or plastic.
Take clean, dry cans and make holes in the sides, insert bells and decorate with colored pictures.
Rattles.
Any plastic bottles and metal bottles (for coffee, ketchup, yogurt, as well as filling material that will make noise and attract the attention of the child are suitable for the base. Any cereal, buttons of different sizes, beads will do.
Ratchets.
Make holes in the wooden plates and thread a thick ribbon through them, decorate the plates with colored leaves.
Wooden box.
In a wooden box without a bottom, make a hole in the top and thread a ribbon with beads. Decorate the box with colorful pictures.
I sincerely believe that in the process of making the tool
you will have a large number of original ideas. Try to organize the design process in such a way that the baby takes part in it. I wish you creative success!
An active form of work with the participants of the master class is the production of musical instruments.
Active form of work with
participants of the master – class – the manufacture of musical instruments.
NOISE MUSIC
TOOLS WITH YOUR HANDS»
Form of conducting : pedagogical workshop.
Participants: kindergarten teachers.
Purpose of the workshop:
noise musical instruments in teaching preschool children to play musical
tools within the framework of the educational process in preschool educational institutions.
Tasks:
ü
Introduce participants
master class with methods and techniques, the use of homemade noise
musical instruments in the classroom.
To increase level
professional competence of teachers, their motivation for systemic
use of homemade tools in practice.
Introduce participants to the master
– class with homemade tools, master – manufacturing class
own homemade noise musical instruments, and use them on
practice.
Materials for the master class:
Demonstration – illustrations depicting homemade tools, presentation
PowerPoint, video film of fairy tales – noise maker with the participation of children “Hare – a coward” and ”
Spring has come”, audio aid “Music with Mom. Fairy tales – noise makers “E. and
S.Zheleznovykh, musical accompaniment of the dance – “watch” games
Handout – plastic plates for the “watch” dance.
Technical equipment – multimedia projector, computer, speakers, screen.
Time: 30 minutes.
Introduction:
Relevance of the topic:
consists of sounds; loud and quiet, affectionate and disturbing, Music is present
everywhere. People often do not notice that each object is fraught with a completely
unexpected destination. To understand this, a little imagination is enough.
and also the desire to give new life to things that we encounter every day
at home. With simple tools of production at hand, preschoolers can
waste material (boxes, coffee cans, etc.) to create musical
tools. Getting the joy of creativity from self-production
instrument, children prolong this joy while playing music on them. Before the child
great opportunities open up – to feel the charm of creation, the joy of
opportunities to think creatively through accessible forms of music making.
The child feels ready to learn to play musical instruments,
get acquainted with the vast and diverse world of music. For making musical
tools, even the simplest ones, require conditions and appropriate training.
You need to start by collecting items that may be needed in the manufacture
tools. These are jars, boxes, rice, dried peas and
much more. Most of the tools that are useful for making musical
tools do not require special manual skill and special skills. For
For
creating tools you will need cords of various diameters, fishing line,
adhesive tape, glue and so on. For decoration you need colored and shiny paper, foil,
remnants of matter, patterns, paints and more. Applying some tools
not safe, so you should pay
Attention to compliance with safety regulations and rules of conduct when
work. The process of external decoration of musical instruments awakens initiative in children,
develops imagination. However, the pursuit of clearance can lead to deterioration
the sound of the instrument.
A prerequisite for good luck with
the manufacture of an amateur instrument is, above all, fantasy and
a little patience. Self-created tool and produced on it
sounds and music create in the child a special state of experiencing his own
success. On the created instrument, a preschooler can simply play music during
free activities, games, create the simplest rhythmic accompaniments
for a sounding song or melody, compare the sound of your instrument with
tool made by a friend.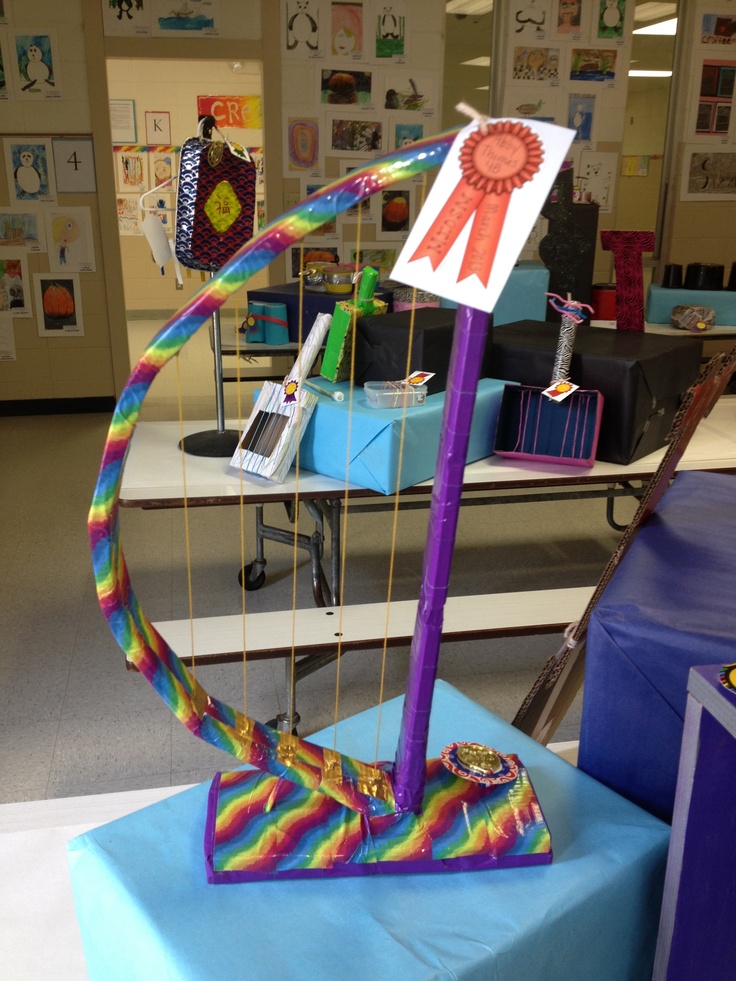
Purpose of this musical instrument: development of imagination, fantasy, communication
skills, natural abilities, metrorhythmic sense, fine motor skills
hands, the formation of elementary skills of playing along on shock and noise
musical instruments.
Playing children’s noise instruments
the following tasks:
1. familiarization with the varieties of children’s elementary musical instruments,
mastering the techniques of playing them;
2. formation of ideas about the expressive essence of musical elements
speech and means of musical expressiveness, mastering musical notation;
3. awakening interest in creative music making and
instrumental activity;
4. development of students’ musical abilities (sense of rhythm,
fret, tempo, pitch, harmonic, polyphonic, timbre,
dynamic hearing), creativity, collective playing skills;
5. formation of artistic taste.
With the help of noise tools, the child can perform various
game tasks, which can be conditionally divided into several groups:
Children’s songs
2. Improvisation of sound paintings on a given topic
3. Sound illustration of poems
4. Tales-shumels
5. Creative tasks
Main part of the master class: 9044 9000
Today I would like
talk about such an activity as playing children’s musical instruments. More specifically,
about playing noise instruments made with your own hands from junk
material.
So what is noise? Noise – random non-periodic
vibrations of the sounding body. Unlike musical sounds, noise does not have exactly
certain height. Noise sounds include crackling, rattling, creaking,
rustling, etc., and orchestral noise instruments are devices for receiving
noises that create a certain rhythmic and timbre flavor. How are you
Do you think what instruments can be classified as noise orchestral? To noise
orchestral instruments include percussion instruments with an indefinite pitch
sound: drums, gong, tom-tom, cymbals, tambourine, triangle, castanets, etc.
The most important feature of working with children’s musical
tools is that mastering them does not require special training and
the time that is needed when learning to play the instrument in special
music schools.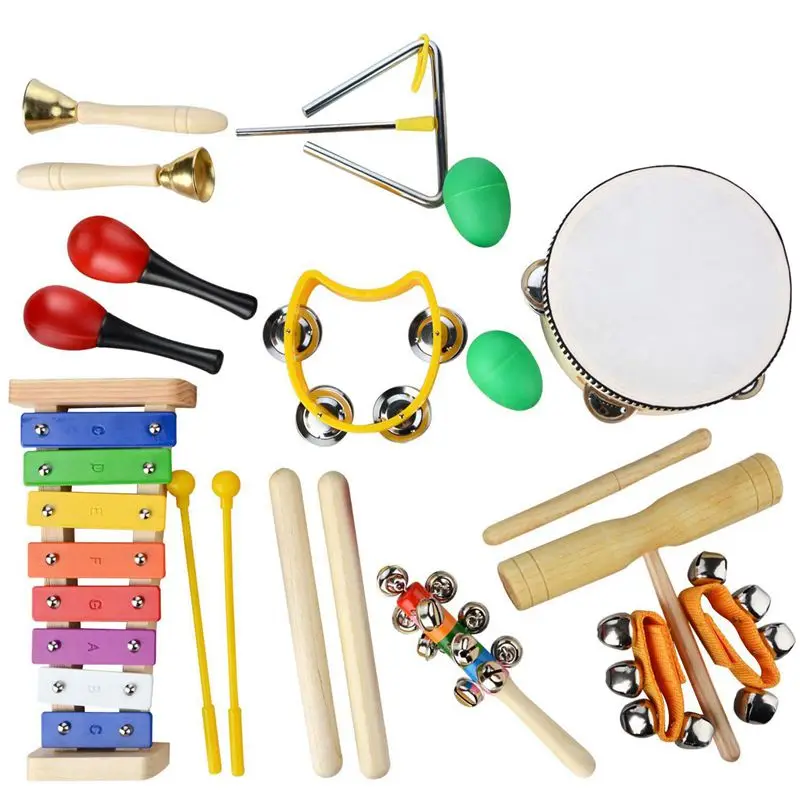 Thanks to this, the child almost immediately begins to play on the
musical instrument and independently gain experience in the process
practical work.
Children playing noise instruments:
first, improve
skills acquired in working with speech exercises (sense of rhythm, possession of
pace, dynamics),
secondly, a sense of ensemble
develops quite easily here,
·
thirdly, children learn
distinguish the sound of instruments by timbres.
Elementary
playing music contributes to the realization of the needs of children in movement, the preservation
their psychological health, as well as the formation of communication skills among
preschoolers. As a result of playing noise instruments, children develop
curiosity, imagination, speech and general initiative, overcome
shyness, increases the level of cognitive and creative abilities. Some
noise musical instruments can be made by hand. It is they
cause a special interest in music and the desire to play music. That’s what’s always
may be at hand: tin and plastic cans with dry rice, buckwheat,
spoons, pot lids. All kinds of rattles, combs, baby rattles.
Keychains. A bag of nuts is a wonderful rustle. Various paper (cellophane,
parchment, newspaper, corrugation, etc.) Wooden cubes, sticks. Thread spools.
Natural materials: acorns, chestnuts, nuts, cones, shells from them and much more
other. Here are some musical instruments you can make your own
by hand.
Noise Makers
jars filled with buttons, cereals or beads. To analyze
sound, you need to shake the jar or bottle. For optimal sound
the material in the jar can either be removed or added. Cover and decorate
jar. In the same way, you can make noise instruments from boxes.
from juice, yogurt.
Sounding keys
For convenience, you need to make a stand in the shape of the letter U and hang it
keys. The percussion instrument can be a nail, a spoon or a stick (may
wooden or plastic hammer). Instead of a rack, you can take hangers for
clothes.
Miracle Castanets
Double folded light bulb cardboard. On both inner sides
paste cardboard large metal buttons. Sound is extracted by compression
miracle castanets in the palm of a child.
Ratchet “Accordion”
Description: Wooden or plastic parts from a pyramid or
beads collected on an elastic band. The elastic band is tied with a loop on both sides. stretching,
like playing the harmonica. For children over 4 years old.
Purpose: Development in children of preschool age of imagination, fantasy,
communication skills, natural abilities.
Shaker
Description: Cans for coffee and drinks with small
loose items.
Shurshunchik
Description: Egg case from Kinder Surprise with small
loose items.
Shurshik
Description: Plastic beverage cans cut, made
longitudinal cuts in strips along the length, 0.5 cm wide, the part with the neck is taken.
Purpose: Development of metrorhythmic feeling, fine motor skills of hands.
Contribute to the acquisition of elementary skills of playing along on shock-noise
musical instruments.
What it is used for: Reproduction of metric pulsation and
rhythmic pattern. Improve the ability to distinguish the sound of children’s
musical instruments.
Do-it-yourself maracas are quite easy to make – any jar,
a bottle, an egg from a kinder surprise will fit for this purpose. fill maracas
can be groats or beads. Just keep in mind – small details should not
get enough sleep, securely fasten the existing seams and close the holes! Children may
swallow or put any small part in the nose and ears. From above the toy can be
paste over with bright paper or paint – the child will be happy to help you.
“Rain noise” or rain stick.
Rainstick – musical instrument
(group “noise percussion”). The invention of this instrument is attributed to
Chilean Indians of South America. Rain sticks were made mainly from
a certain type of long and narrow cacti. But under our conditions
use improvised materials.
Description: rustling instrument, somewhat reminiscent of a maracas, but the sound
he has a long, drawn-out, like the sound of rain or sand carried by the wind. This peculiar
the sound is caused by the slow movement of the grains, poured in a long tube with
barriers. For children over 2 years old.
Purpose: To promote the acquisition of basic playing skills
on children’s shock-noise musical instruments. Development in children
preschool age imagination, fantasy, communication skills, natural ability.
What is used for : Development of the muscles of the hands,
coordination of movements, the formation of a desire to play music on children’s musical
tools. There are several ways to make rain sticks, but here
the most accessible and safe for the child:
We need: long and narrow cardboard tube,
thick paper sheet
couple handfuls of rice
·
piece of food foil
·
paper glue
should be as
thicker, do not wrinkle. Tubes from a gift wrapper are perfect
paper, vinyl wallpaper, fabrics, paper, and anything else that is sold by the yard,
and just strong cardboard tubes – ask at stationery stores).
2-3 boxes of chips glued together. From thick paper cut two
circles, the diameter of which is 1-2 cm larger than the diameter of the tube. Attach to the circles
tube and circle, noting the diameter. Cut valves and to one end of the tube
glue the circle. Cut off a piece of food foil. Length: tube length,
multiplied by 2 – 2.5 Width: 30-40 cm (at least the full width of a standard
roll) Roll the strip lengthwise, crimp lightly, and then wrap around
some stick to make a spiral. Place the spiral inside the tube. AT
pour rice into the tube, close the hole with your hand and try the sound. Try
play with the amount of rice and the density of the spiral turns. Maybe for that
to slow down the fall of the grains (prolong the “noise of the rain”) you have to add
grains or increase the density of the spiral, and hence its length.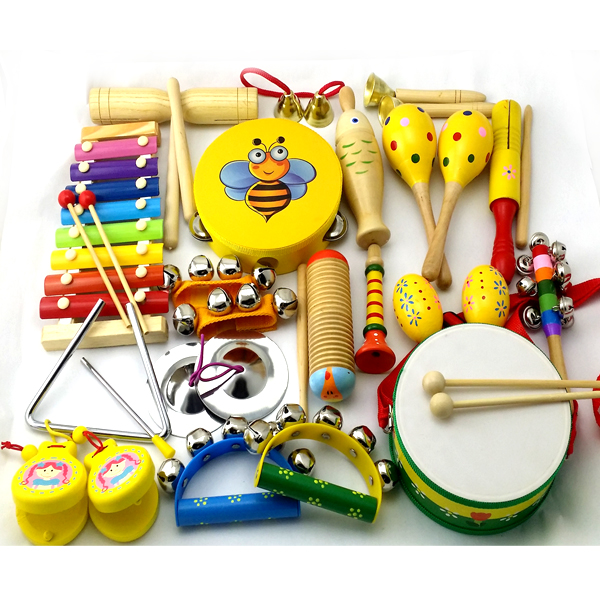 When will you stay
satisfied with the sound produced, seal the open end with the remaining circle
paper.
Magic flowers “ Tulips”.
Description: rustling
an instrument somewhat reminiscent of a maracas, but very beautiful. Made from
cups from – under the plants, and paper containers from under the eggs. Cells finely
cut, soaked in water for several days, then PVA glue is added.
Then both parts (plant + paper flower) are glued together,
beforehand, you need to add any cereal inside, in this case it is millet.
Then we glue the flower with the mass that we prepared in advance, give
dry. After decorating and varnishing. Of course, the manufacturing process
flowers require a long time, but how beautiful they are and cause a stormy
delight in children.
Bells
Description: A sonorous instrument, the same flowers are used as
and tulips, only the glass needs to be cut in the shape of a bell, and inside you can
fasten a bell, or beads, to the string, the main thing is that the tool acquires
magical sound.
Purpose: To promote the acquisition of elementary playing skills
on children’s shock-noise musical instruments.
What is used for : Development of the muscles of the hands,
coordination of movements, the formation of a desire to play music on children’s musical
tools.
Development of imagination, fantasy, communication skills, natural
abilities.
One of the most
fascinating forms of musical and rhythmic games with noise instruments for
child is telling stories – noise makers. Such joint gaming
Leisure activities for a child can be organized by parents or adults without a special methodological
or musical training . In such a fairy tale, the text is composed in such a way that
after one or two phrases, the child is given the opportunity to depict something with noise.
Not so long ago in
In the bowels of the Internet, I found for myself an audio guide “Music with Mom. Tales –
noisemakers” by E. and S. Zheleznov. This is beautiful music, expressive children’s voices and
funny soundtrack. Onomatopoeia on noise and children’s instruments
quickly develop fine motor skills in babies, and babies will also master various
techniques for extracting sounds, develop auditory memory and children learn
perceive and reproduce shades of sound: volume, timbre, pitch, rhythm
and duration. On the basis of the disc material, you can arrange musical
performances with the smallest, which teaches to listen to others, to give in, to empathize
and interact. Fairy tales are good because they cover all age categories.
children children from 2 to 6 years old. But still, choosing the text of a fairy tale, it is necessary
consider how it suits children in terms of complexity and volume. It is important to determine in advance
noise design for the selected story or fairy tale, semantic accents and
pause, do
appropriate notes or symbols in the text. fairy tale
or the story of the end result must be learned so that one can
tell by heart. Through the use of history tools or
fairy tale becomes more interesting and bright.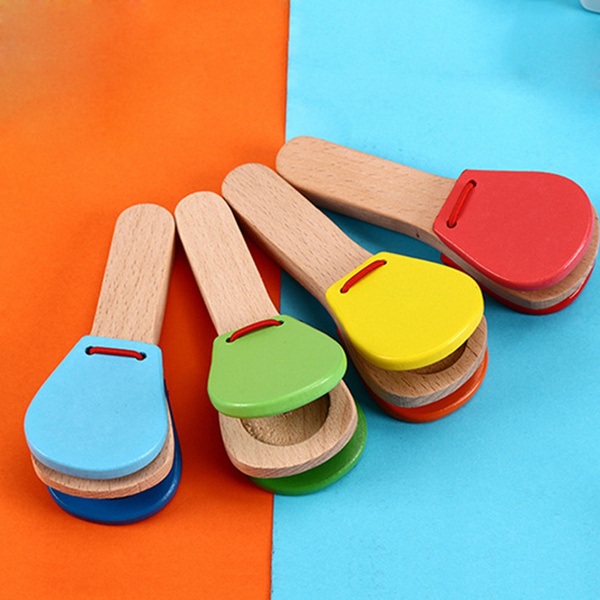 Distribute before the fairy tale
tools, taking into account the capabilities of the child, you can also offer to choose
instrument and allow time to check the sound.
When performing, use gestures and facial expressions, speak slowly
and expressively, pause. Playing an instrument should sound in
pauses to illustrate the text.
Intro can be prompted with a look, gesture or in advance
prearranged signal.
You can also tell the child the volume and
game speed. An adult must prepare instructions for playing instruments
in advance, but at the same time be ready to support an unplanned entry
child, his creative initiative. The child must gradually remember
the names of the instruments, to recognize them by ear, and from the age of 4, with the help of an adult,
learn to compare and characterize the sound of familiar instruments. And now
I propose to watch small fragments of fairy tales – noisemakers with the participation of my
kids. The 2nd junior group will show the fairy tale “cowardly bunny”.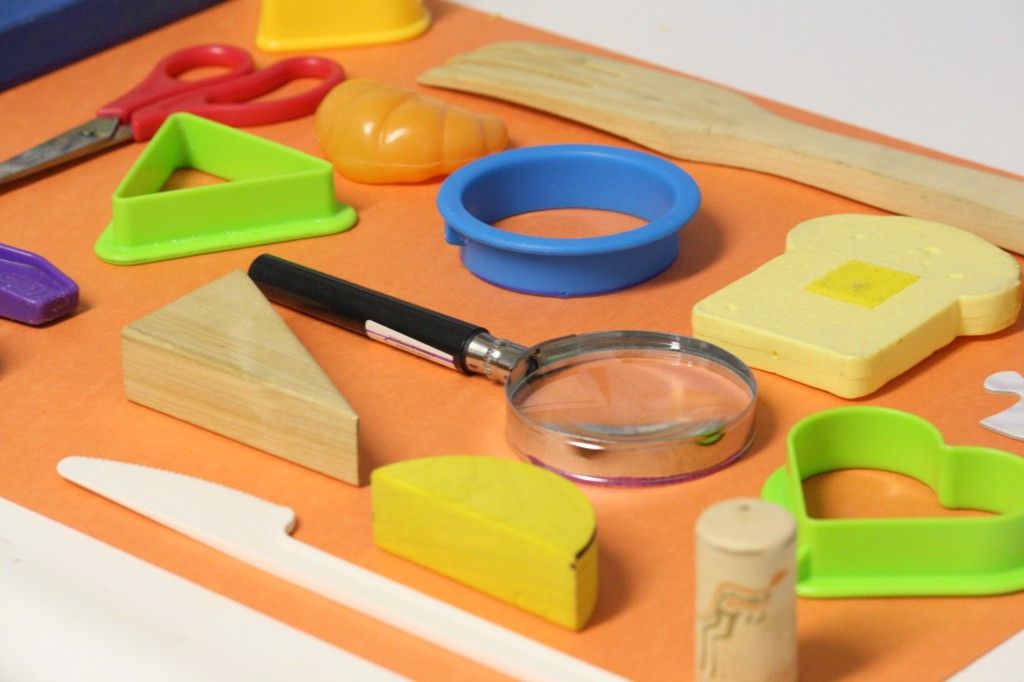 preparatory
group – girls fairy tale “Spring has come.” This is where I experimented a bit.
complicated, added playing the metallophone with musical accompaniment, and
the child himself took the initiative, and together we picked up a melody. Here’s what we have
happened.
Final part. Questions for
reflection:
1. Do you think it is possible to use such tools in
musical development of preschoolers?
2. In connection with this, what discoveries and conclusions did you make for yourself?
3. Are you interested in using homemade music
tools in the independent activity of children?
References
1. Vetlugina N. A. Children’s orchestra. – M., 1976.
2. Ishchuk V. Playing children’s musical instruments // Doshk.
upbringing. – 1994. – No.
4. – S. 68-72.
3. Kononova N. G. Teaching preschool children to play on children’s
musical instruments. –
M., 1990.
4. Musical and motor exercises in kindergarten. — M., 1991.
5. Radynova O.P., Katinene A.I. Musical education
preschoolers. – M.: Academy.
2000.
6. Tyutyunnikova T.E. Musical instruments of Carl Orff // Doshk.
upbringing. – 1998.
– No. 2. – S. 141-150.
7. Tyutyunnikova T.E. Elementary music making with preschoolers. –
M., 1999.
“Education of preschoolers through song and dance creativity”
Municipal budgetary preschool educational institution
“Kindergarten of a general developmental type” No. 56
Consultation for parents
“Musical instruments with their own hands”
Music director
Mosyagina A. V.
V.
Maykop 2015
With the help of music, we bring up in children an aesthetic sense of beauty, love for nature, kindness. When attending kindergarten, the child spends most of the time in a group. Therefore, there must definitely be a place for a musical corner, because children’s music-making is an active activity in which the thinking of a child is improved; develops the ability to take initiative, independence. And most importantly, his emotional sphere is enriched – a kind of immunity from life’s failures. After all, emotions make it possible to evaluate ongoing events in terms of their significance for each of us.
In the process of playing the instruments, the individual features of each are clearly manifested: the presence of will, emotionality, concentration, imagination. For many, this type of activity helps to open the spiritual world. Overcome shyness and stiffness.
And now I want to talk about several options for making musical instruments with my own hands.
NOISE MAKERS
Any small boxes and plastic jars (from Kinder surprises, creams and shampoos) filled one third with rice, beans, peas, etc. can be used as noisemakers. noisy materials.
JINGLES
Made from various small bells and bells. If there are none, various “ringing necklaces” are invented.
The first method of making a necklace
Make holes in metal beer corks, pass a fishing line through the holes. This necklace rings beautifully.
Second method
Various metal tubes are used to make a necklace. Suspended on a fishing line or wire, they also ring beautifully.
Third method
Walnut or pistachio shells are strung on the fishing line. They rattle rather than ring.
WHISTLES
To make a whistle, you have to blow into something. To do this, take well-washed glass vials from medicines or clean glass test tubes. Even pipette tubes are suitable.
In order for the whistles to have different pitches, they are filled with water. By experience, you can build a real scale.
Plastic bottles from Coca-Cola or mineral water, partially filled with water, are also capable of sounding.
KNOCKERS
The simplest percussion instrument is made from two sticks that must be struck against each other. You can add a wooden block to them in the kit, on which blows are applied.
And if you cut wooden strips of different lengths from parquet and knock on them, this is already a prototype of a xylophone. Walnut shells can be strung on a stick so that they move freely. By shaking the wand, we get a sound like that which is obtained by shaking an abacus. The latter, by the way, are also an excellent musical instrument.
CRUSHER
Quieter than rattler. For example, you can rub two cones against each other: a mysterious rustling is obtained. You can make rustling sounds with crumpled newspaper. You can knock on the bottoms of yogurt cups – you get a dull, but expressive sound.
Or you can simply transfer pistachio shells from one hand to another or from one box to another. The sound in this case resembles the sound of rain or a waterfall
PICKERS
The finished plucker is an egg cutter that sounds very nice – like a mouse squeak.
You can make a small bow with a line instead of a string. This line needs to be pinched. (The bow, by the way, was the first stringed instrument in the history of mankind.) Two or three fishing lines can be pulled on a bow. Then you will get the prototype of a real harp.
Stretch a thin (drug) elastic band over tight cylindrical boxes of lemon wedges or chips. The rubber band stretched over the empty space of the box should be the chord of the upper circle. If there are two or three rubber bands, you can already play the simplest songs on such primitive gusels.
Even simpler: rubber bands are stretched over an empty matchbox. It is important to remember that the elastic must be stretched elastically, not sag. Therefore, it may need to be wrapped around the box two or three times.
You look – and you have at your disposal a whole orchestra in the spirit of Winnie the Pooh, composing grumblings and nozzles. Success depends only on your desire and imagination.
RATCHETS
A wonderful ratchet tool can be made from two plastic bottles.
Take two bottles. Cut off the neck on both blanks (about 15-20 cm) and cut the sides of the bottles into longitudinal strips 1-1.5 cm wide and about 10-15 cm long. You can play by holding the instruments by the former necks. The tool will crack if you rub the bottles against each other or run your hand or pencil over the strips. You can color the ratchet with a marker or stick an appliqué.
Of course, any other material at hand can be used for rattles, such as wooden combs, corrugated sides of cans, walnut shells attached to the ends of pieces of wire collected in a bouquet, etc.
CONNECT THE STRINGS!
Do you remember the funny bear from the old children’s cartoon that sat on the stump and pulled the bark, listening and enjoying the sound it made?
Let’s try to build such a “single-stringed” instrument from a plastic yogurt cup and ordinary gum.
It’s very simple. Slide the elastic along the cup so that part of it is at the top and in the middle. It is necessary that the elastic fits snugly around the edges and does not hang out. Then the sound, when you pull the free piece of gum, will be sonorous and unusual. And if you attach rustling paper to the outer side of the bottom of the cup (cut the paper into strips) or hang a bell, then on one.
BELL
One of the favorite instruments of children is the bell. Of course, you can buy a bell in a store (for example, wonderful bells for fishing are sold in a pet store). But it is much more interesting to make it yourself.
Take an empty tin can (be sure to secure the edges first) or a small clay flower pot, a nail, string, a hammer, a nut and a bead. The nut is the “tongue” of our bell. Tie a nut to the end of the rope, thread a bead and tie a knot on the rope. It is necessary to tie so that the distance from the knot to the nut is less than the height of the jar or pot. Using a nail and a hammer, punch a hole in the top of the bottom of the jar (there is already such a hole in the clay pot). Pass the rope through the hole and tie a knot. Such a bell used to be called “talo” in the villages and was hung around the neck of a cow.
Making a bell will require a little more diligence on your part. You will need; a piece of tin (square 4 × 4), scissors, a nail, a hammer, a string, a bead or a metal ball. First you need to draw a square into four small squares, and then draw and cut a flower from four petals (you need to cut it from the edge to the center). Make a hole in the middle with a nail. Then thread the string through the hole and tie a knot at the end. Inside the bell (middle of the flower), put a bead or ball and bend the petals inward so that the bead does not fall out. Now you can ring and delight others with your music.
We will make an instrument on which you can play a whole melody from glass bottles. Bottles can be taken from under milk, kefir or water. Let’s call it a “musical-airy” xylophone. If you blow into the neck at a certain angle, you get a sound that you can sing with a note. If you collect a lot of bottles of different volume and neck size, you can build a major or minor scale. In the same bottles you can pour water and play by hitting them with a stick.
Musical glasses were popular in the 18th and 19th centuries. You will be surprised, but Mozart, Haydn, Franklin and others wrote music for this musical instrument. Crystal glasses or glasses made of simple thin glass were placed one inside the other and the sound was extracted by a simple touch. You can make your own set of musical glasses. You need to pour water into glasses (you need a different amount of water to build a scale) and play with a stick or by running a wet finger around the rim. It will be great if you add a little food coloring of a different color to each glass.
WIND MUSIC
Do you know that some musical instruments can sound without human intervention? This so-called “music of nature” can be performed on the “aeolian harp”. They were popular in Central Europe in the 19th century. Their name comes from the name of the ancient Greek wind god Aeolus. The harp consists of strings of the same length, but of different thicknesses, stretched over a wooden case. The wind, falling into the strings, makes them sound, giving rise to unique and mysterious music.
You can try to make “singing” pipes yourself. This kind of musical instrument is popular in the countries of the East, in China and Japan. Pipes are hung outside, and when the wind blows through them, a soothing quiet sound is heard. Take a small hollow pipe, a sea shell, a bottle or an ordinary key with a hole, hang them on the street and enjoy the “wind music”.
The tweeter ball is a well-known instrument from childhood. We suggest you make it yourself. You need to take a cardboard tube from a spool of thread, a burst balloon, thread or tape, scissors and PVA. Cut a small strip from the ball and glue it on top of the end of the tube so that there are small gaps along the edges of the hole. Secure the strip with string or tape and blow into the open end of the spool.
Making musical instruments with your own hands is a useful and exciting activity. There are no clear rules and laws, so any idea easily turns into reality: paint, tie, stick, pour, pour, sew, experiment … The main thing is to make music together, then it will bring a great creative mood to both the baby and you!
Remote support of parents by the music director
Prepared by T.I. Alikina
music director
“specialist of the highest category”
Consultation for parents “Creating a home orchestra”
Everyone knows that spending time together with the family, and especially playing music at home, brings unforgettable joy, causes emotional satisfaction in adults as well as in children.
Creating a home orchestra will be interesting for both parents and children. Of course, not every home has real musical instruments, but this is not a problem. You can also make instruments for the orchestra at home, which, for sure, will turn into an exciting process in which all family members will be involved.
Show your fantasy, imagination, creativity in creating musical instruments, use improvised means, waste material. Items such as discarded yogurt jars, mayonnaise buckets, boxes, Kinder surprise containers and many other items will be useful for creative activities in creating noise musical instruments.
The child, by making noise instruments himself, will think more creatively. The very experimentation with sounding objects made independently, various kinds of onomatopoeia, affect the cognitive attitude of the child to the world around him, develop his musical abilities.
Rattles and rustlers, wooden rulers, drums, rattles and bells made from various kinds of auxiliary materials, while entertaining, create in the child the desire to work, make music, create and compose. In the process of creating musical instruments, children will acquire design and inventive skills, they will develop a need for playing activities to transfer their knowledge, skills, and experience to their peers.
As a result, the complex, all-round development of children occurs through the joy of independent labor, artistic and musical activity.
Maracas
Any plastic jars for yoghurts, juices, etc. Dried rustling or rattling material is poured into the jar – rice, buckwheat grains, peas, beads of your choice. The variety of the contents of the jars will give a different sound. As a result, we will get noise instruments – maracas. Stick an application of self-adhesive film or film for Easter eggs on the jar.
Rings
Made from various small bells and bells. If there are none, various “ringing necklaces” are invented. Another way is that walnut shells are strung on a wire and hung on a ring or comb. Keys can be used as a ringer. An excellent ringer can be obtained from “wind music” divided into separate tubes.
Knockers
The simplest percussion instrument is made from two wooden sticks that can be struck against each other. And if you cut wooden strips of different lengths from parquet and knock on them, you get something like a xylophone. Accounting bills are also an excellent noise tool. Ordinary stationery wooden rulers can serve as a prototype for a ratchet. The simplest drum can be made from a plastic can of sour cream, and drum sticks from corks and wooden skewers. A more complex version of the drum will turn out if you cut the bottom of two plastic cans, insert into each other and fasten with adhesive tape. Such a drum is decorated with colored paper, colored electrical tape or in any other way. Wooden spoons, too, will give your orchestra a unique sound and beauty.
Dear parents! I offer a wonderful video that you can use when playing with children at home in the orchestra.
Who plays in the meadow
https://www.youtube.com/watch?time_continue=9&v=PWkRlqAM_x8
Cheerful garden
https://www. youtube.com/watch?time_continue=9&v=PWkRlqAM_x8 6&v=-PhSR83abGw
Good Master
https://www.youtube.com/watch?time_continue=2&v=yOPDUOR_yx4
Forest Band
https://www.youtube.com/watch?v=ayYcGHVd374
Summer Band
https://www.youtube.com/watch?time_continue=2&v=e1ypvEa6203 Butterfly Polka
https://www.youtube.com/watch?time_continue=2&v=2qgihOdrF4g
Three Bears Orchestra
https://www.youtube.com/watch?time_continue=2&v= pPfUj9NHty4
Consultation for parents
“Children’s musical instruments ”
Prepared:
Musical Directorate
Mustafaeva Elvira
to determine, what is the overalls, what is the overalls, with the oven, which in various types of musical activity. These include singing, dancing, playing musical instruments. The most accessible means of introducing children to music at home are musical instruments.
Children’s tools are, as it were, a small semblance of real, professional ones. Of course, they are greatly simplified and far from fully reproducing the sound of real instruments, although they sometimes bear their names, are similar in appearance and in the way sounds are extracted from them.
Depending on the method of sound production and the nature of the sound, children’s musical toys and musical instruments are grouped and musical instruments are grouped into certain types:
Silent.
These toys only represent musical instruments, such as a piano with a mute keyboard, balalaikas with non-playing strings, button accordions with bellows, etc. Despite the lack of sound, their appearance is attractive and contributes to a playful situation. Children often imagine themselves as “musicians”, imagine themselves as pianists, accordionists, balalaika players, perform familiar songs, sometimes varying them, or improvise their own. Such activities develop the creative imagination and musical and auditory representations of the child.
– Svils: https://youtu.be/cvwyaqajvdo
– puffs: https://youtu.be/cvwyaqajvdo
3. Toys with a fixed melody:
Sharmine: https://yautu
music boxes: https://youtu.be/vH8WcIxZu38
While playing on them, children’s actions are only mechanical.
4. Toy-instruments with a diatonic or chromatic scale: metallophones, pianos, grand pianos, clarinets, flutes, saxophones, button accordions, harmonicas, harmonicas, bells, zithers, domras, balalaikas, etc.
These tools are significantly different from the previous ones. By playing them, especially those that have a chromatic scale, you can play a variety of melodies.
This is interesting!!!
There is a certain classification of these musical instruments:
Stringed – zithers, domras, balalaikas and other instruments according to the folk type. The sound on them occurs when the child touches the strings with his fingers or with a plectrum (a thin plate of plastic).
Wind instruments – flutes, saxophones, clarinets, triplets, “melodies”. The sound is produced when air is blown into the instrument’s tube.
Key-reed accordions, accordions, harmonicas. The sound is produced when a key is pressed.
Percussion pianos, pianos, metallophones, xylophones. The sound causes a hammer to strike metal plates, which occurs when a key is pressed.
Of course, musical instruments will cause some inconvenience, such as disturbing the silence and your peace, but it is important to understand what effect they can have on the development of your child. First of all, it is the upbringing of love and interest in music. Secondly, playing musical instruments contributes to the development of fine motor skills of the fingers, which is inextricably linked with the development of speech. Thirdly, instruments help develop musical pitch and rhythmic ear. For many children, playing children’s musical instruments helps to convey feelings, the inner spiritual world. This is an excellent tool not only for individual development, but also for the development of thinking, creative initiative.
When choosing a musical instrument, it is necessary to take into account the age characteristics of the child. The annotation to the instrument must necessarily indicate at what age you can start learning to play the instrument. Music programs implemented in preschool institutions recommend learning on the metallophone from 4-5 years old, on the piano (piano, synthesizer) – from 6-7 years old.
Before teaching a child, one can say that something trembles in any musical instrument, so it sounds. In string instruments, the strings tremble (violin, guitar, harp, harp, piano), the bell rings because the metal surface of the bell trembles, etc. In addition to musical instruments, invite your child to experiment with sounds by making improvised objects musical. For example, in order for an elastic band to sound like a string, it must be pulled over a box. The tighter the band, the higher the sound. You can stretch two elastic bands, setting them to the intonation of a second, and play the melody of the Russian folk song “Magpie”.
Try to extract sound from combs. Here it is important to play only with a pick, in order to avoid cuts to the fingers. A piece of thick paper folded in a corner can serve as a mediator. The whole family can perform a “hairdresser’s polka”! We play a haircut to a cheerful folk melody: dad rhythmically clicks scissors, mom and child play combs.
https://youtu.be/ap3WwOKofDA
Creativity can also be shown in a joint utensil orchestra.
https://youtu.be/-THno_ekaFU
Believe me, your child will be delighted with such family creativity!
It is important that already at preschool age the child could fantasize, experiment with sounds. The world of sounds is huge and surrounds us everywhere: the wind is rustling, the leaves are rustling, the car is slowing down, the clock is knocking, etc.
Read a poem about sounds by A. Usachev to a child:
Life would be terribly boring,
If life were silent.
How beautiful it is to hear the sound:
The sound of rain and the beat of the heart!
We scream, laugh, breathe,
We hear words and thoughts,
We even hear silence…
How a cat walks on the roof,
How mice rustle behind the wall,
Wolves howl at the moon.
A world without sounds would be sad,
Grey, boring and “tasteless”!
Playing with musical instruments is of particular interest to children. A musical instrument for a child is a unique toy. It not only entertains, but also teaches, develops hearing, attention, imagination, memory.
Dear parents, since we are forced to stay at home in the current situation, I propose to make musical instruments with our own hands.
A handmade tool is especially expensive, as a rule, it causes children to take care of it.
To make tools at home, you need to open a small workshop. You can use different waste material:
boxes, postcards, bottles, cups, measuring spoons and containers, buttons, beads, walnut shells , and everything that seems interesting, beautiful and practical for this activity. You will also need glue, tape, scissors, etc.
The easiest instruments to make: rattles – kinders . It is necessary to put a little bulk material into empty capsules, always different. For example: beads of various sizes or small buttons, beads, rhinestones, etc.
Be sure to draw your child’s attention to the fact that each capsule with different materials sounds differently: softly – loudly, loudly – deafly. Try to find analogies from life, or from a fairy tale. What does each instrument sound like? The sound of rain, the rustle of leaves, the dance of grasshoppers…? Let the child imagine, invent. Help him, develop his initiative, creative thinking.
Just as easy to make plastic maracas – rattles. They can be made from jars, cosmetic bottles. It’s great if they are transparent. Then let the material being filled be beautiful. For example: beads, beads or something else shiny, colorful, bright. Just sprinkle material. It is not advisable to use cereals. When shaking the object, the cereal crumbles, settles on the walls of the jar, and looks aesthetically unattractive. Under the influence of temperature changes, humidity becomes loose, soft, moldy.
More difficult to make maracas-rattles from bottles with stickers and inscriptions. It is necessary to glue them so that the inscriptions are not conspicuous and look aesthetically attractive. This is painstaking work that requires patience, but how much room for imagination and creativity!
It is practical and convenient to seal the inscriptions with adhesive tape, having previously pasted on it small geometric figures made of colorful, shiny paper cut out of unnecessary postcards, covers, magazines. You can also stick glitter on tape. To do this, you need to finely chop the old tinsel and sprinkle on scotch tape. Then stick on the bottle.
Particularly interesting in the manufacture and practical use of cardboard rattle boxes of various sizes. They can be not only rattles, but also music boxes.
Boxes are also filled with material, sealed so that the material does not crumble, and are designed aesthetically, as mentioned above.
If the lid of the box opens and closes up and down like a door, it will make a music box . Then the box won’t close. Put the material, closed, played. Then another material was added. And so you can play music and experiment, developing creative abilities. Since the contents in such a box will be available to the child, it is necessary that the activity takes place under the supervision of adults.
Let’s talk about drums in particular. They can be conditionally called drums and drums.
Drums can be easily made from yogurt cups. Also aesthetically designed. The top is sealed with tape. You can put some material into the glass. For example, beads, pistachio shells or something else. Some of the material will stick to the adhesive tape and will additionally decorate the instrument, and some will remain at the bottom. Then the tool can be used as a rattle. In a rattle, sound is produced by shaking. On the drum – by hitting the membrane of the instrument with a finger, i.e., on the surface sealed with tape from above.
These drums can be made from a variety of round jars that are convenient and aesthetically pleasing for the activity.
“Drums ” can be made from mayonnaise buckets, small flower pots. The manufacturing method is the same. The only difference is that the bucket has a lid on top, and the flower pot will have two layers of tape for greater strength.
Proposed methods for making musical instruments can be varied. For example, cover the surface at the drum not with adhesive tape, but with parchment paper in two or three layers, wrap it with twine several times and glue it with glue.