


How to draw on walls: 6 Ways to Paint Designs on Walls
Now’s the Time to Let Your Kids Draw on the Walls
For those seeking a useful way to spend their time during social distancing—or anyone simply interested in forging a deeper connection with their homes—HB has launched Home Love, a series of daily tips and ideas to make every minute indoors more productive (and gratifying!).
If you were anything of a creative child, you may well have heard, at some point in your younger years, that dreaded phrase: “No drawing on the walls!” But as designer and author India Hicks sees it, sometimes letting your children have creative freedom over the walls isn’t such a bad idea. Hicks took to Instagram last week to share a photo of her 12-year-old daughter, Domino, painstakingly painting a cow print on her bedroom door at the family’s home on Harbour Island, in the Bahamas.
View full post on Instagram
“It was totally her idea,” Hicks says of her daughter. “She said, ‘I want to paint cow print all over my room.” And clearly, her mother obliged. But, for any parents out there wondering if they should leave their children alone with paints and pens and the home as their canvas, Hicks has some thoughts.
“My view, basically, whether you’re in quarantine or not, is that kids drawing on the walls is fantastic—at a certain age,” she tells House Beautiful.
As for her daughter? “She’s 12, she’s pretty together, she’s incredibly organized. I mean, she was the best assistant I ever had. So when she says, ‘I’m going to do a project,’ I kind of trust her,” says mom.
Tip: Confine the drawing to one area
Hicks notes that she set some boundaries: “I did say, ‘Why don’t we focus it into one area,’ because I know these projects can get bigger and take longer than we imagine.” Plus, not only does setting a (literal) parameter discourage too much freedom of expression in certain areas, but it gives children ownership of their own spaces. “I’m probably not going to let her paint my sitting room, but her own door is perfectly fine,” quips Hicks.
Tip: Plan it out
With that as a guideline, Domino went to work: “She drew it out completely on her own,” Hicks says. “She found the paint in the garden shed. She started painting on her own, and that was it.”
It was a more successful project, the designer admits, than some that have taken over her creative household. “I’ve got four boys, two of them share a room, and some years ago when they were younger, they had the brilliant idea that they were going to graffiti all over the desk,” she recalls. “And at first I thought this sounds really cool. And then when I saw it I thought, Oh, this is actually going to be quite hard to live with.” So, Hicks laughs, “the graffiti ended up getting repainted.”
Tip: Stick to repaint-able surfaces
And that’s an important lesson, too: So long as the art is on a surface you could technically paint over, it’s never really permanent, an important consideration for parents wondering how much freedom to give their kids. (And if you’re looking for a really removable option, consider whiteboard paint—it comes in more colors than just white).
“We have five kids basically under house arrest, and they’re all just reaming for some freedom,” says Hicks. “And if that freedom can manifest itself by painting on their walls. I think that’s fine. I think it should be encouraged. Because at the end of the day, you can always paint over it.” Hear, hear!
While her kids tap into their creative sides, Hicks herself is turning to philanthropy, creating a group of local political and church leaders to start a Food Bank initiative to collect provisions for those on Harbour Island struggling during the shutdown. Click here to support their efforts.
Follow House Beautiful on Instagram.
For more Home Love ideas, head here—we’ll be launching a new one every day until April 1st. And tag your own home project photos #homelove for everyone to enjoy.
Hadley Keller
Digital Director
Hadley Keller is House Beautiful’s digital director. She oversees all digital content for the brand as well as working on the print magazine. She has covered covering design, interiors, and culture for 10 years in New York. She served as Associate Market Editor, Design Reporter, and News Editor for Architectural Digest and AD PRO before joining House Beautiful. Hadley is a staunch maximalist and vocal opponent of the Open Floor Plan.
How to Paint a Room: 10 Steps to Painting Walls Like a DIY Pro
AD It Yourself
Learn how to paint a room in your home or apartment with these easy DIY steps and brighten up any space in no time
By Lindsey Mather and Elizabeth Stamp
All products featured on Architectural Digest are independently selected by our editors. However, when you buy something through our retail links, we may earn an affiliate commission.
Learning how to paint a room properly is essential for beginning DIY’ers, new homeowners, and veteran home improvement experts alike. After all, it’s pretty painless, relatively inexpensive, and—should something go horribly wrong—easy to fix. But before you grab your roller and get started with your first coat, it’s essential to have a plan of attack. So we asked a handful of experts for their best painting tips and tricks to get you started. Read on to learn how to paint a room and see step-by-step what you’ll need to do to make sure your project is a success.
While San Francisco based designer Nicole Hollis may have turned heads for painting the exterior of her home jet black, we’re prone to the moody blue she chose from Farrow & Ball for the bar.Douglas Friedman
1. Plan your approach
Start by thinking about how you want the finished project to look and remember that you’re not limited to four walls or an entire room in the same color. Consider painting an accent wall in a bold hue or highlighting moldings in a contrasting shade or finish. And don’t forget to look up and see whether the ceiling could use a refresh as well.
Alexander Gorlin used Parma Gray by Farrow & Ball on an accent wall in a New York apartment.
2. Choose your color
Browsing through fan decks and paint chips can be overwhelming. Start by figuring out the general color characteristics: Do you want a warm or cool shade? Neutral or saturated? If you have existing furniture or art, you’ll also want to consider how the shade will complement them. Once you have a sense of what you’re looking for, pick a few shades and get samples—lots of direct-to-consumer brands, like Backdrop and Clare, will send you adhesive swatches you can slap on the wall for a better sense of shade (and it’ll save you a trip to the store). Test the colors to see how they look in the room at different times of day.
Many paint companies also have tools on their websites that will let you upload a photo of your space and preview different colors on the walls. But colors can look different in real-world conditions, so you’ll still need to try it out in the space.
Test samples of your color choices in the room to see how they look in different lighting conditions.
Photo: Richard Drury/Getty Images
3. Pick out your tools and materials
Every project is unique and you may need different tools depending on the paint you choose and the condition of your walls, but there are a few must-haves:
- Paint
- Paint roller
- Paint roller extension pole
- Drop cloths
- Paintbrushes
- Paint tray
- Sandpaper
- Painter’s tape
- Rags
- Putty knife
Click here for a shopping list to order all the paint supplies you’ll need to get started—from sanding and priming to your very last touch-ups.
Gather all the essential tools before you start.
Photo: Anika Salsera/Getty Images
4. Determine how much paint you’ll need
Whether you’re painting a powder room or the exterior of your house, the general rule of thumb is one gallon per 400 square feet, says Carl Minchew, vice president of color innovation and design at Benjamin Moore. But that’s just a rough guideline: To get a more precise number, which you’ll definitely want for large projects, use a paint calculator like the ones provided by Benjamin Moore or Pratt & Lambert; they take into account window and door measurements. (And both assume two coats of paint per project.)
Most Popular
Planning on whitewashing a charcoal gray wall? You’ll likely need additional paint when going from dark to light. On the other end of the spectrum, a deep color base tends to require more coats of paint than a lighter color, says Carolyn Noble, color marketing and design manager at Pratt & Lambert. She recommends applying a gray-tinted primer to the surface before you paint your walls a saturated color to help reduce the number of applications. When it comes to finish, you may have heard that the glossier it is, the higher the coverage rate, but it’s not enough of a difference to change the number of gallons you need to buy, Minchew says.
If you’re painting a highly textured surface rather than a smooth one, buy a little extra, says Julianne Simcox, Pratt & Lambert associate brand manager. Cabinets with complicated millwork require more paint, too; Minchew suggests purchasing about 10% more than calculated.
Calculate the correct amount of paint you’ll need to spare yourself trips back to the store and wasted paint.
Photo: Daniel Acker/Bloomberg/Getty Images
5. Prep the walls and the room
You don’t want to damage your favorite sofa or that heirloom Grandma gave you, so empty the room of all the furniture. If you don’t have enough space to relocate everything you own, push it all to the center of the room. Cover the pieces with a drop cloth or lightweight plastic sheeting and do the same with the floor, as well as any cabinetry or countertops that might be in danger of excess splatter. “Don’t skip the drop cloth—paint will splatter, we promise,” say New Jersey contractors—and cousins—John Colaneri and Anthony Carrino, the stars of the HGTV series Cousins Undercover and Kitchen Cousins as well as The Build Up and Grand Design on Ellen DeGeneres’s Ellentube.
Grab a roll of painter’s tape—the cousins recommend FrogTape—and firmly apply it to the edges of the room’s corners, base and crown moldings, and door and window casings, using a putty knife to seal if needed. “Getting a good seal so paint doesn’t get under the tape is everything, plus it will pull away clean after everything is dry,” Colaneri and Carrino say. If you dare (or have an artist’s steady hand), you can skip taping entirely. Remove light switch and outlet covers and apply painter’s tape to protect outlets and switches from paint drips. Before you get started, make sure you know how to repair drywall so you can clean up any nicks in the walls.
Most Popular
Protect floors and furniture with drop cloths.
Photo: Patti McConville/Getty Images
6. Mix your paint
Use a wooden paint stick to stir the paint, and re-stir often throughout the project. Paint that isn’t stirred consistently can lead to the ingredients separating and you’ll risk compromising the true color you’re going for.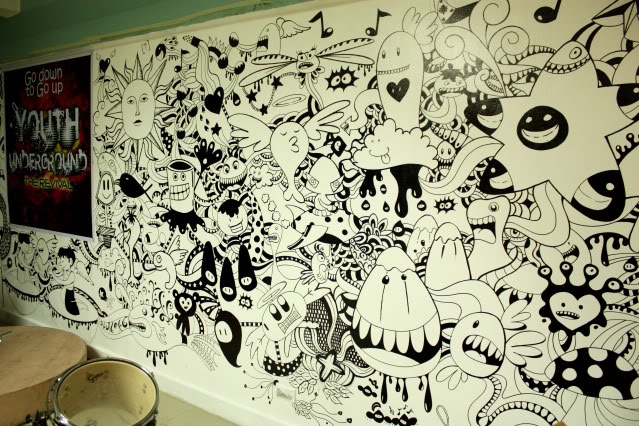 If you’re using more than one gallon of paint, combine the cans in a large bucket in case there is a slight variation in color.
Mix your paint early and often.
Photo: Tetra Images/Getty Images
7. Pick your painting techniques
Your paint is mixed and your roller is at the ready, but make sure to plan a strategy before you get started. Work from the top of the room down, starting with the ceilings. Planning a bold focal wall? Paint the adjoining light-colored walls first. “Don’t worry if you get paint on what will be your accent wall—the dark paint will cover up whatever lighter paint found its way there. After the lighter wall dries, tape off that edge so the dark color doesn’t bleed onto your new paint,” Colaneri and Carrino advise. If you’re covering up dark walls with a brighter hue, plan on three coats: your primer, plus two coats of the new color to ensure nothing shows through.
Most Popular
Tackle one wall at a time. Take a brush and “cut in”—paint along the molding and the corners from top to bottom—while your painting companion uses a roller to cover the main expanse of the wall, staying away from those more precise spots. When applying paint with the roller, use long strokes in a W pattern for ample coverage (and to avoid those pesky roller marks). Once the wall is dry to the touch, it’s ready for a second coat.
If you are painting the trim, remove the painter’s tape and wait for the walls to dry before applying tape to the walls. Start with the trim closest to the ceiling, move on to door and window frames, and, finally, the baseboards.
Start by cutting in near moldings and corners with a brush.
Photo: Banks Photos/Getty Images
8. Don’t forget ventilation
Watching paint dry is no fun. Make sure your space is well ventilated throughout the project by opening windows and using fans. “Keeping the room warm and a fan blowing definitely helps speed up the drying process,” the cousins say. “If it’s a damp day, it will take much longer for the paint to dry.”
Open a window or use a fan for ventilation.
Photo: Stephen Simpson/Getty Images
9. Clean up
You’ve done multiple coats, but it’s not time to relax just yet. Remove all the painter’s tape and gather drop cloths, making sure any spills or splatters are dry before you move them. For latex- and water-based paints, clean brushes with soapy water, though oil-based paints will require mineral spirits. You can use a painter’s brush to clean and reshape bristles. If you want to reuse roller covers, use the curved edge of a 5-in-1 tool to remove the excess paint under running water (they’re also useful for opening a paint can, removing nails, and scraping).
Most Popular
Clean brushes with soap and water if you used latex- or water-based paints.
Photo: Ableimages/David Harrigan/Getty Images
10.
 Give yourself enough time
The amount of time your project will take depends on the size of your room, how you’re painting, and your skill level. For instance, using a dark shade on the walls and painting the ceiling and trim will take longer than just doing the walls in a neutral color. While some spaces can be done in a few hours, others may take several days. Be sure to budget more time than you think the job will need and don’t forget to take prep and cleanup into account.
Shopping guide
ExplorerenovationDecoratingpaintDIYAD It Yourself
Read More
ad-it-yourself
How to Dispose of Paint the Responsible Way
You know not to dump old paint in a landfill, but what should you do with it instead? Here, some earth-friendly paint disposal tips
By Jennifer Beck Goldblatt
how and what? – Readers’ Articles
Painting on the walls is one of the most accessible and creative ways to make the interior of an apartment look like no other.
About a year ago, for the first time in my life, I painted on the wall without fear that I would be scolded for it. My friend entrusted me and my artistic skills with the walls in his apartment – in the children’s and guest rooms. And I liked this lesson so much that I continued to draw on the walls in different houses. During this time I have accumulated some experience, which I want to share with you.
1. For drawing on the walls, I choose acrylic
Acrylic markers have become a real discovery for me: they are convenient to draw even lines, they do not flow, do not leave smears, allow you to easily control the color saturation and reduce the time for drawing. I liked the Molotow markers the most: their refills are guaranteed not to shag, with other manufacturers I can’t be so sure. Look, I drew cyclists and a dandelion with markers.
If you want a more lively, not so smooth line, strokes and other creativity, then I choose acrylic in tubes and flat brushes. It takes more time for such work, it is more difficult to draw, but there is some pleasure in this. Here’s an example of a wall that has been outlined with a brush.
2. Which walls to paint on?
Acrylic adheres well to almost all surfaces. I tested walls with paintable wallpaper and directly painted walls. Soon I will have to draw on rather embossed wallpaper, I have already tried the marker on a small piece – it turns out well.
I don’t pre-treat the walls. Of course, if they are very dirty, it is better to wipe the surface first and let it dry. I also do not cover acrylic with anything: it is very sticky and resistant.
3. The projector is the artist’s savior
If you need to translate a complex drawing with many details, such as the cyclists from the example above, on the wall, my advice to you is to rent or borrow a projector from your friends. It will really make your life easier. Just display your picture on the wall and circle it with a pencil: less time, less nerves, and the result is better and smoother.
Hint: if you are right-handed, move from left to right so as not to
close your review.
Before I was told to take the projector, I was thinking about giant transfer paper and cell translation. Thank God I didn’t have to use them. Although I am going to translate the map of Europe for one future project exactly by cells.
4. Creativity is not only creativity, but also calculations
idea of scale. I print the houses on paper (I originally drew them in vector), measure each line and translate it to the correct scale. I do this part of the work in advance – it is small and requires a lot of time.
By the way, drawing on the wall is also a slow process. For example, recent houses (but I draw not only them!) on a wall only 1.9 m long took 4 hours – and this is just a pencil sketch.
5. It is not necessary to start with a complex one
really change the look of the room.
I have collected for you some pictures from wall-art on Pinterest: look, there are quite simple, but very effective designs. By the way, I highly recommend this site for inspiration!
A little more information about my wall projects is on my blog. And if you have any questions – write, I will try to answer them.
I wish you smooth walls and a firm hand!
Add to favorites10
- Tags
- Wall
- Design
- Interior
- Wall Art
- DIY
- DIY
- Acryl
- Drawing
Wall, interior, WALL ART, DIY, DIY, DIY, ACRIRISHIP 9,000 do-it-yourself: detailed instructions for non-artists
We all dream of a beautiful and boring interior. And it seems that there is a great idea – to paint the wall with your own hands, and the desire, and the creative idea was formed. But there are no skills, and the services of professional artists and designers are not cheap. As a result, we give up the dream and stick the most ordinary wallpaper, because it’s so easy. Or maybe we can still paint the wall?
A wall is not a sketchbook. A drawing cannot appear here just because you wanted to draw. Choosing an image is a task almost as difficult as painting. The picture should fit the interior style of the room, correspond to the functional purpose of the zone and express certain emotions. And it can also perform some additional functions, such as diverting attention from a low ceiling or an uneven wall. Most often, art painting is found in children’s rooms, because it brings so much happiness to kids. Especially if it depicts his favorite cartoon characters or various animals.
Even if you are not an artist, there are still chances to paint a wall with your own hands. There are two options for this.
Contents:
- 1 Hand-painted wall art
- 1.1 What paints are used on the walls?
- 2 Artistic wall painting in the apartment using a stencil
- 2.
 1 Video: How to make a stencil for wall painting with your own hands
- 2.
- 3 Drawings on the walls in the apartment with your own hands: photos of real works
- 4 Wall painting in the nursery: photo and video
 1 Video: How to make a stencil for wall painting with your own hands
 Freehand art wall painting
In order to have a beautiful image on the wall of your room, try to follow the following procedure.
Step 1. Select an image and decide on the size of the future drawing. It is assumed that at the moment you already know exactly in which part of the room and why this picture will be there. There is a huge selection of different images on the Internet, but try to choose something simpler for the first time, and the sketch will be easier to create. Luxurious castles in the flaming distance will draw later.
Step 2. Prepare the wall. Professionals love to paint on a freshly painted smooth surface, so it needs to be sanded and painted in a color that matches the background of the painting. If the drawing is intended to make up for the flaws made during the recent repair, then you will have to draw according to what is.
What paints are used on the walls?
Step 3. We purchase all consumables: paints, brushes, etc. All experts advise only water-based acrylic matte paints. They are easy to mix and apply, after drying they are not erased with a slight movement of the shoulder, like gouache. True, some, for complete certainty, cover the drawing with a couple of layers of facade matte acrylic varnish. To achieve the desired shade, the paints are diluted with white acrylic paint. To obtain the necessary liquid (the ideal consistency is considered to be similar to 15% fat sour cream), water is added. Just do not get carried away, otherwise, when too liquid paint dries, unpleasant stains will remain on the wall. You need to take two types of brushes: for large strokes, wide, large and flat ones (synthetics and bristles) are suitable, and for contours and small details, small round ones are suitable. Even professional decorators use a foam roller to draw flower petals with dotted movements. Also prepare containers for rinsing brushes and mixing colors. If you don’t want to sacrifice dishes, buy a disposable set.
Step 4. Print 5-10 images in black and white to look like a sketch. Now you need to apply a background that is identical to the color of the wall, because the same shade looks different on a white and green wall. After drying, apply contours until you reach automatism. Now you need to choose such shades so that the whole picture “plays”. If the drawing has a lot of the same type of details (petals or leaves), it is better to prepare the simplest stencils. Only after that you can proceed to painting the wall.
Step 5. Now you need to draw a rough pencil drawing on the wall. In no case do not use a black pencil, it is difficult to erase, it leaves dirty stains. It is better to use soft colored pencils. All unsuccessful lines are easy to remove with a large and soft eraser. First, they are indicated by the border line of the picture, then the largest parts are drawn. Only after that proceed to detailing and more careful drawing. Constantly step aside to immediately see the violations of proportions and correct them. The better you draw the image, the easier it will be to apply paint. For those who have problems with scale and spatial orientation, the cell marking method will help. The entire area of the drawing is divided into squares, on which you then draw, as in a school notebook. Markings can be done either with a pencil or with pieces of twine fixed to the wall.
Step 6. Start painting with acrylics. It is necessary to dilute and mix the paint immediately before application, because. Acrylic dries very quickly. Paint in several strokes to achieve volume and naturalness of the picture, just wait until the previous layer dries. Hold the brush perpendicular to the wall. Correct all defects with a thin brush. To achieve smooth movements and increase enthusiasm, turn on your favorite music. Take a break after you finish drawing and filling in the main outlines. Then, with renewed vigor, proceed to small details, if necessary, obscure the borders of the image. At the very end, we work through all the smallest contours with a thin brush, achieve volume, glare from the Sun, etc.
If, after reading this, you understand that you are absolutely not an artist, then use another method.
Art painting of the walls in the apartment using a stencil
Currently, templates with various images are available in many online stores and construction hypermarkets. It is best to purchase stencils made of polymer film that are glued to the wall. They are easy to wash and can be used many times. If, among the variety of drawings, you did not find “that one”, then you can make a stencil with your own hands. This will require mylar film (milar).