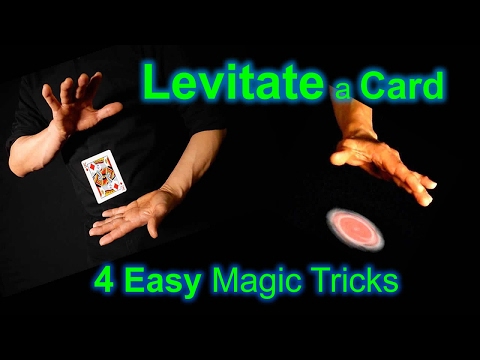
How to do an easy magic trick: 3 Ways to Do Magic Tricks
15 Easy Card Tricks for Kids (2022 Guide)
There is something wondrous about magic tricks. Even when we are old enough to know they are all about sleight of hand, misdirection, and preparation, we can still be amazed by a skilled magician.
If your child wants to try magic, easy card tricks for kids are an excellent place to start, but it is not all about the trick itself.
Teach your child that part of the skill is in talking to the audience and misdirecting their attention, and that the rest is down to practice, practice, and more practice.
Easy Card Tricks for Kids (Step by Step)
These simple tricks are a great place to start for your budding magician. Make sure they understand not to get discouraged right away — with practice, they’ll get better.
Mind Reader
Before you go in front of your audience, count out 25 cards. Put these cards at the top of your pile and keep them slightly twisted, so you know where the middle is.
- Cut the cards at the split so there are 25 cards in each pile.
- Place the top cards face down on the table and ask your helper to choose a card from the cards left in your hand.
- Have them show the card to the rest of the audience and memorize the card.
- Tell your helper to put their card back onto the pile in your hand.
- Pick up the pile from the table and place it on top of the pile in your hand.
- Now, slowly turn over the cards one by one, counting in your head as you go.
- Card number 26 will be your helper’s card. When you turn it over, reveal that your magic senses tell you this is their card.
Jumping Cards
For this, you will need two decks of cards, prepared ahead of time. There are many variations of how to do this trick, including putting a bend in special “jumping” cards.
- Take the ten of diamonds and the five of spades from both decks of cards.

- Put one deck to the side, you won’t need it for the rest of the trick.
- Place one ten of diamonds and one five of spades at the top of the remaining deck and one ten of diamonds and one five of spades at the bottom.
- Now, go in front of your audience and say you can make cards jump.
- Turn over the top two cards and show them to your audience. Put them back on the top of your deck and tap the deck with your magic wand or wave your hand above the deck.
- Tell your audience you have made the cards jump to the bottom of the deck.
- Turn the deck over and reveal your two cards.
Two Stacks
Before your trick, separate the cards into suits. Put the diamonds and spades in one pile and the hearts and clubs in another. Put the two piles together, but keep the top pile slightly twisted, so you know where one pile ends and another starts.
- Ask for a helper from the audience.
- Split the cards at the point you have kept track of by keeping the top pile slightly twisted.
- Put the piles next to each other on the tabletop.
- Ask your helper to choose a pile.
- Let them shuffle their chosen pile until they are happy.
- Have them cut the pack and choose a card.
- While they are choosing their card, pick up the other pile of cards.
- Hold this pile toward your helper and ask them to put the card anywhere in the pile.
- Let them shuffle the cards and hand them back to you.
- Fan the cards out with their faces toward you.
- The odd card out from the pairs of suits will be their card.
Red And Black
Before you do this trick, separate the cards, putting all the black cards at the top of the deck and all the red cards at the bottom.
- Fan the cards out, face down, and ask your audience member to pick a card. Mentally note whether it came from the red or the black area of the deck.
- Tell them to look at their card, remember it, and place it back in the pile.
- Before they put the card back, fan the cards again so that the audience member puts the card back in the opposite end of the pack from where they drew the card.
- Fan out the cards with the faces toward you and the audience member’s card will be the one in the wrong color.

Queen And Aces
- Take the queen of hearts and the two black aces from a pack.
- Lay them out, face-up, on the table in this order: Ace of spades, queen of hearts, ace of clubs.
- Turn your back and ask your audience member to choose one of the cards, but don’t touch it.
- Ask your audience member to swap the position of the two other cards with each other.
- Tell your audience member to turn each card face down.
- Now turn back around and ask your audience member to move the cards around, face down on the table. It is important that you keep track of which card was in the middle when you turned around.
- Have the audience member line the cards up again.
- Now turn over the card you were following.
- If the card is the queen of hearts, the card the audience member chose was the queen of hearts. If the card you turn over is the ace of clubs, the card they chose was the ace of spades. If the card you turn over is the ace of spades, the card they chose was the ace of clubs.
 If the card you turn over is the ace of clubs, the card they chose was the ace of spades. If the card you turn over is the ace of spades, the card they chose was the ace of clubs.
M.A.G.I.C
No preparation is needed for this trick, but you do need to be able to spell out the name of the cards.
- Take your deck and shuffle them. You can ask the helper if they want to shuffle.
- Count out three piles of three cards.
- Discard the other cards.
- Now ask your helper to choose one of the piles.
- Whichever pile they choose, have them flip the pile over so the cards are face up.
- Tell your helper this is the MAGIC card.
- Turn the pile back over and put all three small piles on top of each other. The pile with the MAGIC card must go on the top.
- Then you spell out the name of the card, but you have to do it a particular way.
- For example, let’s say the MAGIC card is the two of diamonds.
- From the top of your pile of nine cards, you spell T.W.O. out loud.
- As you do so, you drop a card for each letter.
- Once you spell the first word, drop the remaining cards on top of the pile you have just spelled out.
- Then spell out O.F.
- Drop the cards on top of these cards.
- Finally, spell D.I.A.M.O.N.D.S and drop the cards on top.
- Now you spell out the word M.A.G.I.C., dropping a card onto the table for each letter.
- Flip over the card that is C and it will be your MAGIC card, in this case the two of diamonds.

It doesn’t matter what card is the MAGIC card, it always works.
The Whispering Queen
We need no card preparation for this trick, but you do have to remember the lines in bold.
- Shuffle a deck of cards, or have an audience member shuffle them.
- Ask the audience member which queen should help you in the trick. For the sake of this tutorial, we’ll assume they say the queen of clubs.
- Fan out the cards, with their faces toward you. Remove the queen of clubs, or whichever queen they chose, and place it to one side.
- While you are looking for the queen, make a mental note of which card is at the bottom of the deck while it is face-up toward you.
- Hold the queen in one hand and place the cards, face down, on the table. The card you looked at is now at the top.
- Put the queen face down and put something on top of the card. Tell your audience member you are doing this so the queen can’t see what you are doing and cheat.
- Now ask the audience member to cut the deck of cards, roughly a third of the way down, and place the pile in their hand to the right of the deck.
- Now have them cut the main deck again and place the pile in their hand to the right of the first cut pile.
- Now tell your audience member to point to a pile. It’s important you tell them to point to a pile and not choose or pick one.
- The next step depends on which pile the audience member points at.
 For the sake of this tutorial, we’ll assume they say the queen of clubs.
-
- If the audience member points to the middle pile, that is their chosen pile. Set aside the other two piles.
- If they point to one of the other piles say, “We’ll eliminate that pile,” and set that pile aside. Then have them put one index finger on each pile and tell them to lift one of their fingers up. If they lift their finger from the pile that was in the middle say “So you chose this one” and set aside the pile they have their finger on.
- But if they keep their finger on the pile that was in the middle say, “So you choose this one,” and set aside the other pile.
- Now you are left with one pile. Tell your audience member you are going to turn around. While your back is turned, instruct them to look at the top card of the pile they have chosen, remember it, and put it back.
- Reassemble the deck, in any order, and shuffle them. You can also invite the audience member to shuffle the cards.
- Now have the audience member cut the deck roughly in half and lay the two piles next to each other.
- Pick up the queen and wave her slowly across the two piles of cards.
- Lift her up and pretend she is whispering in your ear.
- Slowly reveal what she is telling you about the card your audience member chose. This will always be the card you saw in step four.
 You can also invite the audience member to shuffle the cards.
Moving Cards With Your Mind
This trick does not always work as it depends on probability, but if it doesn’t work exactly, there are ways to fix it.
- Give the pack of cards to an audience member and ask them to shuffle the deck as much as they like.
- Then get the audience member to name two types of cards, like tens and eights.
-
- Do not have them name the suit as this will not work.
- If they do name a specific card, for example, the ten of clubs and the eight of hearts, just say “I’m a new magician and not that good yet. Let’s stick with tens and eights.”
 Let’s stick with tens and eights.”
- Put your hand on the top of the deck and pretend to concentrate hard.
-
- Tell the audience you are making a ten and an eight sit together in the deck.
- Count to about twenty in your head. This gives the illusion you are using the power of your mind to move the cards in the deck.
- Ask the audience member to pick up the deck, turn it over, and spread out the cards in a rough line.
- Somewhere in the line, there should be two of the cards your audience member named, next to each other.
- Point these out to the audience and say, “Look, I pushed these two together for you.”
- If there is not a pair of the correct cards next to each other in the deck, you explain by saying “Oh, I almost pushed them together, I just didn’t concentrate for long enough.”
Guess The Bottom Card
- Show the cards to your audience so they can see it is a normal deck.
- Shuffle the cards or give them to an audience member to shuffle.
- Take the deck and glance at the bottom card before you hold the entire deck face down in your left hand.
- Using your left hand, start to move the cards at the top of the deck toward you, and ask your audience member to say stop whenever they like.

Now comes the tricky bit. You will have to practice this to make it go smoothly.
- When they say stop, slide the top cards off of the deck and slide the bottom card off at the same time. You should now have a small pile in your right hand, with the bottom card you remember, at the bottom of this new, small pile.
- Place this small pile at the bottom of the main deck. Your card should still be at the bottom. Do this a few times so the audience believes the cards are well mixed.
- Close your eyes, for dramatic effect, and slide the card from the bottom of the deck. Hold it so it faces the audience.
- Ask your audience “Is this the……. ?” and name the card.
 ?” and name the card.
All The Eights
This trick needs a little preparation:
- Take all four eights from the deck.
- Hold the deck face down.
- Put one eight on the top of the deck.
- Now, counting down from the top of the deck, with the first eight as card one, put the second eight in position ten.
- Next, flip the deck over, count seven cards down, and put the last two eights in positions eight and nine.
Now you’re ready to do the trick.
- Hold the deck face down.
- Begin to fan the cards out, from one hand to the other. But, in your head, count ten cards so you know where the eight is.
- Pick out this card and place it face down on the table. Tell your audience this is the “prediction card.”
- Now move the cards from one hand to the other, from the bottom, count the cards in your head as you go.
- When you get past numbers eight and nine ask an audience member to tell you when to stop.
- Split the cards at this point into two decks. One deck will have the eights near the bottom, and one deck will have an eight at the top.
- Put the deck from the bottom on your right and the deck from the top on your left.
- Flip the top card of the deck on your left and lay it, face-up, next to your “prediction card.” If you have counted correctly, this should be an eight.
- Tell the audience this means the deck is telling you to take eight cards from the pile on the right.
- Keeping the cards face down, pick up the pile on the right, and count out a new pile of eight cards from the bottom of the deck.
- Turn over the top two cards — they should be eights, and then reveal your “Prediction card” which is the first eight.

I Know Your Card
Again, this trick has many variations to it, meaning you can do it several ways.
- Ask an audience member to shuffle your deck and place them, face down, on the table.
- Have them cut the deck at any point, and place one pile next to the other.
- Pick up the pile that was the top half of the deck. How you pick up the pile is important. Pick it up with your thumb on the inner edge of the pile and your fingers on the other edge.
- Ask the audience member to pick up the top card of the pile on the table, but not to let you see it. If there are other people, have the audience member show everyone, except you, the card.
- Now use the hand you are holding the pile in and point at the pile on the table, telling the audience member to put their card back on the pile. As you point to the pile, tilt your hand far enough that you can see which card is on the bottom of the pile in your hand. Don’t let the audience see you look.
- This card on the bottom of the pile in your hand is now your “Pointer Card.”
- Put the pile in your hand on top of the pile on the table. Your “Pointer Card” is now on top of the audience member’s card.
- To make it look like you are mixing up the cards, cut the deck, but be sure the cut you make is not too close to the audience member’s card.
- Tell the audience you are going to find the audience member’s card.
- Begin dealing the cards from the top of the deck. Turn over each card so it is face up and deal the turned cards into a tidy pile.
- To make things more dramatic, every now and then pause and say something like, “I think this might be your card. Oh no, wait a minute, it’s not that one.”
- When you turn over your “Pointer Card,” the next card you turn over will be the audience member’s card.
- Amaze them by saying “Oh, at last, THIS one is your card.”


I Know Your Card 2
Once you have perfected “I Know Your Card” you can move onto the next trick.
- Do the “I Know Your Card” trick, up to step 11.
- Instead of pointing out the audience member’s card, go three or four cards past it. But, make sure you can still see the card.
- Now pick up the top, face-down card from the pile in your hand. Be sure not to turn it over.
- Ask your audience member, “Will the next card I turn over be your card?” They will say no because their card is already in the discarded pile.
- Now, put the single card in your hand back on top of the face-down pile in your other hand.
- Reach into the discard pile and pick up the audience member’s card. Turn the card over on the table. The next card you turned over was their card.
The Fourth Card
No set-up is required for this trick.
- Shuffle and pass the deck to an audience member. Let them shuffle and cut the deck as much as they like.
- When the audience member indicates the cards are well mixed, flip the deck over, and fan them out. Do this quickly and smoothly so it looks as if you are just showing the cards. However, what you are really doing is looking at the fourth card from the top, the “Target Card. ”
- Place the deck, face down, on the table.
- Ask the audience member to cut the cards anywhere they like. Tell them to place the pile in their hand down on the table next to the other pile.
- Remember which pile was the top of the deck. We will call this the “Top Pile.”
- Now pick up the bottom pile and tell the audience, “The fourth card in this pile is going to tell me what the fourth card in the other pile is.”
- Count down to the fourth card and look at it. Do not let the audience see this card, but they can see you looking at it.
- Say “This card tells me the fourth card in this pile is” and point to the “Top Pile” with a dramatic pause.
- Say the name of the “Target Card” you saw at the beginning of the trick.
- Now count down four cards, flip over the fourth card, and it will be your “Target Card.”
 ”
”Card Flip
No Preparation is needed for this trick.
- Shuffle the cards, and if you like, get the audience to shuffle.
- Hold the deck face down in your hand and fan out the cards.
- Ask an audience member to take a card from anywhere in the pack and let them look at it. But tell them not to let you see the card.
- While the audience member is looking at their card, hold the top face-down card from the deck in your hand, flip the rest of the cards in your hand so they are face-up, and put the face-down card back on top of the pile. Now you should be holding a pile of cards that are all face-up, except for the top card. It will take some practice to do this smoothly.
- Ask your audience member to slide their card face down so you cannot see it, back into the deck in your hand.
- Next, swap the deck of cards from one hand to the other, flipping them over as you go. Now the cards will be face down in your hand.
- Cut the cards into two decks, but be careful to keep the cut far away from where your audience member inserted their card.
- Pick up the top card from the cut deck and flip it over, as if you were telling the audience member this was their card.
- Pretend to be disappointed you got the wrong card.
- Now, turn over the deck of cards and fan them out. One card will be face down. Act surprised.
- Ask your audience member to take the card and look at it. It will be the card they chose.


Mind Reader #2
No preparation is needed.
- Shuffle the cards and fan them out face-up to show your audience it is a regular pack of cards.
- Take this opportunity to see which card is on the top. Remember this card.
- Place the deck of cards, face down on the table.
- Ask an audience member to cut the cards.
- Then have them turn the cards over and put them, face-up, at the top of the deck.
- Now ask them to cut the cards, turn them over, and put them at the top of the deck again.
- Place your hand over the cards and slowly slide them to one side, getting rid of the upturned cards.
- Pick up the card at the top of the pile and show it to your audience.
- Tell them you are going to read their minds and that the card is…
- The card will be the same one that you saw at the top of the pile in step 2.
Beware The Skilled Child Magician
We hope you and your child enjoyed learning these easy card tricks. Magic tricks can be wonderful for amazing other people, but also great lessons in preparation, persistence, and the value of practice.
Just be careful, you don’t want your child to become so skilled they are tricking you out of extra allowance.
Feedback: Was This Article Helpful?
Thank You For Your Feedback!
Thank You For Your Feedback!
What Did You Like?
What Went Wrong?
About the Author
Patricia Barnes
Patricia Barnes is a homeschooling mom of 5 who has been featured on Global TV, quoted in Parents magazine, and writes for a variety of websites and publications. Doing her best to keep it together in a life of constant chaos, Patti would describe herself as an eclectic mess maker, lousy crafter, book lover, autism mom, and insomniac.
Subscribe to Our Newsletter
We won’t send you spam. Unsubscribe at any time.
how to learn easy magic trick
TikTok
Upload
For You
Following
yannick.magic
Yannick
Easy to do and fooling #magic #magictutorial #learnmagic #party
4.2K Likes, 13 Comments. TikTok video from Yannick (@yannick.magic): “Easy to do and fooling #magic#magictutorial#learnmagic#party”. Do you wanna BLOW your fiends MIND?. Lo-Fi analog beat.
82.9K views|
Lo-Fi analog beat – Gloveity
thedudewithcards
Daniel Huckins
learn this easy magic trick👀 #LikeAMonarch #learn #easy #tutorial #magictrick #magic #foryou #fyp #foryoupage #paper #thedudewithcards #learnit #tutorials
2K Likes, 8 Comments. TikTok video from Daniel Huckins (@thedudewithcards): “learn this easy magic trick👀 #LikeAMonarch #learn #easy #tutorial #magictrick #magic #foryou #fyp #foryoupage #paper #thedudewithcards #learnit #tutorials”. CUFF IT.
60.9K views|
CUFF IT – Beyoncé
jeremytanmagic
Jeremy Tan
Learn this EASY CARD TRICK! 😁#learningisfun #jeremytanmagic #learnontiktok #learnwithtiktok
297.5K Likes, 624 Comments. TikTok video from Jeremy Tan (@jeremytanmagic): “Learn this EASY CARD TRICK! 😁#learningisfun #jeremytanmagic #learnontiktok #learnwithtiktok”. card magic
Card tricks
Magic tricks
Learn card magic
Magic
Magician
Viral card magic
Viral magic tricks
Easy magic tricks
Beginner magic tricks
Easy card tricks
Easy card magic
Beginner card tricks | #jeremytanmagic
#learningisfun
#learnontiktok
#magic
#cardtricks
#fyp
#magictricks
#learncardmagic
#learncardtricks. original sound – Jeremy Tan.
3.2M views|
original sound – Jeremy Tan
seandoesmagic
Seany
how to do super easy magic tricks <3
146.3K Likes, 543 Comments. TikTok video from Seany (@seandoesmagic): “how to do super easy magic tricks <3”. Magician TEACHES
3 MAGIC TRICKS. A-O-K.
1.4M views|
A-O-K – Tai Verdes
oscar.owen
Oscar Owen
Amazing coin production tutorial #magic #oscarowen #trick #amazingmagic #magictutorial #magicmoment #cointrick #cointrickrevealed #cardtricktutorial
4.4K Likes, 15 Comments. TikTok video from Oscar Owen (@oscar.owen): “Amazing coin production tutorial #magic #oscarowen #trick #amazingmagic #magictutorial #magicmoment #cointrick #cointrickrevealed #cardtricktutorial”. Easy magic trick you can learn NOW🔥 | Did it fool you?. Blade Runner 2049.
172.3K views|
Blade Runner 2049 – Synthwave Goose
seandoesmagic
Seany
how to do easy magic tricks part 1 🪄 @mxrkup #magictrick #magician
300.4K Likes, 465 Comments. TikTok video from Seany (@seandoesmagic): “how to do easy magic tricks part 1 🪄 @mxrkup #magictrick #magician”. HOW TO DO MAGIC 😱. Lady – Hear Me Tonight.
3.6M views|
Lady – Hear Me Tonight – Modjo
itsdreamsandnightmares
Itsdreamsandnightmares
Quick abs easy magic trick tutorial #fyp
915.7K Likes, 1.6K Comments. TikTok video from Itsdreamsandnightmares (@itsdreamsandnightmares): “Quick abs easy magic trick tutorial #fyp”. Learn this trick in a few seconds | Follow for more magic tricks and tutorials . sonido original.
10.7M views|
sonido original – Ichigo this my bae❤
yannick.magic
Yannick
Beginner tutorial 😋 #magic #magician #learnmagic #trick #learnontiktok
223.1K Likes, 364 Comments. TikTok video from Yannick (@yannick.magic): “Beginner tutorial 😋 #magic#magician#learnmagic#trick#learnontiktok”. LEARN this simple trick – FOOL EVERYONE . Originalton.
2.1M views|
Originalton – Yannick
yannick.magic
Yannick
Such an easy way to impress your friends 🔥 #magictutorial #learnmagic #cardtrick #learnmagic #magic #magician #partytrick #barbet #wizard
89. 4K Likes, 254 Comments. TikTok video from Yannick (@yannick.magic): “Such an easy way to impress your friends 🔥 #magictutorial#learnmagic#cardtrick#learnmagic#magic#magician#partytrick#barbet#wizard”. LEARN this IMPOSSIBLE party trick ANYONE can do . Originalton.
1.1M views|
Originalton – Yannick
iamshahinz
iamshahinz
Should I do more tutorials 🤔??? #tutorial #magic #fyp #foryou #viral #cool #easy #trick
16.4K Likes, 73 Comments. TikTok video from iamshahinz (@iamshahinz): “Should I do more tutorials 🤔??? #tutorial #magic #fyp #foryou #viral #cool #easy #trick”. Easy Magic Tutorial
😉. Lose Control.
285.5K views|
Lose Control – MEDUZA & Becky Hill & Goodboys
Simple Finger Tricks and their Secrets
There are many tricks that require no props other than the dexterous hands of an illusionist. They are great help in cases where there is no opportunity to use complex props or prepare a spectacular trick, and others ask for a miracle.
Although seemingly simple, finger tricks require great flexibility and long practice. Most of these tricks are based on visual tricks, where the audience sees only one side of the hand. For this reason, they are often performed on stage, at children’s parties, or at home parties, but never on the street or during a bar party. When skillfully performed, such tricks are capable of capturing the imagination of the most skeptical viewer.
Band trick
Take 2 identical bands. Put one of them on the thumb and forefinger of the right hand, and passing the second under it, throw it on the corresponding left. You will have a kind of flexible cross in your hands, which cannot be divided without removing the rubber bands from your fingers. Demonstrate to the audience that rubber bands never go through each other, or suggest that someone in the audience try to do it themselves.
However, nothing is impossible for an experienced trick! A few quick movements – and the elastic bands are easily separated, while continuing to be stretched between the thumbs and forefingers of both hands.
You can learn this trick with the help of this video:
Of course, in order to repeat this trick, you will have to practice a little. Spread your arms wide to tighten the elastic, and with the middle finger of your right hand, press it firmly against your index finger. Then quickly bring this hand down, slipping your fingers under the loop, and transfer the elastic band from index to middle. Thus, you freed your index finger. Once again, spread your arms and slip it into the loop between your thumb and the intersection point of both elastic bands. You should get a complex design in which the right rubber band is stretched simultaneously on the thumb, index and middle fingers. As soon as you release the middle finger, the elastic will hang in its original position between the thumb and forefinger, but. Already separate from his “neighbor”.
This is important! All movements must be worked out to automatism in order to be done very quickly during the performance. Otherwise, your secret will be easily revealed.
Finger through the ear
Simple tricks with the disappearance and appearance of fingers, their “passage” through other parts of the body and other metamorphoses are very popular at children’s matinees. Ask the audience if they can stick their finger in their own ear? The answer, of course, will be no – but you can do it with ease.
To do this, put your thumb to your ear, and quickly press the upper part of the auricle against it with your index finger. At the same time, you need to pull the earlobe to your finger with your second hand. Your thumb will be almost completely wrapped on both sides of your ear, and your index finger will not allow the flexible cartilage to turn back.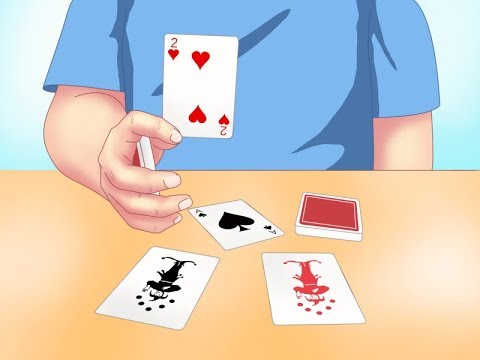 Of course, you need to do all this very quickly so that the audience does not have time to see your actions.
Infinite Finger
Equally unusual is the trick with the finger suddenly lengthening like it’s made of rubber. You clamp the tip of the big one with your teeth and, for fidelity, holding it with your other hand, begin to take your head to the side. And – about a miracle! Your finger stretches out, and then just as obediently decreases back to normal size.
The secret of this trick lies in the skillful substitution of the finger of one hand with the finger of the other. Bite it and bring your other hand to your mouth, supposedly clasping your thumb with your palm. Your main task now is to quickly change hands, so that the thumb of the other hand is clamped between the teeth, and the first, “lengthening”, moves freely in the fist. Move your head away while spreading your arms to the side: the finger will stretch. Bring your hands together again, and it will return to its original size. All other movements must be repeated in reverse order: change the fingers touching the lips, and you can go to receive applause.
This is important! The most dangerous moment in this trick is the change of fingers. An attentive person may well notice it, so at the right moment you should turn your head slightly while raising your fist to shield your mouth with it.
Severed finger
Straighten your hand and wiggle your fingers. Clamp the big one in the fist of the second hand. Ah, bad luck! The finger came off and remained in the hand, the nail peeps out of the fist … It’s okay, such a powerful wizard like you, it doesn’t cost anything to grow it back! Another quick move and he was back in his seat.
Like all finger tricks, this one relies on sleight of hand and the correct positioning of the magician in relation to the audience. Make sure the audience can’t see the back of your hand. Move them a little to divert attention, and squeeze the index and middle fingers of the other hand around the thumb.
After this, all movements should be performed as quickly as possible. Turn your hands a little and, unclenching your fist, press your thumb in your palm. At the same time, stick the thumb of the other hand in its place. If you did everything right, the second, “tearing off”, palm will show an almost real “fig”, only the tip will protrude between the middle and index. Now you just have to make a picture jerk, as if you were unscrewing your finger from your hand with effort.
You need to “graft” the finger back according to the same scheme: first, press your hands against one another and straighten your thumb, then slowly “remove” your fist from it, while straightening your “fig” so that the audience sees the gradually decreasing tip of the nail peeking between the fingers .
Surprise for real!!! Cards and props for every taste in the largest store of magic tricks and cards.
By the same principle, you can easily do other tricks with tearing off and attaching your fingers back. The main thing is to work out the moment when one finger hides behind the palm and is replaced by another.
Do not forget that the artistry of the illusionist plays an important role in such performances. An expression of surprise or fright at the right time will help convince the viewer of the reality of the metamorphosis taking place with your fingers. But the words are not required. On the contrary, you can, through experimentation, create your own image, based solely on unusual tricks and rich expressive facial expressions.
Having learned the simplest movements, you can begin to master more complex tricks with your fingers. Video training for some of the most spectacular tricks you can watch in this video:
Using props
Was this article helpful? Share it on social networks:
10 “tricks” that are easy to do at home
At your child’s birthday party, weekend or vacation, make the most of your time and become the center of attention of many eyes! 🙂
An experienced organizer of scientific shows, Professor Nicolas, helped us in preparing the post.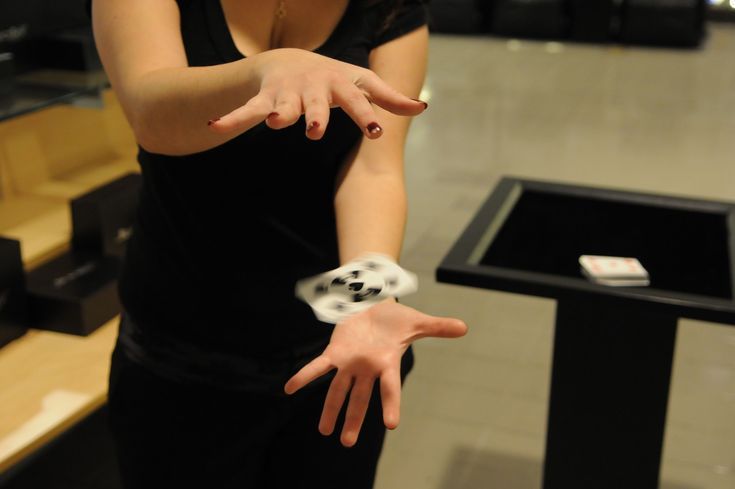 He explained the principles behind a particular focus.
1 — Lava lamp
1. Surely many of you have seen a lamp that has a liquid inside that imitates hot lava. Looks magical. 2. Water is poured into sunflower oil and food coloring (red or blue) is added. 3. After that, we add effervescent aspirin to the vessel and observe a striking effect. 4. During the reaction, colored water rises and falls through the oil without mixing with it. And if you turn off the light and turn on the flashlight, the “real magic” will begin.
“Water and oil have different densities and also tend not to mix no matter how we shake the bottle. When we add effervescent tablets inside the bottle, they dissolve in water and begin to release carbon dioxide and set the liquid in motion.”
Want to put on a real science show? More experiments can be found in the book “Experiments of Professor Nicolas”.
2 — Soda experiment
Surely at home or in a nearby store there are several cans of soda for the holiday. Before you drink them, ask the kids, “What happens if you dip your soda cans in water?”
Drown? Will they swim? Depends on the soda.
Invite the children to guess in advance what will happen to this or that jar and conduct an experiment.
1. Take the cans and carefully lower them into the water. 2. It turns out that despite the same volume, they have different weights. That is why some banks sink and others do not. 3.
“All of our cans have the same volume, but the weight of each can is different, which means that the density is different. What is density? This is the value of mass divided by volume. Since the volume of all cans is the same, the density will be higher for one of them, whose mass is greater.
Whether a can floats in a container or sinks depends on the ratio of its density to that of water. If the density of the can is less, then it will be on the surface, otherwise the can will go to the bottom.
But what makes a regular cola can denser (heavier) than a diet drink can?
It’s all about the sugar! Unlike ordinary cola, where granulated sugar is used as a sweetener, a special sweetener is added to diet cola, which weighs much less. So how much sugar is in a typical soda can? The difference in mass between regular soda and its dietary counterpart will give us the answer!”
3 – Paper lid
Ask the audience: “What happens if you turn a glass of water over?” Of course it will spill! And if you press the paper to the glass and turn it over? The paper will fall and the water will still spill on the floor? Let’s check.
1. Carefully cut out the paper. 2. Put on top of the glass.
3. And carefully turn the glass over. The paper has stuck to the glass, as if magnetized, and the water does not pour out. Miracles!
Commentary by Professor Nicolas
“Although it is not so obvious, but in fact we are in a real ocean, only in this ocean there is not water, but air, which presses on all objects, including us, it’s just that we already We are used to this pressure that we do not notice it at all. When we cover a glass of water with a piece of paper and turn it over, water presses on the sheet on one side, and air on the other side (from the very bottom)! The air pressure turned out to be greater than the pressure of the water in the glass, so the leaf does not fall.
More interesting experiments in the book “Professor Nicolas’ ABC of Experiments”.
4 — Soap Volcano
How to make a small volcano erupt at home?
1. You will need baking soda, vinegar, some dish detergent and cardboard. 2. 3. Dilute vinegar in water, add washing liquid and tint everything with iodine.
4. We wrap everything with dark cardboard – this will be the “body” of the volcano. A pinch of soda falls into the glass, and the volcano begins to erupt.
Comment by Professor Nicolas
“As a result of the interaction of vinegar with soda, a real chemical reaction occurs with the release of carbon dioxide. And liquid soap and dye, interacting with carbon dioxide, form a colored soap foam – that’s the eruption.
5 — Candle pump
Can a candle change the laws of gravity and lift water up?
1. We put a candle on a saucer and light it. 2. Pour tinted water on a saucer. 3. Cover the candle with a glass. After a while, the water will be drawn into the glass against the laws of gravity.
Commentary by Professor Nicolas
“What does a pump do? Changes pressure: increases (then water or air begins to “run away”) or, conversely, decreases (then gas or liquid begins to “arrive”). When we covered the burning candle with a glass, the candle went out, the air inside the glass cooled, and therefore the pressure decreased, so the water from the bowl began to be sucked in.
Games and experiments with water and fire are in the book “Experiments of Professor Nicolas”.
6 — Water in a sieve
We continue to study the magical properties of water and surrounding objects. Ask someone present to put on a bandage and pour water through it. As we can see, it passes through the holes in the bandage without any difficulty.
Bet others that you can make it so that water will not pass through the bandage without any additional tricks.
1. Cut off a piece of bandage. 2. Wrap a glass or champagne glass with a bandage.
3. Turn the glass over – the water does not spill out!
Comment by Professor Nicolas
“Due to such a property of water as surface tension, water molecules want to be together all the time and it is not so easy to separate them (they are such wonderful girlfriends!). And if the size of the holes is small (as in our case), then the film does not tear even under the weight of water!”
7 — Diving bell
And to secure your honorary title of Water Mage and Master of the Elements, promise that you can deliver paper to the bottom of any ocean (or bath or even basin) without getting it wet.
1. Have the audience write their names on a piece of paper. 2. We fold the sheet, put it in a glass so that it rests against its walls and does not slide down. Immerse the leaf in an inverted glass to the bottom of the tank.
3. Paper stays dry – water can’t get to it! After you pull out the leaf, let the audience make sure that it is really dry.
Professor Nicolas comment
“If you take a glass with a piece of paper inside and look closely at it, it seems that there is nothing but paper, but this is not so, there is air in it.
When we turn the glass upside down and lower it into the water, the air keeps the water from getting close to the paper, which is why it stays dry.
By the way, it is this property that is used in diving bells.
8 – Flying porridge
After this experience, children will love porridge more, especially such a magical, flying oatmeal.
1. Pour a little oatmeal on a plate and inflate a balloon. 2. Rub the ball on your head while saying the magic words.
3. Bring the ball to the porridge and demonstrate how the flakes seem to have gained wings and flew towards the ball.
Commentary by Professor Nicolas
“In order to understand what force made our flakes jump, we need to know this interesting fact. It turns out that the atoms that make up everything-everything-everything in the world can have both positive and negative charges. So, particles with the same charge repel each other, and particles with different charges attract. When you rub the balloon against your hair, it becomes negatively charged. Now, if you bring it to the flakes, the positively charged particle begins to reach for it, and the flakes fly up and then fall back! Blimey!”
More interesting experiments in the book “Professor Nicolas’ ABC of Experiments”.
9 — Paper bridge
Can paper be as strong as a bridge?
1. Take a plain piece of paper and place it on top of two glasses. Let the children try putting something on top. The paper will sag under the weight and the bridge will break. 2. Say that now you will make the paper bridge so strong that even a car (of course, a toy) can drive over it. Fold the paper several times so that it becomes an accordion.
3. Now the bridge is ready to withstand the most difficult tests!
Comment by Professor Nicolas
“We did some real engineering work. By bending a piece of paper like an accordion, we created the so-called stiffening ribs, which gave strength to the entire structure, which allowed the bridge to withstand the weight of even a glass of water! Great!”
Experiment with the professor at the amazing shows of Professor Nicolas.
10 — Invisible ink
What child doesn’t like secrets? Teach them how to write secret messages to each other. Divide the children into two teams. One will prepare a secret message, and the other will receive it.
1. No one should see the secret message. To prepare it, you will need lemon juice or milk.