Activities for 10 year old girl: 5 easy tie-dye instructions — plus, 4 tie-dye patterns to try
5 easy tie-dye instructions — plus, 4 tie-dye patterns to try
What can we help you find?
ArrowLeftRed
SearchRed
SearchClose
Back
Sheri Reed
Tie-dying is exactly what it sounds like. You twist a T-shirt, garment or other cloth item, tie it in various places with rubber bands and then dye it. When finished, the twisted and folded areas of the shirt reveal a cool colored pattern. After a good rinsing and then drying, you are left with a shirt that’s as fun as it is fashionable.
Tie-dye shirts make great team T-shirts, and they also make for a great activity for kids. Consider lining up a fun tie-dye project for your next party. Even better, the final product doubles as instant party favor. Try these instructions for tie-dye basics and a few fun patterns.
Tie-dye materials
- White, 100% cotton T-shirt (or other cotton item)
- A tie-dye ink kit (which includes tie-dye instructions) or several colors of Rit dye
- These items, if not using a tie-dye kit:
- Squirt bottles
- Rubber bands
- Rubber gloves
- Gallon-sized zip plastic bags
- Water (to add to the ink bottles)
- A spray bottle of water (helpful to dampen shirts before applying ink)
- Paper towels or rags for spills
Project preparation
1. Get set up
If you have purchased a new T-shirt, machine wash and dry it first, but don’t use fabric softener or a dryer sheet, to avoid leaving any kind of residue on the fabric that might repel the ink. Cover your work space with a plastic tablecloth (or set this up outside).
2. Prepare your ink
If you bought a kit, set up the inks in the bottles according to the tie-dye instructions. If you bought powered or liquid dye, prepare it according to package instructions and put the ink into the squirt bottles.
3. Prepare your shirt
Spray the shirt with water to dampen it, then choose your pattern from the list of four below or come up with your own. Twist the shirt and wrap with rubber bands to secure it in your desired pattern.
4. Ink the shirt
Squeeze ink onto the sections per kit instructions or per the pattern you’ve decided to follow — or freestyle it! Once you’ve finished dying, place each shirt in a sealed plastic bag for 24 hours to allow the ink to set and the colors to become vibrant.
5. Rinse
After 24 hours, put on a pair of rubber gloves, remove the shirt from the bag and rinse it in cold water (without removing the rubber bands) until the water runs clear of the dye. Then remove the rubber bands, rinse again, then machine wash and dry the shirts on the hottest setting allowed on the shirt tag. Do not combine the shirts with any other clothing for that initial wash and dry in case any extra dye bleeds. When it’s dry, you are ready to wear and enjoy your classic shirt!
Tie-dye patterns
1. The classic swirl pattern
Pull the shirt from the center stomach area and twist/swirl in one direction so the entire shirt forms a flattened disc shape that looks a rose. Wrap the disc with three to six rubber bands in a crisscross overlap pattern which will give you six wedges or quadrants of fabric. Put on your rubber gloves and squirt at least three different dye colors onto the wedges formed by the bands. Make sure to do the back of the shirt, too, so you have a uniform look.
2. Crumpled or splotched pattern
Lay the shirt flat then take your hand and twist, turn and crumple it while keeping the shirt flat. Pull little pieces of the shirt up by pinching your fingers to bring as much of the shirt up to where the dye will be applied. Continue to crumple the shirt in a random way while making a flattened disc shape. Take several rubber bands and tie into quadrants. Don your rubber gloves, choose your dye and saturate each quadrant.
3. Striped pattern
Fold the shirt from the bottom up into small pleats until the shirt in the shape of a long, thin log. Take your rubber bands and place them evenly across the pleated shirt log using about five to eight bands. Put on your rubber gloves and choose a different dye for each section between rubber bands, making sure the ink is fully absorbed through each layer of pleating. Make sure the shirt is saturated all the way around.
4. Circle pattern
Choose the areas where you want the circle or bull’s-eyes to appear. (Three circles are standard.) Pull a tiny bit of the fabric up in these areas and twist and pinch with your fingers and wrap with one rubber band at the base so the fabric sticks up above it. Follow this for the other areas where you want a circle pattern. Next, choose the color you want the circle to be and squirt on that area above the rubber band making sure it is saturating through. Next choose the color(s) you want the shirt to be and squirt both front and back avoiding where the circle dye is.
Like what you’re reading?
Join Care for FREE
Please enter a valid email address
Click ‘Next’ to start an account and get tips, tricks and trending stories.
Already Registered
The email address you entered is already registered. Would you like to log in?
Log in
Almost done!
Join Care for FREE
Create a free account to access our nation wide network of background checked caregivers.
First Name
Please enter first name
Last Name
Please enter last name
Zip Code
Please enter a valid zip code
By clicking “Join now,” you agree to our Terms of Use and Privacy Policy.
Welcome to Care!
You’re on your way to finding someone your family will love.
Start now
31 Fun Things to Do With 10 Year Old Daughter
WhatToGetMy Instructional Article
-
This article helps you with an exciting list of fun yet cognitive activities to do with your 10 year old daughter. Our list contains both activities to do at home and outdoor activities that she will enjoy.
Spending time with your child is very important and beneficial. Our article on the Benefits of spending time with your child gives you more insights on all the benefits you get to enjoy by spending quality time with your child.
But knowing how to spend quality time with your child in a way that is both fun and exciting for them is always the challenge. In the particular context of a 10 year old, we appreciate that parenting a 10 year old daughter is not always easy. You may often wonder what to do with your daughter, especially for fun and to keep her from being bored. Wonder no more. In this article, we give you a list of the 10 best fun things to do with your daughter who is 10 years old, whether indoors at home, or outdoors.
In our earlier article on Fun things to do with a 10 year old boy, we cover the fun activities you can do with your 10 year old son.
Another related article: Outdoor activities for 3-5 year olds.
6 Fun Things To Do With Your Daughter At Home.
Table of Contents
The key to fun activities with your 10 year old daughter, is to have those fun activities that also help with their cognitive development. In our earlier article on Cognitive development activities for 6-12 year olds, we explained the importance of incorporating cognitive development activities into the fun routine of 6 – 12 year olds.
Here are 6 wonderful fun and yet cognitive-developmental activities you can have with your 10 year old daughter.
1. Have a backyard tea party.
Tween girls love their tea parties. Why not indulge her by playing as her guest at her high garden tea party. Ask her that you want the honor of an invitation to a tea party and let her bring out her tea party set for an afternoon of fun. It is also a good time to bond and catch up and hear all her exciting stories.
2. Virtual vacations.
Virtual vacations are the new craze. You can travel to many places in the world without even leaving your couch. On a lazy day, sign up for one of these exciting vacation experiences and enjoy it with your 10 year old daughter.
3. Talk.
Talking to your 10 year old daughter is very important. It is a good cognitive development exercise for her too. Talking gives you a chance to get a glimpse into her life and the challenges she may have and questions she has about life and growing up in general. You can make your time talking more fun by either journaling together or playing a talking game with fun conversation cards like Our Moments For Kids.
4. Read together.
Even at 10 years old, reading is still a fun and helpful activity to engage in with your 10 year old daughter. If you feel that she may have outgrown some of her childhood storybooks, why not ask her for her favorite books and read these with her. Since children are more technologically inclined these days, you can each read with a Kindle and discuss some of the points arising from your reading.
You may also like our related article on Gifts for a kid who loves to read.
5. Dance “Competition”.
Show your 10 year old daughter that you still got the groove in you and let her teach you a thing or two about modern dancing. You will have a good laugh and exciting time.
6. Fashion show.
10 year old girls love fashion shows and a chance to bring out their inner fashionista. Plus it could also be a good excuse to get her to clean out and organize her closet, and yours too. Join in the fun by also trying out and showing your own fashionista side. She may have a thing or two to teach you.
Check out this related article: Activities for 12 year olds at home.
7 Fun Things For 10 Year Olds To Do When Bored At Home.
When kids get bored they can easily become restless and a pain to handle. To avoid that happening, it is good to keep them engaged with fun activities that would be engaging enough to keep the boredom at bay. And here are some great boredom eliminating activities for your 10 year old daughter to do at home.
7. Play a jigsaw puzzle.
Jigsaw puzzles are fun and very engaging. Given the many small pieces they contain, they are also a good way to kill time at home especially if your 10 year old is feeling bored. Bring out your jigsaw puzzle and have a great time joining the pieces together to create one giant beautiful piece.
8. Cook and/or bake together.
This is another fun activity you can do together to keep the boredom at bay. Why not bring out your baking book or cookbook and ask her what she would like for you both to try out. Our article on Gift Ideas for Baking With Children also has helpful ideas for your baking session with her.
Related article: Baking set for teenagers.
9. Paint together.
Painting is a fun, engaging, and creative way to spend time with your 10 year old daughter when she is bored at home. You can create a canvas painting together at home. She will be thrilled at the idea of creating something artistic and beautiful. In our article on How to throw a canvas paint party, we also give you ideas on having a canvas paint activity with your child.
For your art-loving child, check out our related article on Gift for kid who loves art.
10. Play a video game together.
Video games can be addictive if they are not properly managed (check out our article on What to do if your child is addicted to video games if your child is already addicted to it). This is why playing video games with your 10 year old daughter is one of the ways you can manage how much time she spends on video games.
In case you don’t know which video games she loves, this chart drawn from a 2019 survey seen on Statista provides insight into the type of video games they love.
Most popular video games among preteens in the United States as of September 2019. Source: Statista
Preferred device for playing video games according to children in the United States in 2019, by age group. Source: Statista
And as the second survey also from the same period shows, 10 year olds prefer playing their video games on a gaming console. So, why not bring out her gaming console and have a fun time playing Minecraft or Fortnite. You will be surprised at how much you will also enjoy it and learn from it, especially Minecraft.
11. Binge-watch their favorite shows or movies together.
The beauty of this fun activity is that it also serves to remind you about the TV shows and movies you loved growing up. You will most likely be tempted to draw comparisons between the popular shows in your time and how the stuff that kids watch these days pale in comparison to them.
This is another great activity that allows you to get an insight into the kind of things your daughter is watching and how good it is for her development.
12. Play games – card games or board games.
Board and card games are good cognitive activities for all ages and are great for passing time. Next time your 10 year old daughter is bored at home, bring out your game of Scrabble or a deck of cards or maybe checkers, and play with her. The boredom will be gone in seconds because she will be too preoccupied with trying to beat you at the game.
And if you’re looking for more ideas of games for two people that you can play with her, check out our article on Fun Games To Play With Two People, for more fun game ideas.
13. Put together a craft or scrapbook.
Scrapbooking or making something crafty and artsy is another fun way to spend an afternoon or day that is feeling boring. Bring out your scrapbook and get scrapbooking or make a card together.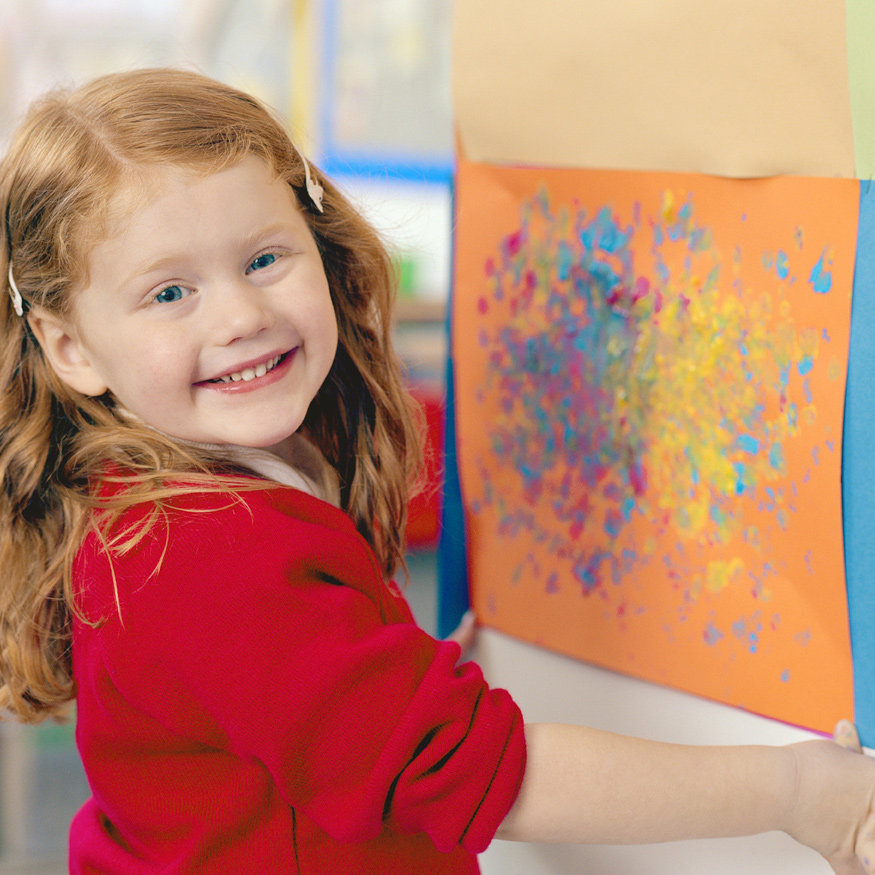 And if you don’t have one yet, check out our article on Gifts for Card Makers, Crafters, and Scrapbookers for quality items to buy to get started.
18 Other Fun Things To Do With Your 10 Year Old Daughter.
At home isn’t the only place to have fun with your 10 year old daughter. This chart from Statista has a good list of other fun things 10 year old girls love.
U.S. parents by the type of trips they have taken in the past as of 2016. Source: Statista
From this chart and our additional items, here is a list of 18 other things 10 year old girls like that you can enjoy with your daughter.
14. Girl’s dates – dinner, ice-cream, lunch e.t.c.
Taking your 10 year old daughter out on a date will make her day. It will make her feel very special and loved. Both moms and dads should have this activity with their 10 year old daughter. For moms, it is a good bonding time with their daughter.
With their dads, it serves two purposes. They get to bond, and secondly and very important, they don’t feel the need to go out with just about any boy that comes along because their dad has made the idea of going on a date pretty normal.
15. Go camping together.
49% of North American parents surveyed in this 2014 survey confirmed that camping with the family is a great way to bond with the family.
Impact of camping on personal life among parents and non-parents in North America as of July 2014. Source: Statista
Camping out in the wild or outdoors, or even in your backyard is a fun activity that 10 year old girls love. Staying up at night and discussing things that fascinate her around the campfire is a fun and bonding activity she will enjoy very much.
16. Learn a different language together.
Being bilingual is an important life skill to have. And the formative ages of 3 to about 16, 17 years old are key ages to catch on quickly with another language. Why not join the 22.6% of parents who spoke another language other than English with their children at home, according to this survey seen on Statista.
Percentage of school children who speak another language than English at home in the U.S. from 2009-2018. Source: Statista
And you don’t even have to leave the comfort of your home. You can download a free language app like Duolingo and teach each other your language of choice, from Spanish, to French, and even German or Portuguese.
17. Go to the spa and/or salon together.
10 year old girls love being spoilt to a time at the spa or salon. Make it a mother-daughter outing and enjoy a lazy afternoon at the spa getting spoilt and followed by a hair treatment at the salon.
18. Family road trip.
Road trips are a fun family activity enjoyed by kids. They get the chance to play their favorite road trip games like I-Spy or License plates. Not to mention that it is the perfect excuse to sing out loud or just enjoy the road trip snacks they get to enjoy.
19. Go on vacation.
What is the best age to travel with children? Source: Statista
Who wouldn’t love packing the vacation bags and taking a much-needed vacation, including 10 year olds, according to the above chart. You can make it a weekend getaway to nearby Canada or you can go as far as Europe or Mexico. Get your daughter and yourself excited with time away in a different place (or continent).
Related article: Gifts for someone who likes to travel.
20. Visit the museum or other historic sites.
Explore the museum or historic sites around you. And if you don’t have any around you, you can visit some on your next vacation trip or a road trip to another town.
21. Take them to a children’s library reading event.
Children’s library reading events are these cool reading events that libraries put together to try and encourage reading habits in children. Notwithstanding their usefulness and help in motivating children to read, sadly not many parents have bought into it, at least according to this 2015 survey. Why not tap into this under-utilized fun activity for children and take your 10 year old daughter to one in your local library.
Popularity of children’s reading or storytime programs offered by libraries in the United States as of August 2015, by demographic. Source: Statista
22. Amusement park and theme park outing.
Amusement and theme parks are every child’s idea of fun, even a 10 year old girl. Take her for an afternoon of splashing in the water and taking part in fun rides. You can even take the rollercoaster with her and scream your lungs out.
23. Nature/national park outing.
Or you could go for the national park outing for a chance to spend more time in nature and enjoy the serene and calm greenery. Outings to national parks is a good opportunity to show your 10 year old daughter nature and the living things found in nature.
24. Beach vacation.
She would love a chance to wear her bikini and just splash around in the water and play. Beach vacations are a favorite with everyone. To know exactly what you should pack for your beach vacation so that you have a great time with your 10 year old daughter, check out our article on Things to bring on vacation to the beach. Our article on Best beach games for families also gives you awesome ideas about what games you can play with her while at the beach.
Another related article you may also love is Fun things to do at the beach at night.
25. Going to a live sports game like basketball or baseball or American football.
Watching a sporting event live is never the same as watching it at home. If your 10 year old daughter is a fan of sports, why not buy tickets for a live sports event of her favorite sport. She would be so elated.
You will also love this article – Gifts for sporty tween girl.
26. Snow outing/activities – snowboarding; skiing; ice skating; roller-skating; or making a snowman.
The snow always presents good play opportunities with children. Take your 10 year old out to build a snowman or one of the snow activities like ice skating or snowboarding.
Related article: Gifts for snowboard lovers.
27. Go shopping.
Shopping is great therapy for everyone regardless of age. 10 year old girls especially love shopping as they get a chance to check out that favorite nail polish or lip gloss or sneakers or clothing items they’ve been buying. It is also another exciting mother-daughter activity that you will both enjoy.
28. Go out for a picnic together.
You can take your picnic outdoors in a nice park or any other nice place. Pack a picnic bag and have fun with your 10 year old daughter with this enjoyable outdoor activity.
29. Volunteer at a charity together.
Teaching your child the value of giving back at an early age is important. And what better way to teach them than by making it part of your fun activities with her. Set aside an afternoon or specific time(s) in the week or a month to volunteer at a cause that you are both passionate about.
Check out our related article on How to teach your child to give back for more ideas.
30. Go fishing together.
Even 10 year old girls can get a kick out of fishing. Why not pack your fishing rods and set and intrigue her with fishing. She just might enjoy it more than you think.
31. Explore your town or city together.
What better way to show your 10 year old daughter the important landmarks in your town or city to be aware of, than by making it a city or town exploration. You can make it fun for her by giving each other a challenge of things to look out for, like how many streets starts with the letter “A”, or how many McDonalds are there, and the likes. In that way, she gets to pay attention to where important landmarks or areas are in your town or city in case she finds that she is lost one day.
Related article: Fun things to do in a small town with friends.
Frequently Asked Questions.
Why is my 10 year old daughter so emotional?
It is very possible and likely she is dealing with puberty development issues. The only way to know is by studying her closely to observe what generally gets her to go off. That would give you an indicator of what she may be struggling with.
How do I deal with an out of control 10 year old daughter?
Write down rules that they are to abide by and have these visible in the house. Strictly enforce these rules by maybe taking away something she likes as punishment. And when she abides by the rules, encourage her with a reward as an incentive to stay well-behaved.
Also, keep her engaged and busy with chores. That way they have little time to cause chaos around the house. And remember to also strictly enforce it. That way you bring a semblance of order in the house and also teach her the importance of being helpful around the house.
How do I spend time with my 10 year old daughter?
Usually why parents find it difficult to spend time with their children is because they don’t know what fun and engaging activities they can carry out with their children. But we take that hassle out of the thinking for you in this article. By doing any or all of the activities in this article, you get to spend quality time with your daughter.
Closing Thoughts.
Spending time with your 10 year old daughter should not be difficult. With any of the fun activities listed in this article, you will have a blast with your 10 year old daughter, and you will get to bond with her at the same time. Have fun.
02 HOURS 15 MINUTES
ESTIMATED TIME DESIGNING AND UPLOADING THIS ARTICLE
08 HOURS 30 MINUTES
ESTIMATED TIME RESEARCHING AND WRITING THIS ARTICLE
You Might Also Like
13 Signs of Negative Energy in a Person
September 20, 2021
13 Signs of Negative Energy in a Person WhatToGetMy Instructional Article Can energy be negative? While there isn’t as yet a scientific explanation for negative and toxic energy, there is such a thing as negative energy and this article will be unpacking everything you need
Read More »
15 Insightful Ways To Save Your Daughter From A Bad Marriage
July 18, 2022
15 Insightful Ways To Save Your Daughter From A Bad Marriage WhatToGetMy Instructional Article Every parent with a daughter dreams of her growing up to have a fruitful and happy life, and marriage is usually a big part of this. When daughters end up in
Read More »
Valentine’s Day Gifts for Daughter from Dad
January 24, 2020
We heard a lot of dads asking whether they should buy Valentine’s gifts for their daughters or not. Most stores and brands focus on promoting items for those who are in a romantic relationship. That leaves us with a question of whether we should buy
Read More »
What to Write in a Mother’s Day Card From Daughter : 5 Great Ideas
October 10, 2021
What to Write in a Mother’s Day Card From Daughter : 5 Great Ideas WhatToGetMy Instructional Article Writing mother’s day wishes isn’t always easy. It may look like an easy task, but once started, it gets more complicated. And not because there’s nothing to say,
Read More »
17 Signs of a Simple Minded Person
September 19, 2021
17 Signs of a Simple Minded Person WhatToGetMy Instructional Article Simple minded people are generally frowned upon by society for their apparent lack of intelligence and cavalier attitude towards life. These same people, however, seem to be able to navigate life pretty well and generally
Read More »
How to Get Your Daughter Away From a Controlling Boyfriend: 7 Ways
October 30, 2020
How to Get Your Daughter Away From a Controlling Boyfriend: 7 Ways WhatToGetMy Instructional Article Wanting to control someone comes from a place of fragility and insecurity, if you suspect that your daughter might have a controlling boyfriend, the first thing you will want to
Read More »
What to Write in a Father’s Day Card From Daughter – 7 Things to Write About on Father’s Day
October 5, 2021
What to Write in a Father’s Day Card From Daughter – 7 Things to Write About on Father’s Day WhatToGetMy Instructional Article Father’s day is a unique day to celebrate the man that is your father and all that he has done. And with daughters
Read More »
Why Some Mothers Hate Their Daughters: Top 11 Reasons Why Relationships Can Be Strained?
August 22, 2021
Why Some Mothers Hate Their Daughters: Top 11 Reasons Why Relationships Can Be Strained? WhatToGetMy Instructional Article This question comes up again and again. Why do we see negative mother daughter relationships occasionally? Why moms and daughters fight? This article aims to analyze the real
Read More »
HOW TO CELEBRATE THE 18TH BIRTHDAY FOR DAUGHTER
May 14, 2019
How to Celebrate the 18th Birthday for a Daughter WhatToGetMy Instructional Article Finding ways of how to celebrate the 18th birthday for a daughter can be stressful as you want to make sure that she will have the perfect day and that it will be
Read More »
31 Fun Things to Do With 10 Year Old Daughter
November 6, 2020
31 Fun Things to Do With 10 Year Old Daughter WhatToGetMy Instructional Article This article helps you with an exciting list of fun yet cognitive activities to do with your 10 year old daughter. Our list contains both activities to do at home and outdoor
Read More »
Page not found – Child age
Looks like there’s nothing here. .. Maybe try using the search?
Search:
Recent posts
- Online Festival “Sea of Ideas. Winter-Zymagia-Zymagiya»
- Quiz about musical instruments for kids
- Where to go with children in Mozhaisk
- Where to go with children in Almetyevsk
- Prefixes PRE- and PRI-: a rule with examples and exceptions
Archives
Archives
Select the month December 2022 November 2022 October 2022 September 2022 August 2022 July 2022 May 2022 April 2022 March 2022 February 2022 January 2022 December 2021 November 2021 October 2021 July 2021 June 2021 May 2021 April February June December 2020 November 2020 October 2020 September 2020 August 2020 July 2020 June 2020 May 2020 April 2020 March 2020 February 2020 January 2020 December 2019November 2019 October 2019 September August 2019 July 2019 June 2019 May 2019 April 2019 February 2019 January 2019 December 2018 November 2018 October 2018 July 2018 June 2018 May 2018 March 2018 January 2018 December 2017 November 2017 November 2017 November 2017 November 2017 October 2017 September 2017 August 2017 July 2017 June 2017 May 2017 April 2017 March 2017 January 2017 December 2016 November 2016 October 2016 September 2016 July 2016 May 2016 April 2016 February 2016 January 2015 December 2015 October 2015 October 2015 October 2015 October 2015 October September 2015 August 2015 July 2015 June 2015
Tags
1st class
Grade 2
3rd grade
4th grade
5th grade
6th grade
7th grade
8th grade
Grade 9
Grade 10
Grade 11
Quizzes
Geography
DOW
Preschool age (3-7 years old)
Games
Story
Literature
Maths
Infancy (up to 1 year old)
Junior school age (7-12 years old)
Adolescence (12-15 years old)
Early age (1-3 years)
Russian language
SLIDER
Pages
- FAQ
- FAQ list
- Home and child
- Children’s room
- Articles for children
- Leisure
- Event poster
- Travel and recreation
- What to do with a child
- Creativity
- Health
- Child safety
- Pregnancy and childbirth
- Diseases of children
- Child health
- Analyzes
- Children’s pharmacy
- Pediatric dentistry
- Newborn
- Inoculations
- Child nutrition
- Recipes
- About personal data of users
- Feedback
- Training and education
- Primary school
- Independent work
- Basic school
- Senior classes
- Career guidance
- Primary school
- Editorial
- User agreement
- Psychology and Development
- Child rearing
- Patriotic
- Sexual
- Religious
- Family
- Financial
- Ethical
- Child psychology
- Methods
- Development and training
- Children’s speech therapy
- Physical education
- Child rearing
- Categories
Page not found – Child age
There doesn’t seem to be anything here.