What are sensory bottles used for: How to use Sensory Bottles to Reduce Meltdowns in the Classroom
How to use Sensory Bottles to Reduce Meltdowns in the Classroom
Sensory bottles are a great way to help students slow down and relax when they are feeling overwhelmed or unable to manage their emotions. There’s something absolutely mesmerizing about watching a glitter calm down bottle settle, and this can often be enough to help students regain composure. From water beads to mini erasers, there are so many simple ways to create calm down jars, and they are perfect for your classroom cool down space.
From the most basic version to something spectacular, learn more about sensory bottles and get some great ideas for how to create your own sensory bottles using simple household products.
This article includes affiliate links. Purchases made through these links don’t cost you anything additional, but I earn a small commission which is used to help keep this site up and running.
What are sensory bottles?
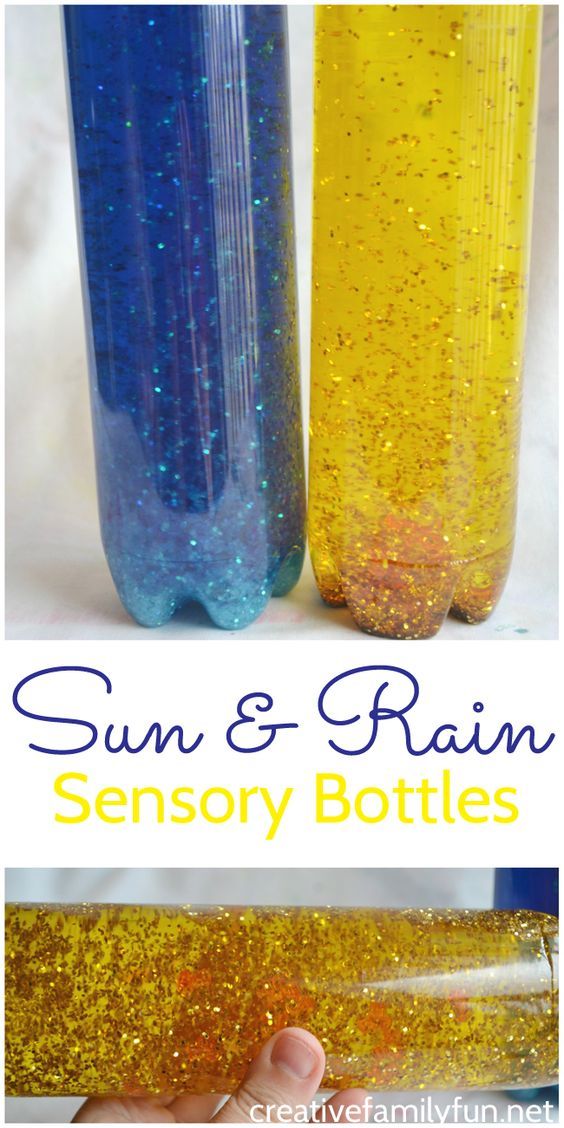
Sensory bottles, also called calm down jars or bottles, are containers that have been filled with a variety of items and sealed to allow students to play and observe without making a mess.
These bottles are a great alternative to messier sensory experiences that students might crave as they try to re-regulate their emotions or seek sensory stimulation.
The bottles themselves come in all shapes and sizes, and you’ll find them filled with a nearly endless variety of materials. Regardless of what you fill them with, they are a great addition to the sensory or calming toolkit you should have in your classroom.
Why are sensory bottles good for kids?
Sensory bottles are great because they offer students a sensory experience in a safe, non-messy way. These bottles allow students who may crave sensory input to have hands-on exploration through their senses without disrupting their learning.
Sensory bottles can be created to meet any number of sensory needs including visual perception, auditory input, bodily awareness, and even vestibular input. This means you can customize the sensory experience you create to meet the exact needs of your students.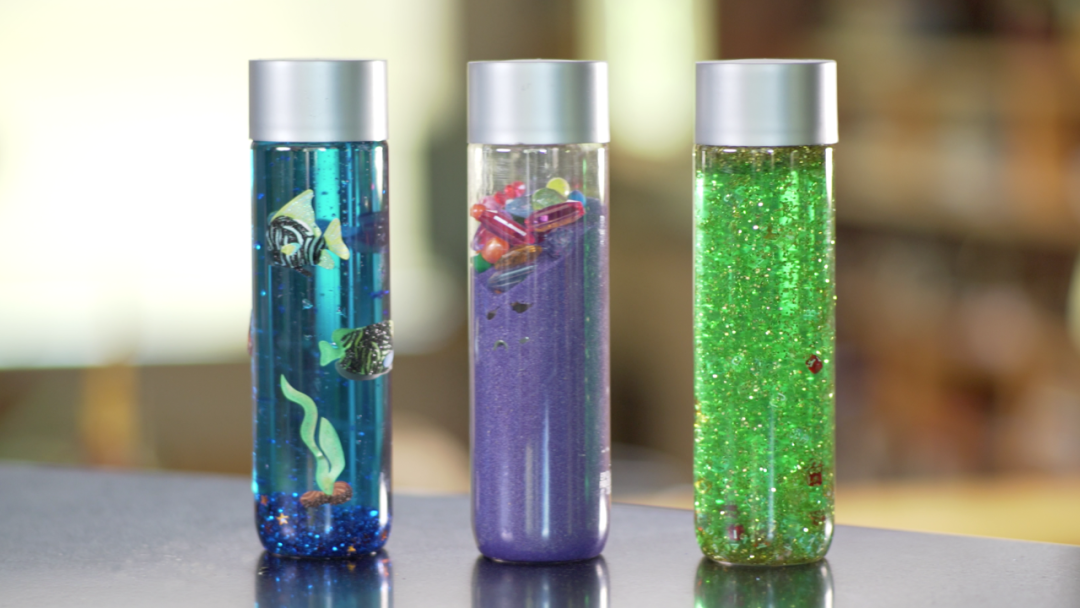
These bottles are also a great way to help calm kids who may be overstimulated or dislike touch. By shaking the bottle, the child can get proprioceptive input in a way that doesn’t harm themselves or others.
Watching the materials in the bottle slowly fall back to the bottom after vigorous shaking can also be a trigger to help calm breathing, thus helping the student re-regulate emotionally.
How to introduce and teach students how to use calm down bottles
Most students will not intrinsically know how best to use sensory bottles to help them calm down or appropriate gain the sensory input they need. This is why it is important to teach students how to use this tool, model its use, and offer guidance as a student begins to implement the strategies you’ve shared.
Step 1: Introduce the sensory bottle before issues arise.
To do this, you will want to introduce the bottle when the child is calm. If you’re using this as a part of a cool down spot in your classroom, you can do a whole group lesson on the bottle and how to use it.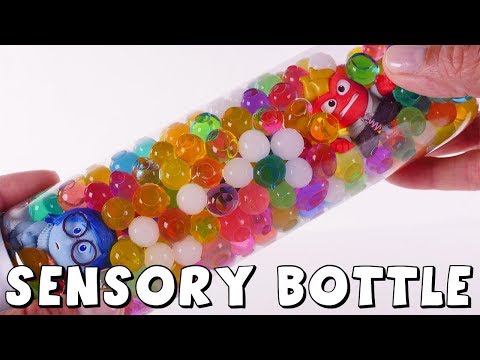 Model how to use the bottle – showing students how you use it to regulate your breathing and body.
Step 2: Use guided practice as the student begins to escalate.
From here, you can offer the bottle when you notice a student is beginning to escalate. You won’t want to wait until you’ve reached meltdown stage. Instead, catch the signs of escalation early so the child can use the strategy more effectively.
For example, you might say, “I see that you’re frustrated about that math problem. Let’s take a break and shake up this calming bottle. Just take some time to breathe while you watch the glitter fall, and when you’re ready, I can help you look at that problem again.”
In the example above, you named the emotion you noticed, verbally reviewed how to use the bottle appropriately, and offered support to help the student once they are calm.
Step 3: Provide access to the bottle and reteach/review expectations as needed.
Over time, you will likely need to provide less verbal direction to the student.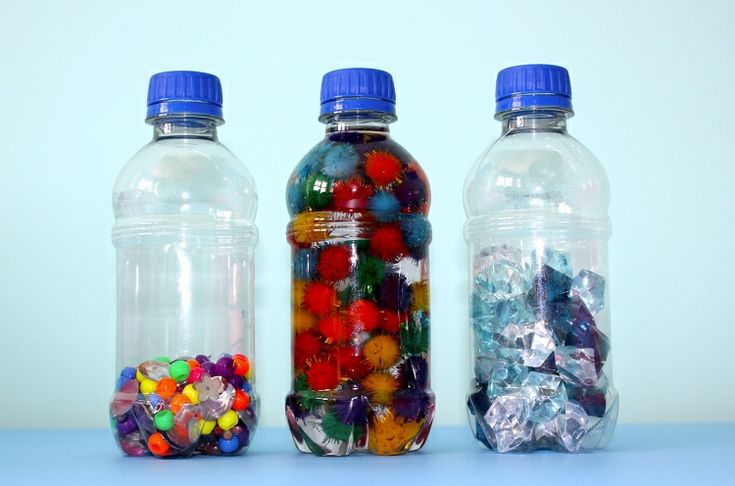 However, in the early stages, you are still helping to reiterate the use of appropriate calming tools.
If you notice that your calm down bottles are being used inappropriately, do a quick re-teach to review the strategy and appropriate use.
Which bottles are the best for sensory bottles?
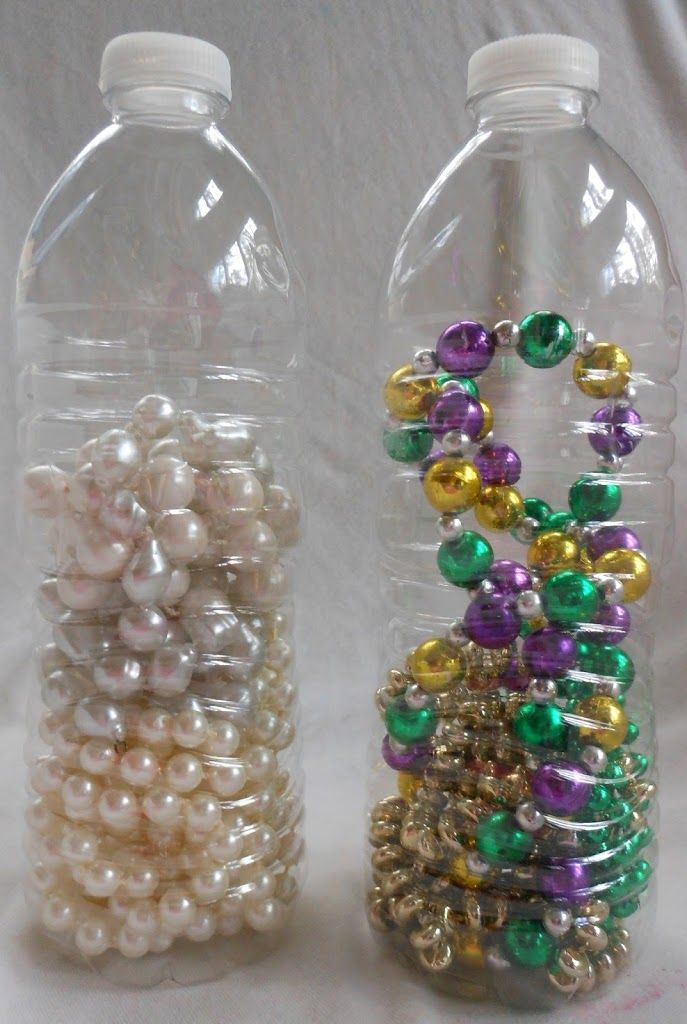
While you can use nearly any bottle you might have laying around, my personal favorite are those bottles that are similar to Voss water bottles. These bottles are great because of their size and lid. This makes your bottles look really nice instead of just some random soda bottle.
In case you don’t drink Voss water, Amazon offers a number of different sensory bottle options that are really decently priced. For example, at the time this article was written, you can get a 12- pack of 13.6 oz bottles shown below for under $17.
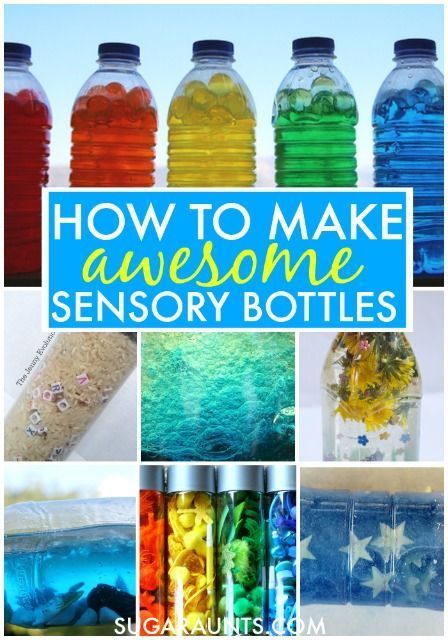
25 DIY Sensory Bottles for the Classroom
Whether you decide to create seasonal sensory bottles or keep the same option all year long, this list has a number of options that are perfect for a classroom cool down spot or in your sensory toolkit.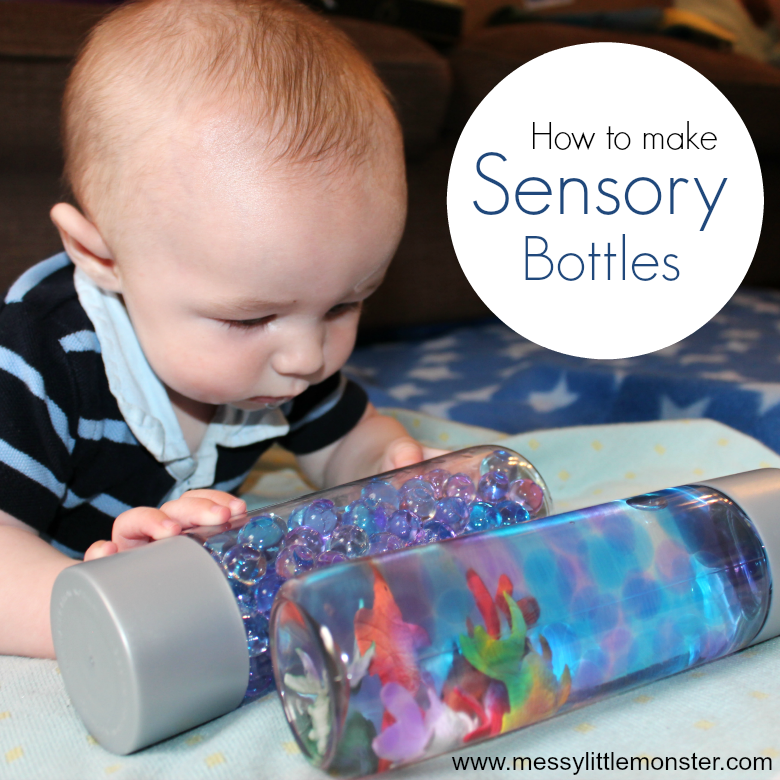
For most of these bottles, you’ll need very few items that are inexpensive and often can be found at your local dollar store.
- Winter Sensory Bottle
- Fall Leaves Sensory Bottle
- Halloween Sensory Bottles
- Firework Sensory Bottle
- Suspended Heart Sensory Bottle
- Cat in the Hat Sensory Bottle
- Monster Sensory Bottle
- At the Beach Sensory Bottle
- Galaxy Sensory Bottle
- Crayon Sensory Bottle
- Color Mixing Sensory Bottle
- Pokemon Sensory Bottle
- Alphabet Sensory Bottle
- Glow in the Dark Sensory Bottle
- Light Saber Sensory Bottles
- Rice Sensory Bottle
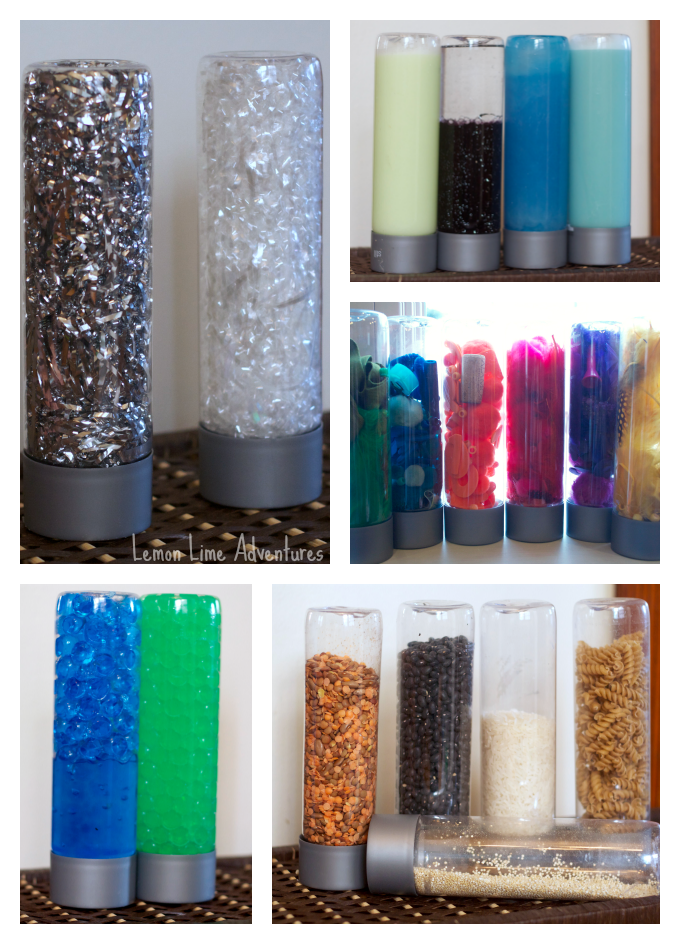
- Magnetic Field Sensory Bottle
- Earth Sensory Bottle
- Liquid Density Sensory Bottles
- Bug Sensory Bottle
- Rainstorm Sensory Bottle
- Shark Sensory Bottle
- Butterfly Sensory Bottle
- Glowing Stars Sensory Bottle
- Ocean Sensory Bottle
What is a Sensory Bottle? What are their benefits? – Sensory Toys Box
Sensory play has many benefits, especially for children of young ages. In the early years, children use their senses to understand and connect with the world around them.
In this post, you can find information about sensory bottles, their benefits, and how to use them. With this tool, you can stimulate the little ones in their development while including moments of fun and many laughs!.
What is a Sensory Bottle?
They consist of a jar or bottle that we fill with different materials generating a variety of sensations and stimulating essential areas of the brain when the child moves it.
We can fill sensory Bottles with liquid or not. I particularly like those containing liquid because they generate a relaxing and attractive effect when moved. Other components can be added to the water so that the impact of falling objects is slower (it can be baby oil, glue, glycerine).
You can also have objects that make noises, objects of different sizes and textures, and various colors so that the child can identify them when moving the bottle.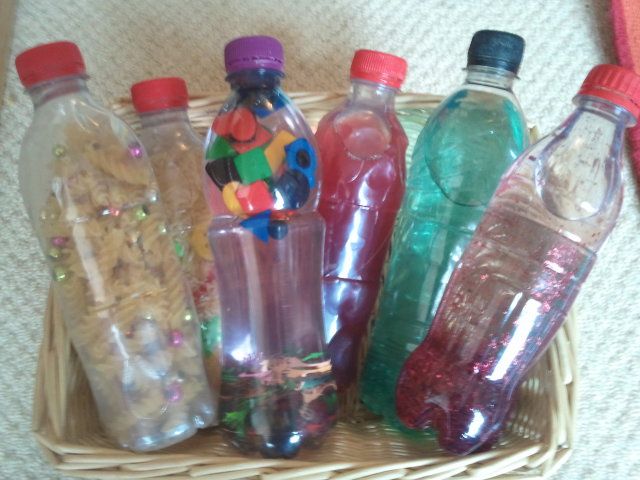
At Sensory Toys Box, we have themed bottles that represent and have materials according to a specific theme (e.g., Ocean, Mermaid, Winter), which becomes an excellent gift option and creates the opportunity to learn and go deeper with the child in a specific theme.
Motor: the simple act of manipulating the bottle exercise the muscles of the hand and arm, which also stimulates fine and gross motor coordination (turning, shaking, rotating). It is essential to promote motor skills development in the youngest children. Motor activities contribute to people’s proper physical, emotional, and social development and are especially important in childhood. Through sensory skills, the child learns to have control of his own body, feels encouraged to explore and discover the environment and to express himself freely, to interact with others more adaptively, with greater control and care of his body and that of his companion (an aspect of great importance for social interaction).
Attention: The child identifies the different objects in the bottle, focuses on one or another, follows them with his eyes as they go up and down. Concentrating on this activity and being present sets aside other concerns that can produce tension or alter them (e.g., screens, adult meetings). This ability to focus on an activity and leave other distractions aside will be adaptive to their lives; they will need it in kindergarten, at school, doing homework, etc.
Stimulate their curiosity and desire to explore: The moments of most significant learning for the child are moments of motivation. The child finds himself interested in discovering what we present to him. These bottles promote curiosity and interest and invite the child to learn and explore.
Emotional regulation: These bottles are an excellent tool to promote relaxation, attract positive emotions in the child, and provide a moment of enjoyment to relieve their tensions.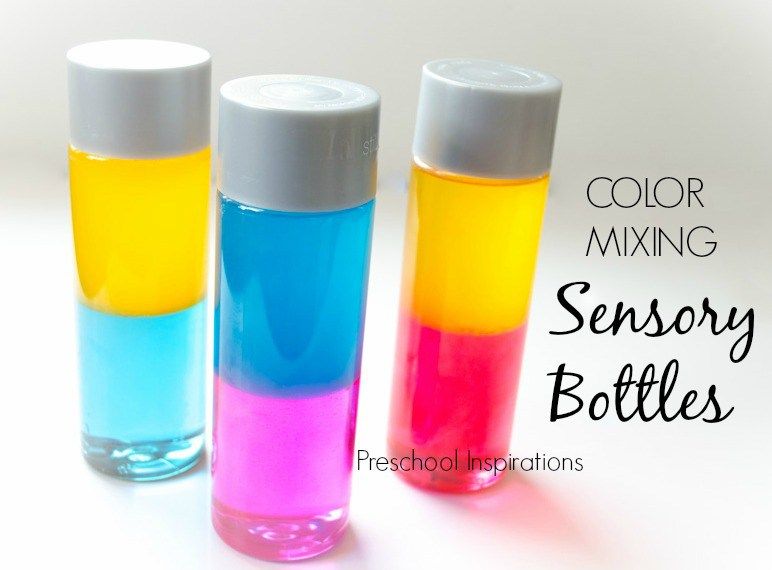 A good time to use it can be after some period of distress like a long car journey, arriving tired from daycare, or before going to sleep. Parents need to provide a calm environment when using the bottle; this can be playing quiet music, dimming the lights, turning off the television.
Sensory skills: We stimulate the sense of sight through visual following of different objects and colors, sense of sound through materials that produce noises, and sense of touch is stimulated by turning, twisting, shaking, and squeezing the bottle.
Early stimulation is significant for childhood development!
Looking for more? Check out our “Childhood Anxiety and the importance of playtime” blog post!
Back to blog
Sensory baby bottles: you can make them yourself
Have you ever seen sensory bottles? If yes, then surely your attention was attracted by its colors and variety of materials.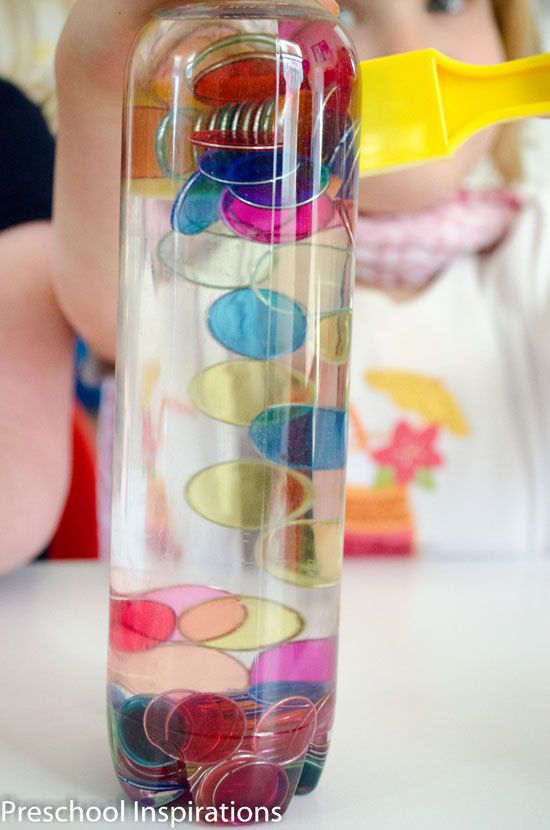
Sensory bottles are the perfect resource to spark babies’ curiosity and stimulate their senses, especially sight and hearing.
They are also very easy and inexpensive to make, all you need is a little imagination. Babies will be delighted with them, and older ones can help you prepare them. Surely you will be very interesting and have fun.
Index
- 1 Benefits of playing with sensory bottles
- 2 How can I make my own sensory bottles
- 3 List of possible materials
- 4 How to make sensory bottles for visual stimulation
- 5 Sensory bottles for auditory stimulation
- 6 Sensory bottles for olfactory stimulation
- 7 Theme bottles
Why play with sensory bottles
- Development of fine motor skills while picking up bottles.
- Language enhancement. We can talk about what is inside the bottles, make up stories, explain things, etc.

- Social development. Children love to share experimental material and their discoveries.
- Visual education. They will learn to look for things in bottles.
- Hearing education. They learn to listen to different types of sounds.
- Development of attention and concentration.
How can I make my own sensory bottles
- First you need to wash the bottle.
- Place material inside. You can use one, two, three, or whatever, but try not to get overwhelmed.
- When you have put everything in (material, toys, liquid), close the lid and seal it with hot silicone so that there is no risk of opening.
List of possible materials
- Rigid and transparent plastic bottles (recyclable). We can use bottles of almost any size. If they are for children, I recommend 200 ml as they weigh less and are easier to handle.
- Glue gun for closing bottle caps. You can also use strong glue. Make sure bottles are well sealed.
- Solid materials for filling bottles. Plastic animals, pipe cleaners, buttons, colored clips, pom poms, clear colored pearls, magnets, shells, balls, iron pearls, colored rubber bands, legumes, rice or pasta (these can be dyed), seeds, sand and very long and so on. As you can see, the possibilities are endless.
- liquids : water, clear glue, corn syrup, baby body oil, liquid soap, glycerin, alcohol, etc.
- Decorate and color You can use glitter, metallic confetti and food coloring. Fat-soluble food coloring is best for coloring butter.
 You can also use strong glue. Make sure bottles are well sealed.
 How to make sensory bottles for visual stimulation
- Liquids in different densities. Half fill the bottles with water dyed with one color food coloring. Mix baby body oil with a different color of fat-soluble paint. Add it to the bottle and voila. When you move the bottles, the colors mix and a new one appears. After a few minutes, the two colors will separate again, as if by magic.
- Shining in the dark . Use the phosphorescent figurines and fill the bottle with water. Surely your child wants to be in the dark all the time to see how it glows. Success guaranteed!
- Play with bubbles. Fill a bottle with water, color it with food coloring and add some detergent to create bubbles and foam.
- Sea in a bottle. Fill one third of the bottle with water, add blue food coloring, and fill the rest with baby oil. You can add shells and fish or marine animal figurines.
 Add it to the bottle and voila. When you move the bottles, the colors mix and a new one appears. After a few minutes, the two colors will separate again, as if by magic.
 Hearing Stimulation Sensory Bottles
Fill the bottles with items that make noise when shaken and the bottles turn into maracas that your child will love.
Sensory bottles for olfactory stimulation
For these bottles you need to make small holes in the lid and use scented materials so that your child can play to discover different smells. Coffee, cologne-soaked cotton, lemon, mandarin, thyme, lavender, etc. can be used. You can make a bottle for every season.
- Primavera . Fill the bottle with plant seeds, dried flowers, bird food and small leaves.
- Summer. Use dried parsley, bee and butterfly figurines, plastic flower petals, and dried lavender flowers.
- autumn . Color the paste green, yellow and red. Add small pine cones, dried leaves, acorns, or the typical fruits of this season.
- Winter. Fill with rice, glitter, white and red eva foam pompoms and figures with Christmas motifs.
The content of the article complies with our principles of editorial ethics. To report a bug, click here.
You may be interested in
Sensory games at home: 5 ideas
Why do games that affect the senses help children’s brains develop? And why the best toys are ordinary dishes, cereals and pasta, dough and modeling mass?
How does the brain develop?
Our brain consists of trillions of cells – neurons, and the connections between them are synapses.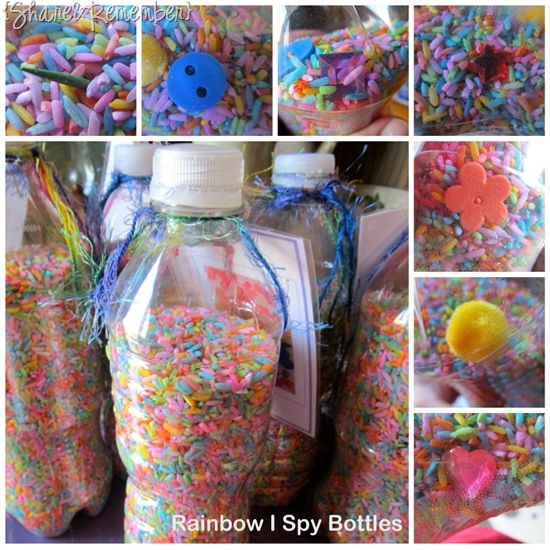 In the first three years, a child’s brain grows at the fastest rate. A baby is born with about 50 trillion synapses, in the brain of a three-year-old child there are already 1000 trillion. Vision, taste, smell, touch, hearing help a child (and then an adult) to perceive the world around them in different ways.
What are sensory games? These are games that stimulate the senses. Most sensory games focus on stimulating touch, vision, and hearing because they are more accessible. Sensory stimulation is necessary for the development of the child’s brain: it helps to develop the corresponding synapses, and then the functions, skills, and abilities. Synapses in the brain appear or disappear depending on life experience – this is called neuroplasticity, the ability of the brain to change neural pathways or synapses in order to “educate” the brain. And in order for the child’s brain to acquire these sensory information processing skills, it is necessary to introduce him to various sensory experiences.
Sensory play is important not only for toddlers, but also for preschoolers and young children.
What are the benefits of sensory play?
When a child needs to use multiple senses to complete a task, he will gain more from experience and retain more information. By the way, this rule works for adults too! In addition to sensory development, sensory activity is also important for other aspects of brain growth, because any game, whether sensory-oriented or not, is good for a child’s development. In the process of games, creative thinking, language, cognitive, visual-spatial, social and emotional skills are developed. So how do you start incorporating sensory play into your daily life? It’s really simple – look around and you can see opportunities for development.
Here are 5 sensory play ideas for busy parents:
1. Turn ordinary household items into sensory toys. You have probably already noticed how much fun the simplest things give a child: a roll of paper towel, a saucepan with a lid, a box with buttons.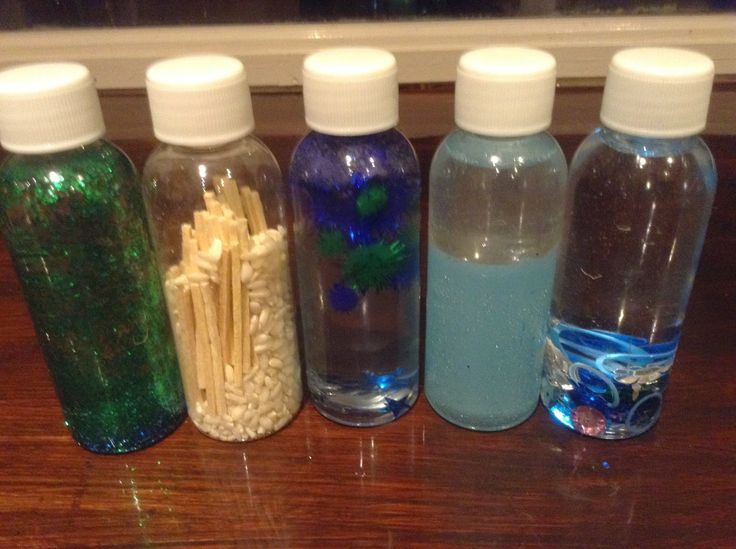 Use them: you can make musical instruments from cardboard tubes and chopsticks for sushi, you can simply crumple out of paper a useful turntable, napkins and foil. Arranging cereals or pasta in containers develops fine motor skills, and a child can also be offered to thread spaghetti into the holes of a colander or build a tower of sponges for washing dishes. Such tasks do not develop not only basic motor skills, but also help to look for solutions.
2. Use plasticine and modeling compound.
For preschoolers, clay and modeling clay are great ways to develop hand motor skills, which will come in handy when learning letters and numbers and handwriting begins to form. Create art objects from plasticine using different techniques (you can pinch, roll, smear, mix, etc.): it will take time and patience to get the desired results. Both are necessary skills in everyday decision making and in life. Invite your child to try to make their own mass for modeling or slime, note the difference: here are a few recipes.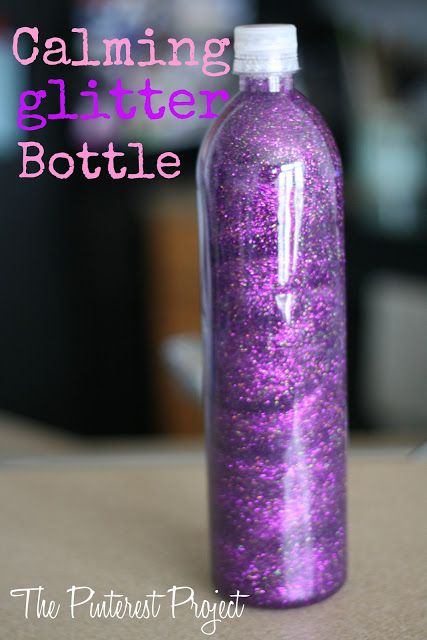
3. Make sensory bottles.
In transparent plastic water bottles, pour a mixture of water and stationery glue or glycerin (in proportion to two parts water and one part glue), add a little food coloring and two teaspoons of glitter to the mixture. Close and shake the bottle and watch together as the glitter settles in a whirlpool.
4. Offer to complete the drawing.
Draw the outline of a tree on the sheet – and then invite the child to “grow” it: color it with pencils or paints, paste over with pieces of paper or real fresh or dried leaves, add fruits or flowers. This way, different textures and shades will appear on the drawing, which the child himself will choose. And you can also just draw squiggles or arbitrary figures on paper one by one – and invite each other to finish them so that you get something recognizable – a man, an animal, a flower or a boat.
5. Create a sensory board or basket.
Collect with your child various objects that can stimulate the senses (and make sure they are safe to use): cloth and fur of different textures, sandpaper or steel wool, soft brushes, glass beads, a bar of scented soap or a cork that you have dripped perfume, rattle, chestnuts and acorns.