


Finger paint projects: Finger painting ideas: easy finger painting ideas for kids and adults
Finger painting ideas: easy finger painting ideas for kids and adults
Finger painting is a fun activity for kids and it’s a great way to introduce them to art at an early age. Art has lots of benefits for young children: it can help them to develop fine motor skills, learn about colour mixing and connect with their senses. It’s also a good way to help young children explore their creative sides and how they see the world.
There are so many finger painting ideas you can show them – from trees with finger-shaped leaves to patterns made with a hand print. You can use finger painting to create pictures of everything from snowmen to hot air balloons – the possibilities are endless. You can also combine finger painting with collage or painting using a brush, depending on your child’s age and stage.
Some of these easy finger painting ideas your child may be able to try by themselves, but other ideas may require some adult help or need your guidance to start them off. It’s best not to leave them unattended with the paints as you could end up with some new decorations on your walls!
We’ve included some finger painting ideas for toddlers along with projects for older children, so there’s something for everyone.
Did you know that grown-ups can do finger painting too? We’ve also included several finger painting ideas for adults which are really impressive – read on to see for yourself!
What you need to start finger painting with children
The good news is that you don’t need lots supplies to start finger painting with children. Here are the basics:
- Finger paints or poster paints
- A smock or apron (or an old t-shirt) to protect the child’s clothes
- Newspaper or a wipeable tablecloth – to protect your table
- Paper
Bear in mind that not all children like getting their hands dirty and find the sensation of the paint unpleasant to begin with. It’s worth keeping a damp cloth or some wet wipes nearby in case your child wants their hands cleaned – or in case things get too messy!
More like this
Most finger paints are washable and are unlikely to stain your furniture, so you don’t need to feel stressed if your child touches anything while they have paint on your hands.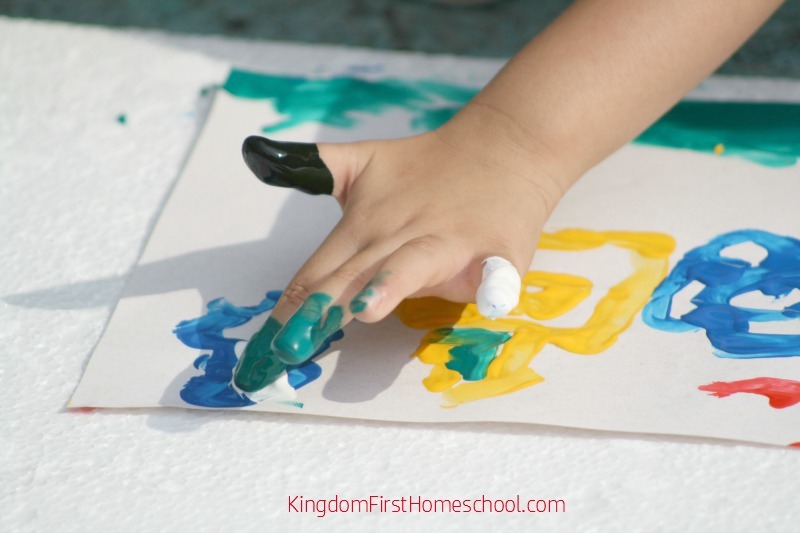 Always check that the finger paints you’re using are non-toxic in case your child tries to eat the paint or puts their fingers in their mouths.
Here are a few recommendations for finger paints that are kind on little fingers and won’t stain your clothes:
Crayola finger paints
Crayola’s finger painting sets are hugely popular and great value for money. The set includes a variety of bright colours for kids to play with. These finger paints are incredibly easy to clean up and will wash out of most fabric types. Highly recommended.
Arteza finger paints
Inspire your child’s creative with this set of 30 colours! These finger paints are very vibrant and can be used on most surfaces.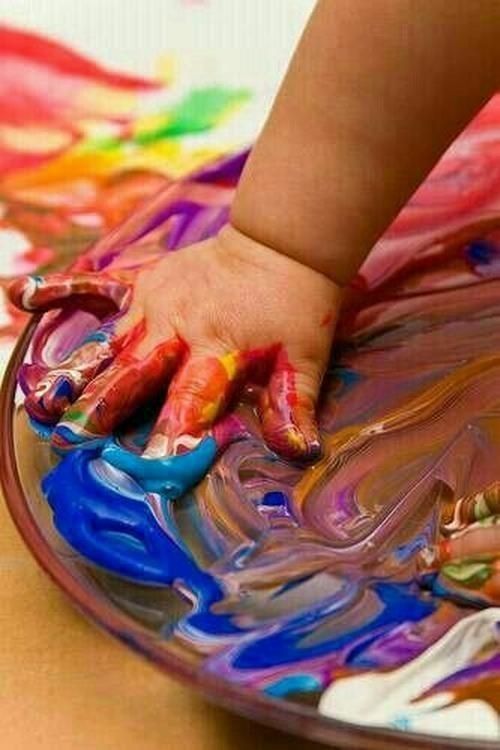 The paints are easy to clean up once you’ve finished using them and won’t stain children’s fingers.
Looking for more creative ideas to try with your children? Check out our craft ideas for kids, crafts for toddlers and easy Halloween crafts for kids.
Read on to discover our favourite easy finger painting ideas…
Featured image by iStock/anaimd
1. Snap dragons
This fun finger painting project is easy enough for most children to attempt – although younger children may need the stems and leaves to be drawn onto the paper for them. Try mixing colours together to get two-tone petals. Find this project on busymommymedia.com.
Photo by busymommymedia.com
2. Winter tree finger painting
Looking for Christmas finger painting ideas? This winter tree design is perfect – and you could use it to make Christmas cards for friends and family. Learn how to create your own winter tree finger painting with easypeasyandfun.com.
Photography by easypeasyandfun.com
3. Fireworks
Celebrate a special occasion with a finger painting of a night sky filled with glittering fireworks! This is a great project for the 4th of July, New Year’s Eve or Bonfire Night. Find the firework painting tutorial on 3dinosaurs.com.
Photo by 3dinosaurs.com
4. Rainbow
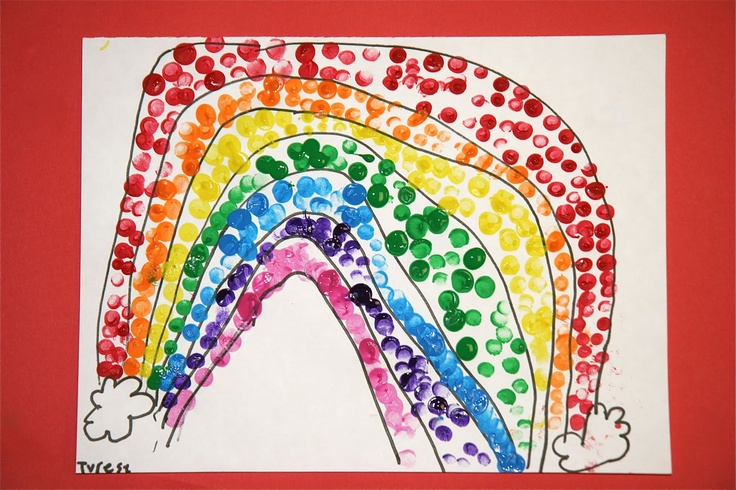
This is a simple finger painting technique, but the results are very impressive. It’s a great way to teach children about the colours of the rainbow and make something beautiful at the same.
Photo by luckymecraftsandkids.blogspot.com
5. Easter finger paintings
Isn’t this a cute idea from Kelsey Nixon? This is a wonderful finger painting idea to do with your child. Get them to cover the paper with thumbprints, then use a pen to turn the prints into bunnies, Easter eggs or anything else you can imagine. If you’re doing this with younger children, it can help them to get started if you do a couple for them to copy.
Photography by Kelsey Nixon
6. Elephants
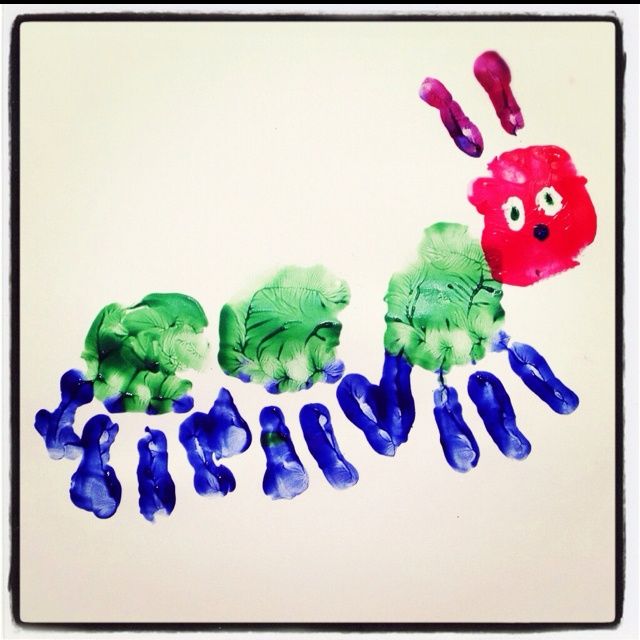
You can also create finger paintings using your whole hand to create a variety of fun shapes! We particularly love this example from the Crafty Morning blog – it’s so bright and cheerful. You could add your own handprint to create a grown up elephant too.
Photography by Crafty Morning
7. Pineapple
Pineapple finger paintings are enjoyable for both adults and kids to try. Experiment with mixing colours to make tropical pineapples in a range of rainbow shades! It would look great on a child’s bedroom wall to add a splash of colour. Find out how to make it with Penny Pinchin’ Mom’s pineapple finger painting guide.
Photography by Penny Pinchin’ Mom
8.
 Flower pot
Dig out pastel shades to make this pretty flower pot. It reminds us of a flower-filled meadow! Use it inside the house so that the paints don’t wash away in the rain. Find out how to make your own on jazminmaybell.com.
Photography by Jazmin Maybell
9. Bonfires
Bonfires are very satisfying for children to paint – they have lots of bright colours and interesting shapes. You can finish off the painting with a dash of glitter too! Find the tutorial on masandpas.com.
Photography by masandpas.com
10. Autumn tree
Looking for finger painting ideas for toddlers? This fun idea from artcraftykids.com is a good one to try. You can paint the shape of the tree for them or use their handprint, then show them how to use their fingerprints to create a vibrant fall scene.
Photography by artcraftykids.com
11. Footprint rocket
We’ve already seen what you can create using handprints, but what about footprints? We love this adorable footprint rocket project from thebestideasforkids. com – and we’re sure children will love making their own!
Photography by thebestideasforkids.com
12. Dandelions
Start your child off by drawing the stalk for them, then show them how to add their own dandelion seeds! Use colourful paper so that the seeds really stand out.
Photography by craftymorning.com
13. Butterfly mugs
Finger painting projects don’t come any prettier than this! This would be a good way for your child to make a gift for a loved one or thank you present for their teacher. You can coat the mugs in a dishwasher-safe varnish to protect the butterfly design. Find out how to make them on thebestideasforkids.com.
Photography by thebestideasforkids.com
14. Edible fingerpaints
Most fingerpaints are unsuitable for babies, but these paints are made using yoghurt and a few drops of food colouring, so they’re perfectly safe for your infant to use. It’s a wonderful sensory play activity for them and you don’t need to worry about them eating the paints.
Photography by funathomewithkids.com
15. Flowers
This finger painting project is better for older children, although younger children may be able to manage it with some assistance. Why not paint beautiful flowers in an array of beautiful colours?
16. Corn on the cob
Combine collate and finger painting to create a cute corn on the cob picture. Tissue or crepe paper can be used to create realistic leaves to complete the picture.
Photography by artsycraftymom.com
16. Paper plate peacocks
This is a great craft project for a rainy afternoon – the cheerful colours and creative design are bound to lift everyone’s spirits! Googly eyes are the perfect finishing touch to give your peacocks some character. Learn how to make a paper plate peacock on iheartartsandcrafts.com.
Photography by iheartartsandcrafts.com
17. Peacock thumb painting
Here’s another great way to create a peacock finger painting from Art For Kids on YouTube.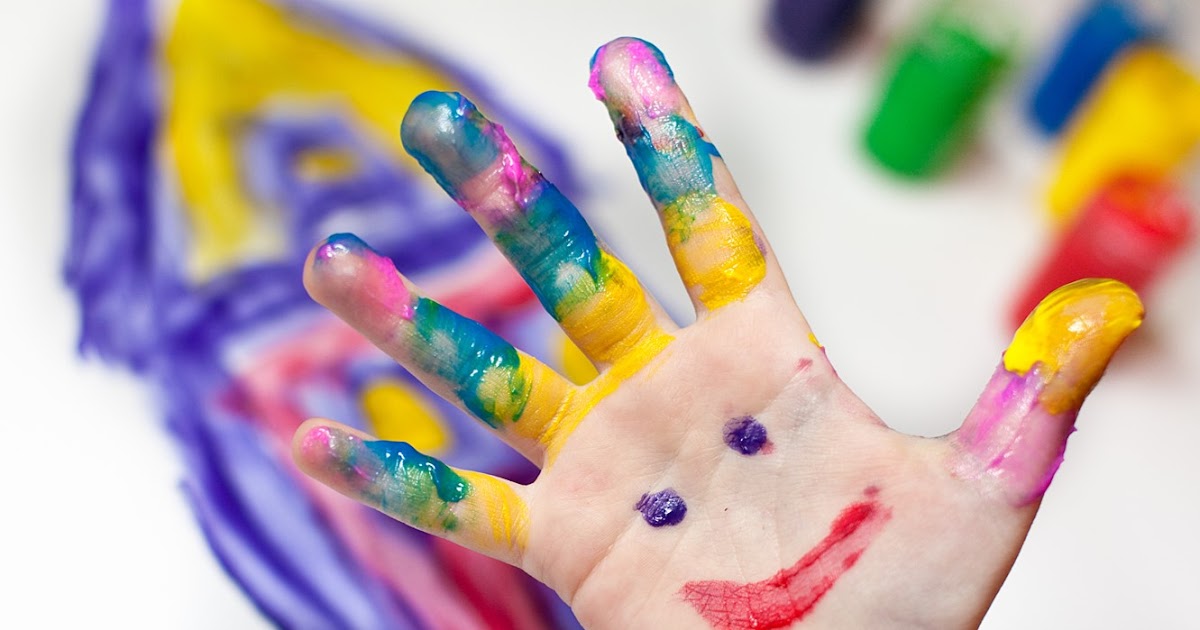 Thumbprints are a good way to create even oval shapes and they make lovely peacock feathers.
18. Snowmen
Looking for Christmas finger painting ideas? These cute little snowmen are full of personality and would look amazing on a Christmas card. Find the snowman tutorial on iheartcraftythings.com.
Photography by iheartcraftythings.com
19. Shells
Finger painting is good fun for grown-ups too! If you’re an artist and you’re struggling to be creative at the moment, trying a new technique can help you to see the world differently. Explore our finger painting ideas for adults to free up your creativity. Artist Alisa Burke used this shell painting to step outside of her comfort zone – and the finished finger painting is really lovely.
Photography by Alisa Burke
20. Roses
Finger paints lend themselves to floral designs, as they can allow you to create very natural-looking flowing shapes. This is a great technique to try if you want to develop a looser painting style.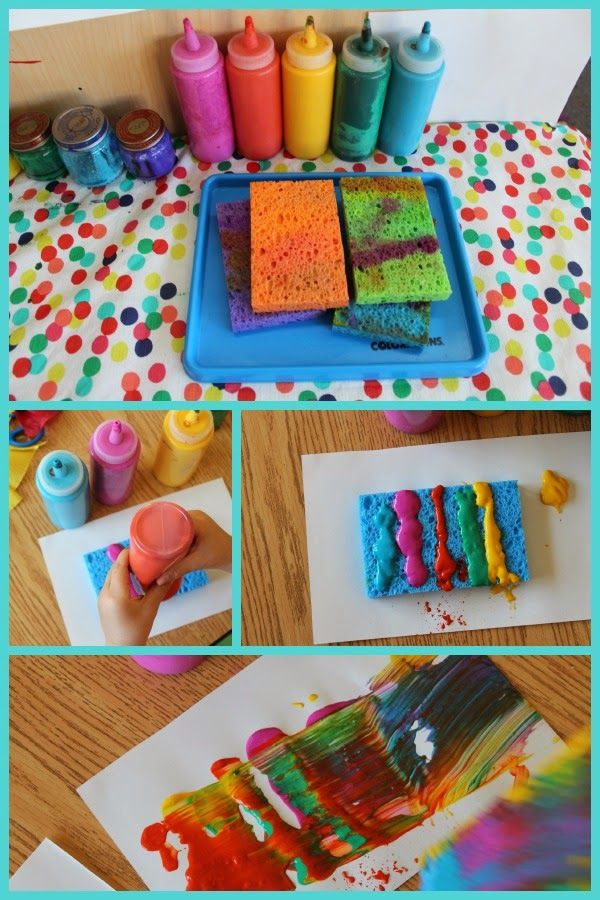 Learn how to create a flower finger painting with Alisa Burke. Looking for more floral art projects? Take a look at our easy watercolor flowers guide.
21. Fish pond
Iris Scott is a talented artist from New Mexico who creates phenomenal finger paintings using oil paints. In this YouTube tutorial, she reveals some of her techniques so you can try making your own incredible finger paintings at home.
22. Floral furniture
Don’t keep your finger paintings on paper and canvas – you can create beautiful finger paintings on your furniture too. According to The Turquoise Iris, your fingers are the best tool for blending and can be used to create a seamless blend.
Photography by theturquoiseiris.com
23. Full moon
Combine speed painting and finger painting techniques to create this dramatic full moon scene. Watch the video tutorial to learn how to do it for yourself.
24. Journal pages
Fill your art journal with an array of floral designs – don’t be afraid to fill both pages with flowers and greenery, as Alisa Burke has done here. Looking for more art journal inspiration? Check out our art journal ideas feature.
Photography by Alisa Burke
25. Ocean waves
There’s something very hypnotic about Dzvenyslava Valaga’s ocean waves painting video. She manages to create amazing textures on the canvas using her fingertips and oil paints. She’s wearing gloves to keep her fingers clean and oil-free.
We hope you enjoyed these easy finger painting ideas! If you’re looking for more painting ideas for adults, take a look at our watercolor painting ideas, acrylic painting ideas and gouache painting ideas.
Finger Painting Ideas for Kids (+ 5 Finger Paint Recipes)
-
Share
-
Email
Besides offering a great deal of fun and freedom for young children, finger painting has therapeutic effects for kids. This type of painting is a wonderful form of messy play and it is great for developing fine motor skills. It also offers a wide range of possibilities for self-expression.
Introduce your preschoolers to finger painting art and watch the excitement that follows. Here are some fun finger painting ideas to try at home with your kids.
Finger Painting Ideas for Preschoolers
There are many different ways to finger paint – expose your kids to different techniques, types of paint and methods of painting. Here are some ideas.
Finger Painting Techniques
Young artists can use their fingertips, palms of hands, sides of hands, or even forearms and elbows to apply and move paint.
Your kids can paint any types of images they want, from letters, numbers, and shapes, to finger painting animals and other favourite designs.
They may use other tools, as well; the teeth of combs, for example, make interesting designs in the paint.
Finger Painting Methods
There are two common methods of finger painting art.
In the first, cover the entire sheet of paper with your chosen colour. Or mix two tints on the paper to form a new colour. Then use the fingers to “draw” the picture, such as a flower.
The white paper shows through, making the flower design, with the paint colour providing the background.
For the other method, dip fingers in chosen colours. Use the fingers almost as paintbrushes to apply and “draw” with the paints.
Papers for Finger Painting
Choose from a variety of surfaces and paint products when introducing finger painting to your child.
Heavy papers like freezer paper often work the best for finger painting and prevent the paint from soaking through.
You can also find paper made specifically for this purpose, which is resilient and nonabsorbent. Try dampening the shiny side of these papers with a wet sponge, first, when using the traditional, thick finger paints. This allows for easier spread.
You can also use other types of heavy paper or cardboard.
Finger Paints
Finger paint is quite thick and often comes in primary colours, which children can mix, right on the paper, to form secondary colours.
You can also use tempera paint for finger painting. This is a little thinner but often available in a wider assortment of colours.
When using finger paints with kids, be sure to choose non-toxic products. And check for egg-free bases, for kids with egg allergies.
Finger Painting with Water
To avoid a mess, especially for the very young, let them finger paint with water. Have a container of room temperature water handy for dipping fingers.
Water shows up well on large sheets of black or dark brown construction paper. Also try clean, dark green or black slates/chalkboards. Children see the designs made with their fingers until the water dries. Then they can start all over again!
5 Simple Finger Paint Recipes
Make the following paints at home. With the non-cook recipes, your children can even help with this stage of the process.
1. Cooked Finger Paint
Ingredients:
- cornstarch
- poster or acrylic paints
- water
- oil of spearmint, wintergreen, or clove (optional)
- Mix 45 grams (3 tablespoons) of cornstarch with 40 ml (3 tablespoons) of cold water in a small saucepan.
 Stir to make a smooth paste.
 - Add 250 ml (1 cup) of boiling water. Stir quickly so lumps do not form.
- Stir until it thickens and looks translucent. If needed, cook over low to medium heat.
- Mix in 60 ml (1/4 cup) of cold water and scented oil if you are using some. These can help to preserve the paints, and they smell pleasant. Cover so the mixture is air-tight to cool.
- You can add colours to the liquid starch a few drops at a time right on the finger paint paper or in separate containers, one for each colour you want to make.
 Stir to make a smooth paste.
2. Non-Cook Finger Paint
Ingredients:
- white flour
- cold water
- tempera paint or food colouring
- Using a whisk, slowly mix 240 grams (2 cups) of white flour into 474 ml (2 cups) of cold water in a bowl.
- Divide into separate containers and add colours.
Optional: For a more textured finger paint, add some sand or salt, first, to the flour.
3.
 Sticky & Shiny Finger Paint
Ingredients:
- corn syrup
- food colouring
- Mix individual portions of corn syrup with chosen colours.
- Store in small zip bags or in air-tight containers.
This paint works well on heavy freezer paper. When the pictures have dried, they look very shiny!
4. Edible Finger Paint with Yogurt
Ingredients for each colour:
- Plain yoghurt (1/2 carton)
- flavoured gelatin powder (1/2 package)
- Mix ingredients in a bowl.
- Paint on paper plates or waxed paper.
5. Edible Whipped Cream Finger Paint
Ingredients:
- container of prepared whipped cream dessert topping
- food colouring
- Mix a drop or two of colour into portions of the whipped cream.
- Paint on paper plates or thick paper.
NOTE: The “edible” recipes are not meant to serve as a full snack. The benefit is that your children can safely sample for a taste.
While you have all these ingredients out and you’re in the mood for having fun while making a mess, you may want to try these playdough recipes too.
Cleaning, Drying and Displaying the Finger Paintings
What happens after the paintings are complete? Consider the following options for cleanup and display.
Cleanup
Many finger paints, purchased or made at home, contain colours that may stain. From little fingers, these eventually wash away. Tip: use hand-washing songs to help teach kids to do this properly.
Clothing may be a different story, depending on how soon the article is washed. Use aprons, paint smocks or old adult shirts for cover-ups.
Protect tables and floors with newspapers, vinyl tablecloths or inexpensive vinyl shower curtains. Throw them away or wipe them down when you are finished.
A few drops of liquid dish detergent added to paints before use makes cleanup even easier.
Drying and Displaying
Folding drying racks made for laundry work great to hang painted pictures with clothespins for air drying. Protect the floor underneath to catch any drips.
For a display of dry pictures, a clothesline strung along the wall works well. Small, decorative “clothespins” are available at hobby shops, which look more attractive than the plain variety.
Your children are sure to enjoy the feel of cool paint squishing between their fingers. And the finished product can be a lasting, pleasant reminder of the experience!
-
Share
-
Email
90,000 project for children 3-4 years old using non-traditional drawing techniques “We Pitter drawings”
9000 9000 9000 9000 9000 9000 9000 9000 9000 9000 9000 9000 9000 9000 9000 9000 9000 9000 9000 9000 9000 9000 9000 9000 9000 9000 9000 9000 9000 9000 9000 9000 9000 9000 9000 9000 9000 9000 9000 9000
9000 9000 9009 9000
tasks of pedagogical theory and practice at the present stage. Most
Most
an effective means of solving it is the visual activity of children in
kindergarten.
Drawing is one of the most important means of learning
world and the development of knowledge of aesthetic perception, as it is associated with
independent, practical and creative activity of the child. Lessons
activities contribute to the development of creativity, imagination,
observation, artistic thinking and memory of children.
However, children of primary preschool age do not yet
graphic skills and abilities are formed, which prevents them from expressing in drawings
conceived, so the drawings of children often turn out to be unrecognizable, far from
reality. And, as a result, many children lose the desire to draw.
Non-traditional display methods
allows you to diversify the child’s abilities in drawing, arouse interest in
study of the visual possibilities of materials, and, as a result,
increase interest in visual activity in general. “You can portray
various materials, based on a variety of materials.
No
boundaries, there must be a desire and creativity of the child himself ”(R. G. Kazakova, T. I.
Saiganova, E. M. Sedova, V. Yu. Sleptsova, T. V. Smagina (2004) ; K. K. Utrobina,
G. F. Utrobin (2001) .
Application
non-traditional drawing techniques creates an atmosphere of ease,
looseness, contribute to the development of initiative, independence of children,
allows the child to move away from the subject image, to express his own ideas in the drawing.
feelings and emotions, inspires the child’s confidence in his abilities, creates
emotionally positive attitude to activity. Owning different ways
images of the object, the child gets the opportunity to choose what develops
creative abilities of a preschooler.
Organization of educational activities for
artistic creativity using non-traditional drawing techniques
promotes development:
Approximate research
activities, preschoolers. The child is given the opportunity
experimentation (mixing paint with soap suds, paste, applying
gouache or watercolor on natural materials, etc.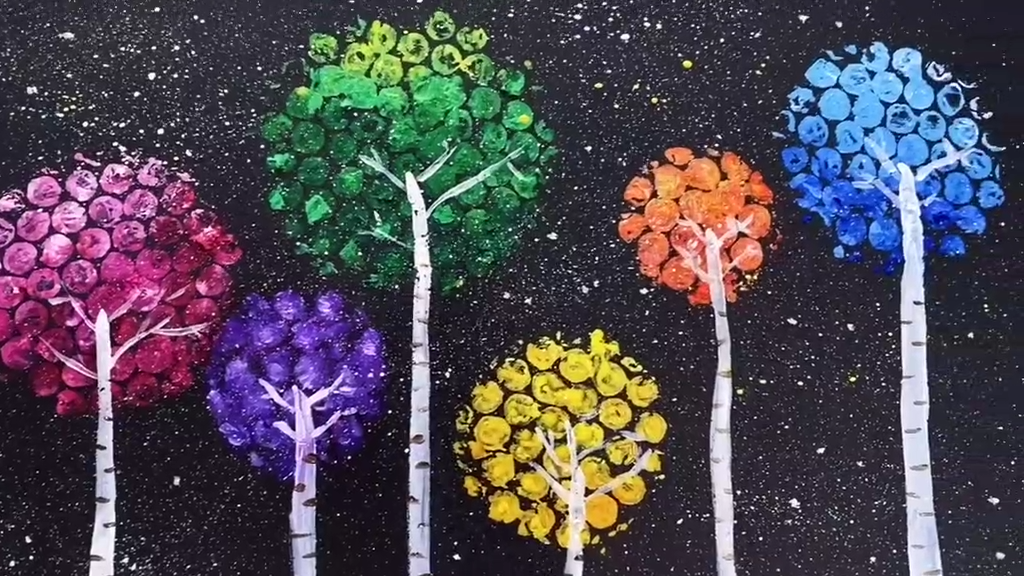 ).
).
petty
motor skills of the fingers, which positively affects the development of the speech cortex
brain.
Mental
processes (imagination, perception, attention, visual memory, thinking)
Tactile
sensitivity (with direct contact of the fingers with the paint, children
know its properties: density, hardness, viscosity);
Cognitive and communicative
skills. Everything unusual attracts the attention of children, makes them wonder. Guys
begin to ask questions to the teacher, to each other, enrichment occurs and
dictionary activation.
Non-traditional drawing based on creative
fantasy, it is interesting that the drawings of all children are different. It
attracts with its simplicity and accessibility, reveals the possibility of using
familiar objects as art materials. And most importantly,
that non-traditional drawing plays an important role in the overall mental development
child. After all, the main thing is not the final product – a drawing or a craft, but
personal development: the formation of self-confidence, in their abilities.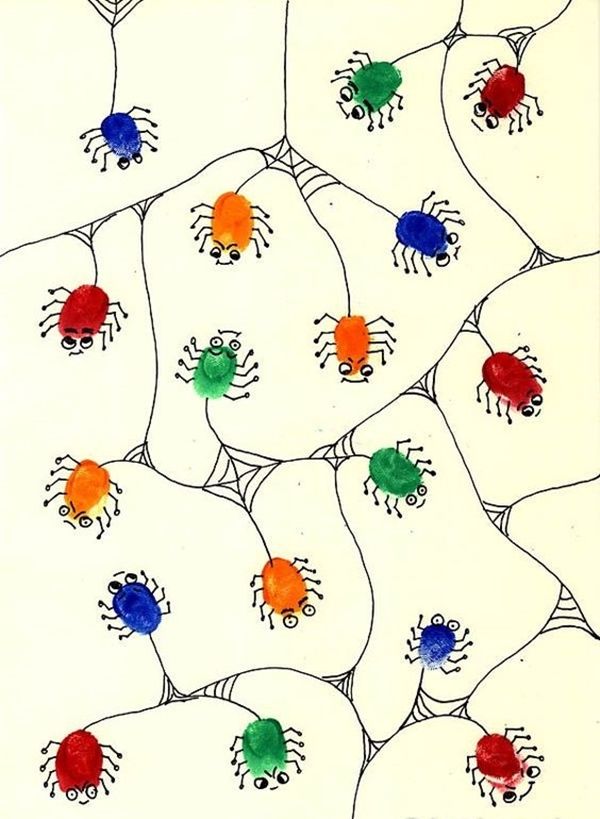
In order for children to engage in creative practice,
some adult guidance is needed. Therefore, in the project
I focus on working with parents. It is important to reveal in time
parents of the ability of each child and give appropriate recommendations,
which help them to develop the creative abilities of their
children.
PASSPORT
PROJECT
View
project: creative
Duration
project: Long-term
Timing
and stages of project implementation: September 2015 – May 2016
I
stage – preparatory:
1.
Study and analysis of research, methodological literature, Internet –
resources on the issue; selection of software and methodological support for
this issue; visual and demonstration, handout material.
2.
Development of the content of the project: “Non-traditional ways of drawing for kids.”
3.
Planning for future activities aimed at the implementation of the project.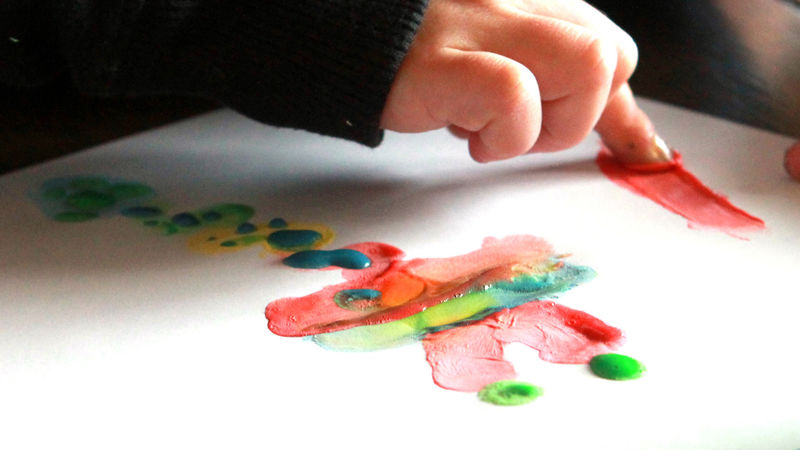
II
stage – main:
1.
Creating conditions conducive to stimulating the development of creative
abilities of young children.
2.
Formation of skills of artistic activity of children of primary preschool
age, organization of joint activities of the teacher, children and parents.
III
stage – final:
1.
Project presentation.
2.
Develop “Guidelines” for the use of non-traditional techniques
drawing with preschool children.
Members
project: educators, parents, children of primary preschool age.
Products of project activities: Drawings,
Exhibitions.
Final project event: Wall newspaper,
presentation.
Project goal: Development
artistic and creative abilities of children of primary preschool age
through the use of non-traditional drawing techniques.
Project objectives:
Meet
children of primary preschool age with non-traditional ways of drawing,
develop an interest in visual arts.
Promote
mastering preschoolers with the simplest technical methods of working with various
visual materials.
encourage
pupils independently apply non-traditional drawing techniques (drawing
fingers and palm, drawing with an imprint of potatoes, etc.).
promote
familiarizing parents with non-traditional drawing techniques; stimulate them
co-creation with children.
Expected end results of the project:
formation
in children of primary preschool age of knowledge about non-traditional methods
drawing;
possession
preschoolers with the simplest technical methods of working with various
visual materials;
skill
pupils independently apply non-traditional drawing techniques;
promotion
professional level and pedagogical competence of preschool teachers in
the formation of artistic and creative abilities of children of primary preschool
age through the use of non-traditional drawing techniques;
promotion
the competence of the parents of pupils in the issue of drawing using
non-traditional technique, active participation of parents in joint creative
projects.
Molds
project implementation:
Forms of work with children: creating a game situation,
pronunciation of the sequence of work, observations, conversations with consideration
pictures, reading fiction, organized activities.
STAGES
PROJECT IMPLEMENTATION
of this age technique: drawing with fingers and palms. Then gradually
introduced new techniques: drawing with cotton swabs, poke, imprint (stamp)
styrofoam, sponge painting, stencil, wet painting, painting
wrinkled paper, monotype, splashing, drawing with a pipette. In addition, scientists
believe that at this age children can be introduced to blotography and
nitcography.
At the first lessons on each technique, I set the task
acquaintance of children with the features of this technique, only in the following classes
any images or plots were created (“A Christmas tree was born in the forest”, “Caterpillar”,
“They sewed a sundress for Tanya,” etc.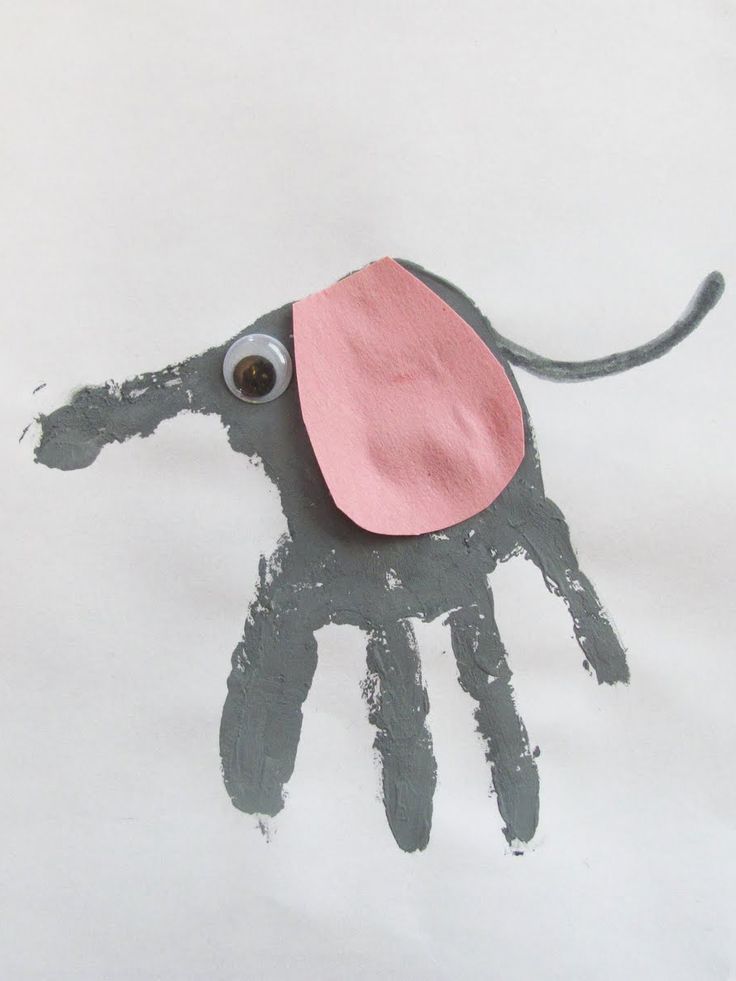 ). Due to the peculiarities of early age,
each lesson used a game technique, an artistic word, finger
games, physical education, outdoor games, music playback.
I made the following lesson plan:
September
drawing
fingers
1. Colored
fingers
2. Berries on
plate
3. Made for Tanya
sundress
4. Multicolored
balls
October
drawing
fingers
1. Rain,
more rain…
2. Leaves
yellow flying
3. Underwater
kingdom
4. Cockerel,
cockerel…
November
drawing
palms
1. Colored
palms
2. Semi-flowered flower
3. Hedgehog
4. Bear
clubfoot
december
drawing
cotton buds
1. Peas
for cockerel
2. It is snowing
3. Pattern on
handkerchief
4. In the forest
Christmas tree was born
January
poke
1. Here is winter all around
2. It is snowing
3. Chicks
4. Beads for
Katy
February
imprint
(stamp) foam
1. Cubes for
Vani
2. Balls
3. Towers
4. Caterpillar
March
imprint
(stamp) foam
1. Dress for
Katyusha
2. drawing
sponge
3. Hide
bunny
drawing
stenciled
1. Funny
animals
drawing
wet
2. Sunny
April
drawing
wrinkled paper
1. Birch trees
2. Dandelions
3. Hedgehog
monotype
4 Air.
balls
may
spray
1. Fireworks
2. stars
in heaven
3. drawing
pipette
4. It’s raining
5. Fly agaric
I wrote a consultation for parents: “The meaning
drawing in non-traditional ways”, “Non-traditional drawing techniques”.
9000 9000 9000 9000 9000 9000 9000 9000 9000 9000 9000 9000 9000 9000 9000 9000 9000 9000 9000 9000 9000 9000 9000 9000 9000 9000 9000 9000 9000 9000 9000 9000 9000 9000
002
CONCLUSION
9006 906 906 directional paint project
creative imagination in children of primary preschool age through
using non-traditional drawing techniques.
Fine
activity is perhaps the most interesting type of activity
preschoolers. It allows the child to express his impressions in his drawings.
about the world around him. However, visual activity
invaluable for the comprehensive development of children, disclosure and enrichment
his creative abilities. An unconventional approach to imaging
gives impetus to the development of children’s intelligence, encourages creative activity
child, teaches to think outside the box. An important condition for the development of the child –
original task, the very wording of which becomes an incentive to
creativity.
Children are very attracted to non-traditional materials than
the more diverse the art materials, the more interesting it is to work with them … Therefore,
familiarization of preschoolers with non-traditional drawing techniques allows not
just to increase children’s interest in fine arts, but also conducive to
development of creative imagination.
B
at present, the guys master many non-traditional techniques: drawing with fingers,
drawing with palms, prints with cork, seals from vegetables and others. To kids
I really like the variety of techniques, children’s work has become more interesting,
varied.
ИСПОЛЬЗУЕМАЯ
REFERENCES
1. Davydova G. N. Non-traditional
drawing techniques in kindergarten. Part I, II – M.; “Scriptorium Publishing House
2003, 2007
2. D’chenko O. M.
The development of the imagination of a preschooler. Methodological guide for educators and
parents. – M.; Mosaic-Synthesis, 2008
3. Komarova T. S.
Teaching preschoolers the technique of drawing. – M.; Pedagogical Society of Russia,
2005
4. Nikitina A.V.
Non-traditional drawing techniques in kindergarten. Planning, notes
classes: A guide for educators and concerned parents. – St. Petersburg. ; KARO,
2008
5. Drawing with
preschool children: Non-traditional techniques, planning, notes
classes / Ed. R. G. Kazakova. – M. : TC Sphere, 2005.
6.Einon D.
Creative play: from birth to 10 years. – M., 1995.
7. Koldina D.N.
Game activities with children 3-4 years old. – M., 2010.
8. Drawing with
preschool children: non-traditional techniques, planning, notes
classes / Ed. R.G. Kazakova. – M., 2007.
9. Belkina V.N. and
etc. Preschooler: learning and development. – Yaroslavl, 1998.
10. Yanushko E.A.
Drawing with young children. – M., 2010.
11. Lykova I.A.
Visual activity in kindergarten. Junior group. – M., 2010.
12. Akunenok T.S.
Use of non-traditional drawing techniques in preschool educational institutions // Preschool
education. – 2010. – No. 18
13. Shklyarova O.V.
Draw in an unconventional form // Preschool education. – 1995. – No. 11
14. Yurkova N.
Drawing with soap foam, colored sawdust, on self-adhesive film // Obruch.
– 1999. – No. 2
15. Lebedeva E.N.
The use of non-traditional techniques [Electronic resource]
Non-traditional drawing techniques | Creative projects and student work
There are many non-traditional drawing techniques, which are unusual in that they allow children to quickly achieve the desired result. Non-traditional ways of depicting… How many of them? It’s useless to count them. New or forgotten non-traditional ways keep popping up and popping up.
We offer to get acquainted with some non-traditional drawing techniques .
Drawing technique “LINE DRAWING”
Material: pencil, marker, paper
Progress:
Try to draw an object without lifting the pencil or marker from the paper. That’s where the imagination works!
And you can close your eyes and draw chaotically different continuous lines to the music, then see what happened, what to look like and color it.
Drawing technique “MAGIC THREAD”
Material: thread No. 10, rope, gouache of different colors.
Work progress:
1st method
Soak one, two, three threads with paints. Spread the threads on a sheet of paper and cover with another sheet so that the ends of the threads are visible. Pull one thread, then another, third, and hold the top sheet with your hand. It turned out fantastic, space, maybe our mood? Try it, you will get so much joy!
Method 2
Fold the album sheet in half. Dip the thread into the paint, and then randomly spread it on one side of the sheet, cover the other on top and press it with your hand. Open, remove the thread, examine the resulting image. As needed, draw to the final result.
3rd method
Dip the rope into the paint, and then lay it out in a ring or in any other way on a sheet of paper. Top with another sheet and press down with the palm of your hand.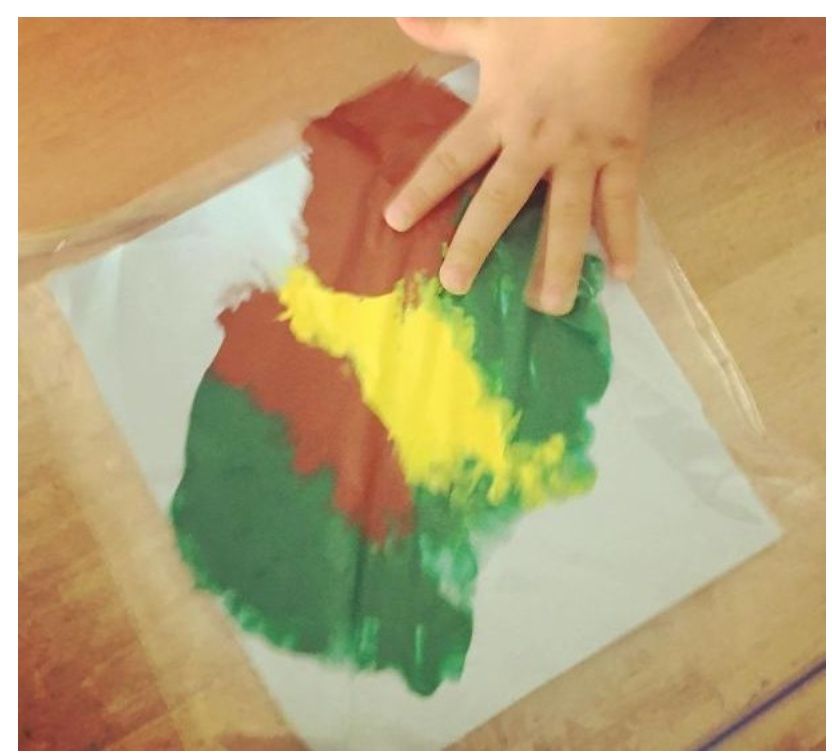 Open, remove the rope and look at the resulting image, finish drawing.
4th method
Wrap the rope around the cylinder. Make a crisscross pattern, first put the rope up, then down the entire length of the cylinder. Soak up the paint on the rope. Then press the cylinder against the bottom edge of the paper. Pressing tightly, you want it from yourself. A rope pattern will appear on the sheet.
Drawing technique “MONOTYPE”
Material: paint, brush, paper.
Workflow:
Fold the paper in half. On one side, closer to the center, apply a few bright colored spots with a brush.
Now quickly fold the sheet along the same fold and iron it well with the palm of your hand. Open it up and take a look: what happened? Fairy flowers? Bug? No, it’s a beautiful butterfly!
Splatter painting technique
Material: old toothbrushes, gouache, paper, herbarium, silhouettes.
Workflow:
A little paint picks up on the tip of the brush. Tilt the brush over a sheet of paper, and run a cardboard or comb over the pile. Splashes will scatter on a clean sheet. So you can depict the starry sky, fireworks.
You can also cut out any silhouette and place it on a sheet of paper and spray paint. Then remove the silhouette and you will have a trace, it can be supplemented, I paint on the missing lines with a brush.
Drawing technique “SOAP FOAM DRAWING”
Material: Plexiglas, watercolors, foam sponge, soap, shampoo, cocktail tube, paper, pencil, brush.
Work progress:
1st method
We lather the foam sponge and squeeze the foam out of it into a plate. Draw a line on a piece of paper with a pencil. On a pencil drawing (you can use coloring), we impose clean plexiglass. With soap foam, we will paint on the glass a drawing that lies under the glass. We take the foam with a brush and lower it into the watercolor paint of the desired color.
Stir until the foam turns into the desired color. We draw with colored foam on the glass, let it dry. Lightly moisten a clean sheet of paper with water and put it on the glass with the wet side, press it, then tear it off the glass. All is ready!
2nd method
Add shampoo to the jar with liquid paint, mix well. We lower the tube into the jar and blow until bubbles rise on top. Then we lower the sheet of paper, then slightly press and lift it up. For work, you can use paper of different sizes, colors, you can superimpose one soap pattern on another, paint on, cut out, make applications.
Technique
“DRAWING WITH CANDLE OR WAX CRAIN”
Material: Candle, paper, brush, paints.
Progress:
1. Translation – Place a drawn outline drawing under a thin landscape sheet. Circle the top with a candle, then apply paint.
2. Friction – place a clearly defined relief pattern under thin paper, rub the top sheet of paper with a candle and apply paint.
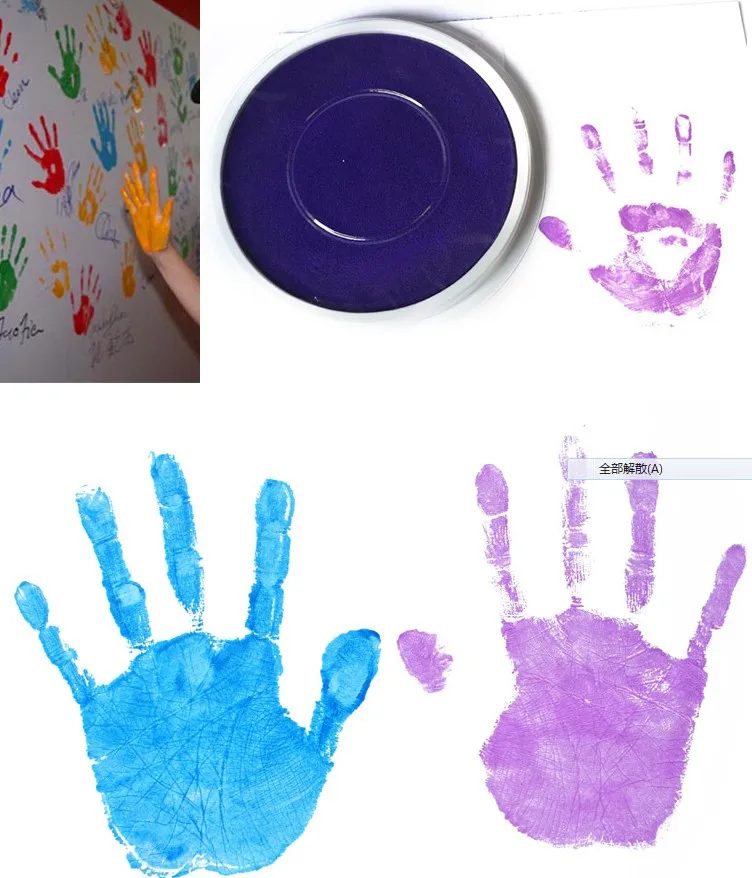
Drawing technique “FINGERS – PALETTE. PRINTING FROM HAND”
Material: paint, plates, paper
Move it from side to side so that the paint is well smeared on the hand. Attach the side of the fist to a sheet of paper and lift it up. Make some prints. The paint can also be applied with a brush.
You can draw with the whole palm, thumb, little finger tip, bent finger, bent finger joint of the side of the little finger and palm, bent fingers into a fist, fingertips.
SIGNET painting technique
Material: seals, paint paper, plates, sponge pad.
Progress:
This technique allows you to repeatedly depict the same object, composing different compositions from its prints, decorating invitation cards, postcards, napkins, scarves, etc. with them.
Signets are easy to make by yourself: you just need to take an eraser, draw a design on the end and cut off everything unnecessary. ” Signet » ready! You can use various paints, corks, sandboxes, etc. Now press the signet to the ink pad, and then to the sheet of paper.
The print is even and crisp. Compose any composition!
Drawing technique “STAMPS”
It is very easy and affordable to make plasticine dies. Apply an even layer of plasticine on a wooden or plastic block, a cube, a detail from a children’s designer. With the help of any sharp object, draw on it some object or an abstract pattern. The stamp is ready! Stamps can be made from any material at hand.
Drawing technique “BLOCK GRAPHY. STRAW DRAWING”
Material: straw for cocktails, paint brushes, water.
Progress of work:
1st method
Let’s put a large blot (liquid paint) on a sheet of paper and carefully blow on the drop .