


Explaining patterns to preschoolers: Teaching patterns to infants and toddlers
Teaching patterns to infants and toddlers
Tracy Trautner, Michigan State University Extension -
Pattern activities can easily be implemented into the day in natural ways with children.
Children love to find patterns in the world around them. Patterns help children understand change and that things happen over time. Patterns are things that repeat in a logical way, like vertical stripes on a sweater. They can be numbers, images or shapes. For example, a pattern can be made out of plastic animals alternating between two and four legged animals or animals that swim versus animals that fly.
Patterns help children make predictions because they begin to understand what comes next. They also help children learn how to make logical connections and use reasoning skills. Patterns can be found everywhere in our daily lives and should be pointed out to small children. “The sun came up and went down and then the moon came up and went down.”
Do not underestimate what a child is capable of learning in all academic areas including math. Toddlers can act out patterns such as jumping to the left, then right, then left and then right. They can observe repeating patterns like a block standing, block lying flat, block standing, block lying flat, etc. They become able to copy simple repeating patterns, such as green, white, green, white and so on. Eventually, they will be able to make their own simple patterns.
Michigan State University Extension provides the following ideas to extend exposure to patterns with young children:
- Use math talk: “Let’s clap to the beat of this song.” “Your sweater has stripes. Red, blue, red, blue, red, blue…”
- Read books and sing songs and lullabies with words and phrases that repeat.
- Have a consistent routine.
- Describe what you see the child doing. “I put the blocks in the pail; you dumped them out; I put blocks in; you dumped them out.
 ”
”
 ”
”Books that teach patterns:
- “Ten Little Rabbits” by Virginai Grossman
- “Max Found Two Sticks” by Brian Pinkney
- “Close, Closer, Closest” by Shelly Rotner
- “Nature’s Paintbrush: The Patterns and Colors Around You” by Susan Stockdale
Other resources from the National Association for the Education of Young Children:
- 10 Things to Know About Math
- Support Math Readiness Through Math Talk
- Helping Your Child See and Show Mathematical Ideas
This article was published by Michigan State University Extension. For more information, visit https://extension.msu.edu. To have a digest of information delivered straight to your email inbox, visit https://extension.msu.edu/newsletters. To contact an expert in your area, visit https://extension.msu.edu/experts, or call 888-MSUE4MI (888-678-3464).
Did you find this article useful?
Other Articles in this Series
Simple ways to teach patterns to preschoolers
PSPKK123October 5, 2014 • 31 Comments
This post contains affiliate links.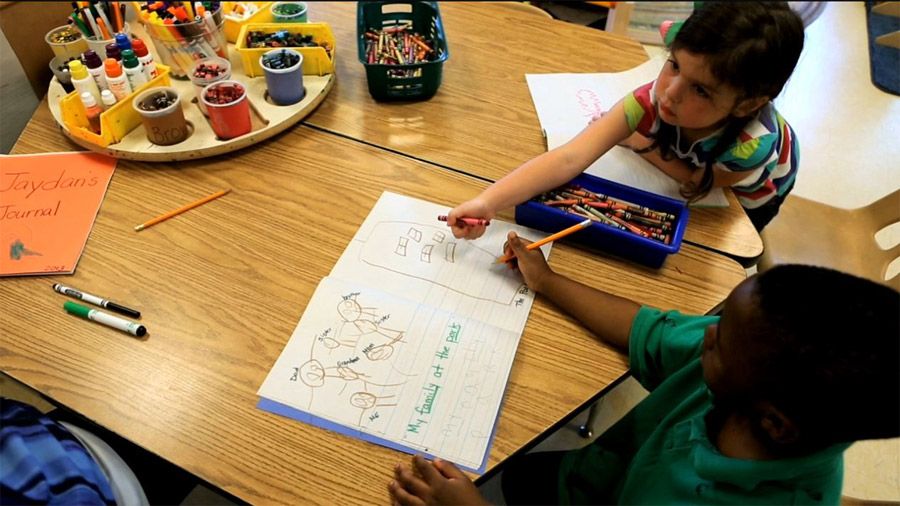 As an Amazon Associate I earn from qualifying purchases.
Sharing is caring!
-
Facebook
-
Twitter
Looking for some fun ways to teach patterns? Today I’m sharing a big variety!
(This post contains affiliate links.)
Basic math skills in preschool and kindergarten set the foundation for learning more advanced math concepts later on. Patterning is one of those important early skills. Thankfully, patterns are easy and fun to teach!
How do we teach patterns? We can notice them, hear them, and physically make them. Here’s a simple progression you might want to use when you teach patterns:
- ABAB (red, blue, red, blue)
- ABC (car, truck, plane, car, truck, plane)
- AABB (crayon, crayon, pencil, pencil, crayon, crayon, pencil, pencil)
- AAB (Cheerio, Cheerio, raisin, Cheerio, Cheerio, raisin)
- ABB (stomp, clap, clap, stomp, clap clap)
Read on for 15 simple ways to teach your early learner about patterns. At the end of the post you’ll find a variety of free printables as well!
Simple ways to teach patterns
1. Notice a pattern on your child’s clothing. “Look, you have on stripes today! Red, blue, red, blue.”
2. Make a pattern with toys. We love to make patterns with Duplos. Making patterns with toy vehicles is fun too.
3. Make a pattern by doing something. “Let’s make a pattern with how we move. Jump. Step. Jump. Step.”
4. Make a sound pattern with rhythm instruments. BANG, tap, tap, BANG, tap, tap. Start out by making a pattern and having your child copy you.
5. Get out a colored manipulative and make patterns. We like to use color tiles, counting bears, and pattern blocks. You could also put pom poms in an ice cube tray.
6. Make patterns with stickers.
7. Save lids and make a variety of patterns.
8. Create patterns with objects you find in nature.
9. You can make a pattern with everyday household objects.
- Pen, pencil, pen, pencil.
- Fork, knife, spoon, fork, knife spoon.
- Big book, small book, big book, small book.
10. Have your child make her own patterns using stamps and washable ink pads.
11. Draw simple patterns using crayons.
12. Make patterns by sliding balls of play dough onto skewers.
13. Use coins to make patterns.
14. Notice patterns you see everyday. Have your child find the tile in your bathroom floor, the pattern in your backyard gate, or the pattern in the picture frame on his wall. Pretty soon he’ll be finding patterns to show you!
15. Here’s a fun one – make patterns using snack food. Pretzel, cracker, raisin, raisin. Pretzel, cracker, raisin, raisin.
Free printables for teaching patterns
I’ve shared counting bear pattern strips.
My truck pattern strips are one of the first printables I shared at The Measured Mom.
Print these coin pattern strips.
DO YOU HAVE OUR PRESCHOOL MATH CURRICULUM?
$24.00
This curriculum contains a wide selection of no-prep/no worry math activities for our youngest learners!
LEARN MORE HERE
Free Math Printables for Pre-K-3rd Grade
Join our email list and get this sample pack of time-saving resources from our membership site! You’ll get printables for counting, addition and subtraction, measuring, problem solving, and more!
Sharing is caring!
-
Facebook
-
Twitter
Filed Under: Colors, shapes & patterns, Math Tagged With: Pre-K, patterns, preschool, kindergarten
You May Also Enjoy These Posts:
Writing Letter J
Why play dough is important
Reader Interactions
Trackbacks
Non-traditional painting techniques | Luchik Educational Center
Each child, learning about the world around him, tries to reflect it in his activities: in the game, in stories, in drawing, in modeling, etc. Excellent opportunities in this regard are pictorial creative activity. The more diverse the conditions conducive to the formation of a creative environment, the brighter the artistic abilities of the child will manifest themselves.
Drawing with non-traditional techniques opens up a wide scope for children’s imagination, gives the child the opportunity to get carried away with creativity, develop imagination, show independence and initiative, and express their individuality.
Unconventional painting techniques are a great way to create small masterpieces. It turns out that you can create a salty picture, and the palm can turn into a blue elephant. A gray blot can become a tree, and carrots and potatoes can surprise with unusual patterns.
For example, with children of primary preschool age, you can use:
- finger painting;
- hand painting;
- thread printing;
- potato or carrot stamp.
You can try with children of middle preschool age:
- picture prints;
- plasticine printing;
- oil pastel + watercolor;
- leaf impressions;
- hand drawings;
- drawing with cotton swabs;
- magic strings;
- monotype.

And with children of older preschool age, you can master more complex techniques:
- painting with soap bubbles;
- drawing with crumpled paper;
- salt painting;
- inkblotography;
- plasticineography;
- scraping;
- frottage.
Each of these unconventional techniques is a little game for a child. The use of these techniques allows children to feel more relaxed, bolder, more spontaneous. These techniques develop the imagination, give complete freedom for self-expression.
Drawing funny prints
1. Plasticine dies
It is very easy and convenient to make plasticine dies. It is enough to give a piece of plasticine the desired shape, decorate with patterns (lines, spots) and paint in the desired color. For staining, you can use a sponge moistened with paint, or a brush that can apply paint to the surface of the die. It is better to use thick paint.
Materials: 1. Plasticine; 2.Pencil; 3. Paint; 4.Sponge; 5.Brush; 6.Paper; 7.Jar for water.
2. Thread dies
To create “striped dies” you can use threads that are firmly wound around an object. With a thick layer of paint, the threads are dyed in the desired color. Then, using imagination, the “striped pattern” is applied to the surface to be decorated.
Materials: 1. Wool thread; 2. Base; 3. Paint; 4.Brush; 5.Paper; 6.Jar for water.
3. Printed pictures
It is possible to make prints using foam molds, which are convenient for drawing with a pointed object, leaving indentations in the mold. Then paint must be applied to the form. Immediately a sheet of paper is applied over the form, ironed. After a while, you need to carefully remove the sheet of paper. A beautiful pattern will appear on its back.
Materials: 1. Foam mold; 2.Pencil; 3. Paint; 4.Brush; 5.Paper; 6. Jar for water.
4. Leaf prints
This technique is familiar to many. To print a sheet, you can use any paint. Apply paint to the veined side. Then the painted side of the sheet is applied to the paper, ironed. After a few seconds, gently lift the sheet. The imprint of the leaf will remain on the sheet of paper.
Materials: 1. Leaf; 2. Paint; 3.Brush; 4.Paper; 5.Jar for water.
5. Potato, carrot, apple prints
Delicious vegetables and fruits can also draw. It is only necessary to give them the desired shape, choose the right color of paint, paint with a brush and make a beautiful print on the surface to be decorated.
Materials: 1. Vegetable/fruit; 2. Paint; 3.Brush; 4.Paper; 5.Jar for water.
Hand painting
1. Draw with palms
It is very interesting and exciting to draw with colored palms. It is very pleasant and unusual to paint your pens with bright colors and leave your prints on a piece of paper. Hand painting is a fun game for little artists.
Materials: 1. Finger paints; 2.Paper; 3.Brush; 4.Jar for water.
2. Draw with fingers
You can also draw with your fingers, leaving multi-colored prints on paper.
Materials: 1. Finger paints; 2.Paper; 3.Pencil/Felt pen; 4.Jar for water.
Bubble painting
You can also draw with soap bubbles. To do this, add any soap solution and paint to a glass of water. Use a straw to slurp a lot of foam. Place paper over the bubbles. When the first patterns begin to appear, you can lift the paper. Bubble patterns are ready.
Materials: 1. Glass of water; 2. Paint; 3. Soap solution; 4.Tubule; 5. Paper.
Salt painting
Salt gives the pattern whimsical patterns. When depicting any landscape or bright background, you can use salt to give the background of the picture a beautiful texture. The background must be sprinkled with salt while the paint is still wet. When the paint dries, just shake off the remaining salt. Unusual light spots will remain in their place.
Materials: 1. Salt; 2. Paint; 3.Brush; 4.Paper; 5.Jar for water.
Crumpled paper drawing
A crumpled napkin or piece of paper also allows you to get an interesting texture. There are two ways to draw with crumpled paper.
Method #1 Liquid paint is applied to a sheet of paper. After a short period of time (while the sheet is still wet), a crumpled napkin is applied to the sheet. Absorbing moisture, the napkin leaves its characteristic mark on the surface of the paper.
Method No. 2 First you need to crumple the sheet or napkin. Apply a coat of paint to this lump. The painted side can then be printed.
Texture sheets can then be successfully used to create collages.
Materials: 1. Napkin/Paper; 2. Paint; 3.Brush; 4.Jar for water.
Oil pastels and watercolors
Technique for drawing “magic” pictures using white oil pastels. Any “invisible” pattern is drawn on white paper with white pastel. But as soon as the brush and paint begin to decorate the white sheet, then … children will feel like real magicians when magic pictures begin to appear under their brushes.
Materials: 1. White oil pastel; 2.Watercolor; 3.Brush; 4.Paper; 5.Jar for water.
Monotype
Monotype technique from Greek. “mono” – one and “typos” – imprint, imprint, touch, image.
This is a drawing technique using a unique print. Only one print is obtained and it is impossible to create two absolutely identical works.
There are two types of monotype.
1. Monotype on glass
A layer of gouache paint is applied to a smooth surface (glass, plastic board, film). Then a drawing is created with a finger or a cotton swab. A sheet of paper is placed on top and pressed against the surface. The result is a mirror image.
Materials: 1.Smooth surface; 2. Gouache; 3.Brush; 4.Paper; 5.Jar for water.
2. Subject monotype
A piece of paper needs to be folded in half. Inside, on one half, draw something with paints. Then fold the sheet and iron it with your hand to get a symmetrical print.
Materials: 1. Paint; 2.Brush; 3.Paper; 4.Jar for water.
Inkblotography
Non-traditional drawing technique “blotography” (blowing with a tube) is another magic of creative activities. Such an activity for children is very exciting, interesting and very useful.
Just like blowing through a straw improves health: the strength of the lungs and the respiratory system of the child as a whole.
To create a magical picture, you will need a large blot, which you need to blow, blow, blow … until an intricate drawing appears on a piece of paper. When a strange drawing is ready, you can paint on details: leaves, if you get a tree; eyes, if it turned out a magical creature.
Materials: 1. Watercolor; 2.Tubule; 3.Brush; 4.Paper; 5.Jar for water.
Thread print
Drawing techniques using “magic thread”. It is necessary to lower the threads into the paint so that they are well saturated with paint. Then they need to be put on paper so that the ends of the thread 5-10cm protrude from both sides of the sheet of paper. The threads are covered with another sheet of paper. The top sheet is held by hand. Threads are bred in different directions. The top sheet rises. An unusual picture is ready.
Materials: 1. Thread; 2. Paint; 3.Paper; 4.Jar for water.
Cotton swab drawing
In the visual arts, there is a stylistic direction in painting, which is called “Pointillism” (from the French point – point). It is based on the manner of writing with separate strokes of a dotted or rectangular shape.
The principle of this technique is simple: the child paints the picture with dots. To do this, dip a cotton swab into the paint and put dots on the drawing, the outline of which has already been drawn.
Materials: 1. Cotton swabs; 2. Paint; 3.Paper; 4.Jar for water.
Grattyzh “TSAP-TSARAP”
The word “grattage” comes from the French “gratter” (scrape, scratch).
To start working in this technique, you need to prepare the cardboard. Cardboard must be covered with a thick layer of wax or multi-colored oil pastels. Then, with a wide brush or sponge, you need to apply a dark layer of paint to the surface of the cardboard. When the paint dries, the drawing is scratched with a sharp object (toothpick, knitting needle). Thin monochromatic or multi-colored strokes appear on a dark background.
Materials: 1. Cardboard; 2. Oil pastel; 3. Gouache; 4.Toothpick/Knitting needle; 5.Brush; 6.Jar for water.
Frottage
The name of this technique comes from the French word “frottage” (rubbing).
To draw in this technique, you will need a sheet of paper, which is located on a flat relief object. Then, on the surface of the paper, you need to start hatching with an unsharpened colored or simple pencil. The result is an impression imitating the main texture.
Materials: 1. Flat embossed object; 2.Pencil; 3. Paper.
Plasticineography
A technique that uses plasticine to create paintings of semi-volumetric objects on a horizontal surface. For the surface (base) thick paper, cardboard, wood are used. To decorate the image, you can use beads, beads, natural materials and more.
Materials: 1. Plasticine; 2. Base; 3.Beads/Beads; 4. Stacks.
Author: Popko Maria Stepanovna
Teacher of visual activity of the kindergarten “Luchik” on Ostozhenka
Summary of the lesson in art for the development of the abilities of preschoolers “Frosty Patterns”
Summary of the lesson of visual activity “Frosty Patterns”
Objectives of the lesson:
–
to natural phenomena in winter;
– help develop the visual aspect, creatively express unusual moments, develop children’s imagination;
– improve the skills of visual activity;
– continue to develop the creative imagination of children.
Materials:
– didactic pictures of winter frost patterns on windows;
– colored or tinted sheet A-4;
– drawing set.
Beforehand, during a walk with a teacher, the children observed the patterns on the windows in winter, experimented with frosty patterns.
Course progress:
Teacher dressed as Santa Claus:
– Hello, guys! I had a misfortune – I lost my assistants, my beautiful patterns disappeared from the windows.
– So that I do not grieve and cry, and winter returns to us, please help me find my patterns, return them to the glass.
-Well, kids, can you help me?
Children: Let’s help, Grandfather Frost! And what needs to be done!
D.M.: First, guess the riddles:
After autumn came.
And snowdrifts.
(Winter)
Riddles about winter for children with answers –
Powdered the paths,
Decorated the windows,
Gave joy to children
And rolled on a sled.
(Winter)
Riddles about winter for children with answers
Snow on the fields,
Ice on the waters,
A blizzard is walking.
When does this happen?
(Winter)
Riddles about winter for children with answers
She opened her snowy arms,
All the trees were dressed in dresses.
The weather is cold.
What season is it?
(Winter)
D.M.: Well done guys! You are so smart and very observant, so you immediately guessed difficult riddles.
– But to return the frosty patterns on the windows, you need to say why you love winter? (children’s answers), for example, you can go sledding, play snowballs.
-It’s obvious that you love winter!
– How do we get the patterns back?
Children: we will draw them!
JM: That’s right! But before we start drawing, let’s take a closer look at the photos of the patterns. (Observation of features on didactic material).
JM: Whoa! Something I got tired while looking for my patterns! Need to play a little to relax and draw frosty patterns!
Dynamic pause.
Hello Zimushka-winter! (bow)
What did you bring as a gift? (we spread our arms to the sides)
Fluffy white snow, (we squat, run our hands over imaginary snow)
Silvery frost (get up, raise our hands up)
Skis, sleds and skates, (imitate the movements of skiers and skaters)
And lights on the Christmas tree! (we raise our hands up, turn the “flashlights”)
D.M.: : Well, we had a rest, and now we will start decorating our windows. It is very simple, you just need to listen and look carefully, try to do the job carefully.
D.M. shows how to hold the brush to draw thin lines and shows different patterns of dots, lines and twigs, circles.
JM: Well, guys, let’s start drawing patterns! You try, and I will help you! (Individual work with preschoolers).
Drawing process.
Demonstration of drawings.
D.