


How to get slime out of kids hair: How to Get Sticky Slime Out of Hair Without a Haircut or Scissors
7 Smart Ways to Get Slime Out of Hair
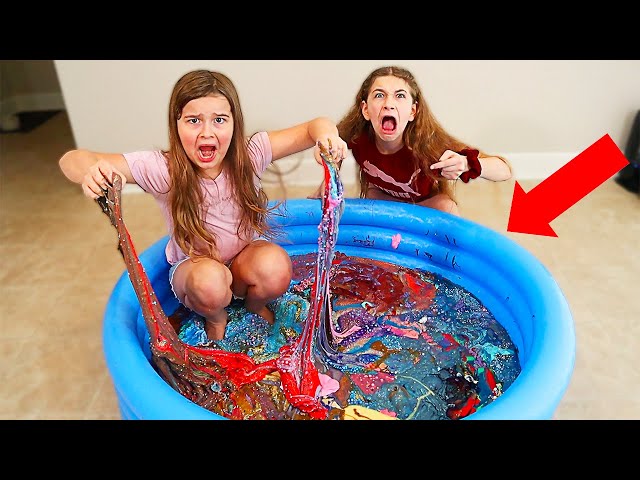
If you have young kids, you have heard all about slime. While slime is fun to make and even more fun to play with, it can also become a parent’s worst nightmare. Even with the closest supervision, slime can go from the table to the hair within seconds.
Once slime gets into your hair, your kid’s hair, or anybody’s hair, it doesn’t seem to want to come out. Don’t panic, though, as there are several ways to remove slime from hair that are not complicated and use items you probably already have at home.
(andrascsontos/123rf.com)
tb1234
tb1234
Table Of Contents
- What is in Slime?
- Remove Slime from Hair with Conditioner
- Getting Slime out of Kids Hair with Oil
- How to Remove Big Globs of Slime
- How to Remove Food Coloring Stains from Hair
- Remove Slime from Hair with Mayo
- How to Get Slime Out of Hair with Peanut Butter
- How to Get Slime Out of Clothes
What is in Slime?
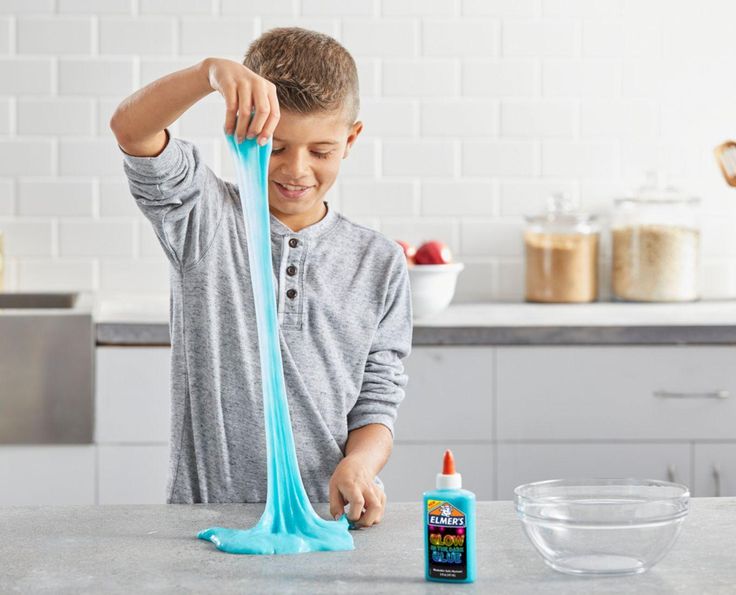
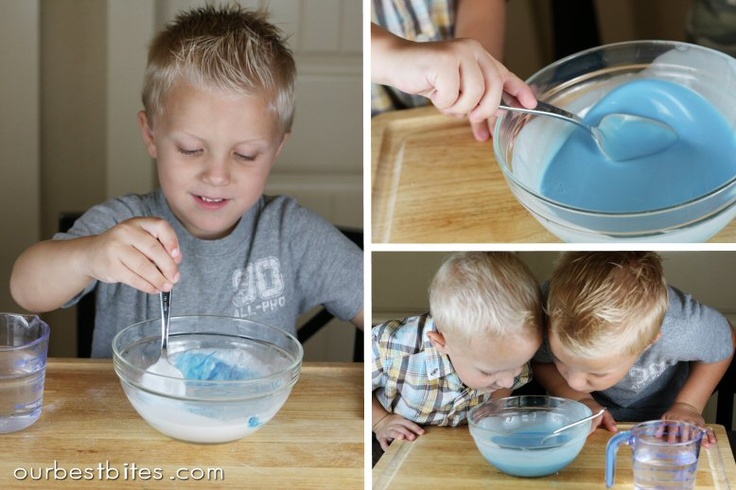
Understanding what is in slime is super helpful when it comes to cleaning it. The majority of slime, including homemade slime, is made from glue, Borax, food coloring, and baking soda.
The Borax and baking soda make it hard to use traditional cleaners to remove slime, while the white glue makes it stick to everything, and the food coloring leaves behind the most colorful stains. Another problem with slime is that it is not water-soluble due to the high oil content.
Think about the greasy oil marks slime leaves behind. Not being water-soluble means you need more than just hot water and dish soap to clean it. Luckily, several bloggers have tackled the subject of the best ways to remove slime from hair, clothes, and everything in between.
Remove Slime from Hair with Conditioner
How to get slime out of hair involves warm water and hair conditioner. According to Crayola, who makes silly putty, conditioner is also the best way to get silly putty out of your hair.
How you can use the warm water to break down the slime will depend on where exactly it is in your hair. If it’s on the ends, you can use a bowl of warm water, while if it’s in the middle or top of the head, you will find it easier to jump into a warm or hot shower.
After soaking the hair in warm water, apply hair conditioner with your fingers. Work the conditioner in from top to bottom.
As you work the conditioner into your hair, use your fingers to break up any slime. The oils in the conditioner will break it down, allowing you to pull it from your hair.
With the water running, massage the slime with your fingers and gently pull away as much as you can. Comb through wet hair to further remove any slime.
Once most of it is gone, rinse out the conditioner and shampoo your hair. Knowing how to wash a synthetic wig can also help in removing goop from the hair there.
Getting Slime out of Kids Hair with Oil
Homemade slime recipes need to start including tips on the best ways to remove slime from hair. Vegetable oil and olive oil can also be used to remove slime or similar products from hair. In addition, when dying your hair, you can rub oil along your hairline to keep the dye from staining your skin.
tb1234
Apply a little of the oil to the slime. Massage the product in using your fingertips, being careful not to tangle the hair.
Gently comb the hair with a fine tooth comb to remove as much of the slime as you can. Jump into a warm shower and shampoo and condition your hair as usual to remove any remaining residue left behind by the product you used.
How to Remove Big Globs of Slime
Big globs of slime can seem impossible to remove, but with a little work, it can be done. Before you use any product to remove the slime, start by removing as much as possible with just your fingers.
tb1234
Vinegar Slime Removal
- Goggles
- 2/3 cup white or apple cider vinegar
- 1/3 cup warm water
tb1234
Have the person wear a pair of goggles while standing inside the shower to prevent the vinegar from getting into their eyes. Make sure the goggle strap is not placed over the area affected by the slime.
Mix water and vinegar in a bowl. Pour some of the diluted vinegar onto the hair and massage with your fingertips to work the vinegar into the slime. Continue applying a small amount of diluted vinegar to the hair until gone.
To remove the residue left behind by the slime, take a warm shower, and apply a small amount of conditioner to the hair. Rinse out the conditioner and then shampoo hair as usual.
How to Remove Food Coloring Stains from Hair
Many homemade slime recipes involve food coloring; after all, who wants to play with white slime? When slime gets in the hair, so does the food coloring. In darker hair, the food coloring isn’t that big of a problem, but in lighter hair, the food coloring is one of the worst slime stains to remove.
One way to remove colored slime stains from light colored hair is with a color stripping shampoo, such as Tresemme. You can also use rubbing alcohol and a paper towel. Soak the paper towel in rubbing alcohol and wipe the hair from top to bottom to avoid tangling.
Remove Slime from Hair with Mayo
One of the quickest ways to remove slime from a kids hair is with mayo and a comb. Grab a handful of mayo and work it into your kid’s hair as you would shampoo. Gently comb out your kid’s hair with a comb or brush.
Make sure you are cleaning hair brushes of slime and mayo after each pass. Wash hair as usual to remove any traces of slime and mayo.
How to Get Slime Out of Hair with Peanut Butter
Peanut butter is one of those lifesaver products that you always want to have on hand. Peanut butter not only removes chewing gum from a person’s hair, but it is also the best way to get silly putty out of your hair as well as slime.
Apply peanut butter to the putty or slime and allow to sit for several minutes. Use your fingers to remove gum, putty, or slime. Shampoo and condition your child’s hair as usual.
How to Get Slime Out of Clothes
Getting gum out of clothes is similar to getting slime out of clothes. First, remove as much excess slime as possible from the clothes. Next, apply a generous amount of dish soap (Dawn works best) to the stain.
Run a steady stream of water and gently rub the fabric together under the water stream. Scrub until the slime stain is gone. Wash the clothes as directed without having to worry about slime chunks spreading to your other clothes.
(andrascsontos/naiyanab/123rf.com)
Thanks for reading our slime cleaning tips. If you found any of our tips on how to get slime out of hair helpful, please take a minute to share the best ways to remove slime from hair with others on Facebook and Pinterest.
How to Get Slime Out of Hair, Using Only Items You Already Have at Home
family
How to Get Slime Out of Hair, Using Only Items You Already Have at Home
By PureWow Editors
Published Sep 13, 2020
Your kids are obsessed with slime and it’s not hard to see why: The ooey, gooey and ridiculously sticky stuff provides endless hours of entertainment for a variety of age groups. Add in the fact that it’s budget-friendly and easy-to-transport, and it’s no wonder that slime consistently ranks as one of the hottest toys of the year. In fact, the only downside is that, well, it’s extremely ooey, gooey and sticky. This means that it’s practically impossible to get out of clothing, upholstery, carpeting and—worst of all—hair. But don’t freak out the next time your toddler decides to see what happens when she rubs the stuff all over her baby brother’s head. Here’s our handy guide on how to get slime out of hair using common household items—none of which are scissors.
How to Get Slime Out of Hair with Shampoo and Conditioner
When it comes to removing slime from hair, start simple with shampoo and conditioner. But there’s a trick to this method: Use conditioner first and then suds up with shampoo. Why? Because most conditioners contain oil, which is exactly what you’ll need to combat all that ooey-gooeyness. Here’s what to do:
1. Rinse hair in warm water.
2. Apply a generous amount of conditioner to slime-soaked strands.
3. Massage the product into the hair and use a fine-tooth comb to gently remove pieces of slime. Wash the comb as you continue to remove the slime.
4. Rinse the conditioner out of the hair.
5. Apply shampoo to hair and create a lather by massaging the product into the scalp.
6. Rinse the shampoo out and dry hair normally.
How to Get Slime Out of Hair with Mayonnaise
Remember what we said earlier about oil being just the thing to combat slime? Well, your favorite sandwich spread just so happens to be loaded with the stuff. It may sound weird but cleaning expert Jolie Kerr swears by the mayo method. (BTW, per the American Academy of Dermatology, using this type of oily substance will also remove that wad of chewing gum from your kid’s hair!) Here’s how it works:
1. Add a couple of spoonfuls of mayonnaise to the affected area.
2. Gently massage the mayo into the hair using your fingertips, going from root to shaft.
3. Use a fine-tooth comb to gently remove pieces of slime, again making sure to clean the comb as you go along.
4. Once most of the slime has been removed, use the conditioner-shampoo method above to remove any leftover sticky stuff. Tip: Use a nice-smelling shampoo and conditioner to nix any lingering odors on your kid’s scalp. (Hey, nobody wants to smell like lunch.)
No mayonnaise in the fridge? You can substitute with peanut butter and use the same method as above. The oil in the PB works in just the same way as mayo and should help coax the slime out of the hair.
How to Get Slime Out of Hair with Oil
You know the drill by now—oil is slime’s mortal enemy and the key to detangling your mini’s tresses. For this method, you can use almost any cooking oil you have lying around, including olive, avocado, canola and vegetable.
1. Gently massage a few spoonfuls of oil into the slimey strands, moving in the direction of hair growth.
2. Once the slime starts to loosen, use a comb to tease it out. Rinse the comb as you brush through the hair.
3. Use the conditioner-shampoo method to remove any remaining slime, then clean hair as usual to get rid of the oily residue.
How to Get Slime Out of Clothes
Your kid was playing with slime and then proceeded to give you a giant hug, smearing the brightly-colored goop all over your favorite sweater. Annoying? Yes, but not a complete disaster. We asked cleaning expert Mary Marlowe Leverette how to get slime out of clothes and her top recommendation was to mix an oxygen-based bleach (such as OxiClean, Nellie’s All Natural Oxygen Brightener or OXO Brite) with cool water and then soak your clothing in the mixture, per product instructions. Once the solution has worked its magic (try to let it soak for at least eight hours), toss the garment in the washing machine for a spin (check the label for care instructions) and it should be good as new, says Leverette. Just make sure you remove any dried slime first with a dull knife or the edge of a credit card and remember that you should never rub a slime stain, since this will push the stuff deeper into the fabric.
One More Thing…
Now that you know how to get that wad of slime out of your kid’s locks and your clothing, may we offer a suggestion for the future? Invest in some non-sticky slime for the playroom. By making your own slime without glue, your kids can have all the fun, without turning your home (or their fresh haircuts) into a sticky mess. Extra bonus: Not all store-bought varieties of glue are non-toxic, so if you’re going the DIY route then eliminating the glue altogether is your safest bet. This recipe only calls for shampoo, food coloring and cornstarch (plus some glitter if you’re feeling bold). Grab some measuring cups and spoons and let your kids get in on the DIY fun. Your finished product should stay damp enough to play with for about five days. When it starts to dry and crack, then it’s time to toss it.
Top 10 Ways to Get Slime Out of Kids’ Hair • The Koala Mom
As a parent of four girls with long hair, I can say that few things are worse than something sticky tangled in a braid or ponytail. Usually, ice cream, lollipops and glue wash out of the girls’ hair with a generous portion of shampoo. Slime, however, is another matter. If your child has been playing with slime and has gotten it somehow tangled into their hair, here’s what you can do to get the slime out of your kid’s hair.
What is slime?
Slime is a mixture of hazardous chemicals like borax, artificial colors, and glue. It’s often marketed as “putty” with different other ingredients added such as minuscule metal beads or glow-in-the-dark paint. It usually has a soft texture and is fun for kids to play with (until it gets dirty or stuck in their hair). If anything, slime is not easy to remove without proper techniques.
It’s also important to note that slime is harmful to your hair. It should be removed as soon as possible. It can lead to early balding, hair damage and hair fall.
Here are the top 10 ways to get slime out of hair.
How to get slime out of kid’s hair
Hair oils
Oils that can be used for hair have excellent repellent properties for the ingredients that make up the slime. They act on the glue present in dirt and start its breakdown so that it gets removed easily. The following steps should be followed for safe removal of slime using oil.
- Take any good quality oil.
- Smear the hair with the oil gently.
- Keep the oil on your hair for thirty minutes. (Have your child read a book or turn on a TV show.)
- Gently comb the hair to get the slime out of it.
Oil is a natural method for cleaning hair and has minimum side effects.
Shampoos and conditioners
Shampoos and conditioners can also be used to remove slime from your child’s hair. If your kid loves having baths, this could be a great option for getting the slime out of their hair.
Start your child’s bath. Wet their hair. Apply the condition first and let it sit for about ten minutes (while they play in the tub). After that, comb your child’s hair gently, which will remove the slime. You may want to start with a wide-tooth comb here or try to work some of the slime out with your fingers.
Then you’ll want to shampoo your child’s hair and apply conditioner again. When your child is done their bath, they should also be slime-free!
Vinegar
Vinegar is a natural killer of gum. It acts on the slime and promotes its easy removal. Here’s how to use vinegar to remove slime from your child’s hair:
- Take a pot and pour some vinegar into it.
- Dilute the vinegar by two times with the help of water.
- Dip the affected area of your hair in it.
- Wash your hair after twenty minutes with a good quality shampoo.
Peanut butter
Peanut butter is another oil found in most pantries that can be used to remove slime from hair. (If your child has a peanut allergy, please don’t use this method.) If you do have peanut butter handy, here’s how to use it to remove slime:
- Scoop some peanut butter into your palm.
- Apply it on the slime and adjacent area.
- Wash the hair after thirty minutes of application to get maximum results.

Mayonnaise
This is another natural method to remove slime from hair. Mayonnaise is thickened oil that may be less messy to apply to hair than other oils. Apply the mayonnaise on the hair and start combing the hair gently for two to three minutes. The mayonnaise acts on the slime and makes it easy to remove from the hair.
Brake cleaner
Brake cleaner is one of the productive agents used for many ages to remove slime from hair. It has antioxidant and bleaching agents, which promote the dissolving of slime. It should be applied in the following way:
- Apply the brake cleaner on the affected area of the hair.
- Wait for twenty minutes.
- Gently comb the area and shampoo your hair immediately after this.
Alcohol
Alcohol is used for ages to remove sticky substances from hair. It has spectacular dissolving properties. It should be used in the following manner to remove slime from hair:
- Spray or pour your slime-affected area with alcohol.
- Start combing your hair gently for about five minutes.
- The slime starts dissolving after two to three minutes.
- Immediately wash your hair with distilled water once the slime disappears.
A research carried out by the American College of Dermatology had found that alcohol is one of the safest and cheapest ways to get rid of slime. It acts on the slime and breaks the bond between its molecules. Knowing that, many other manufacturers mimic the same mechanism that alcohol uses to devise slime-removal solutions. While a product designed to remove slime may be more effective, alcohol is always affordable and simpler to use.
Baking soda
Well, well, well, at this point, you might as well ask is there anything baking soda CAN’T do?
Baking soda is a robust base that acts on the slime ingredients and promotes their pain-free removal. It is essential to use the baking soda in the following manner to get maximum effects:
- Mix one cup of baking soda in water and stir it.
- Dip your hair in the mixture for thirty minutes.
- Once the slime starts shedding off the hair, remove it.
- Wash your hair with shampoo.

Soap and water mixture
Soap is a powerful cleanser of gum and glue. It is a potent base that dissolves the constituents of slime in it. Here’s how you should be used:
- Wash your hair with lukewarm water.
- Apply soap on the hair and wait for fifteen minutes.
- Rub the slime with your hands until it gets removed from the hair.
Haircut
Sometimes, the slime gets so hard that it becomes almost impossible to remove it that none of the above solutions work.
So, instead of getting harder and harder on the hair and damaging its roots, it is advised to cut the affected hair.
What method should you choose?
Many times, parents are worried and confused at the same time about the choice of remedy to get slime out of their kid’s hair. On the safe side, always go with natural methods. They are safe, productive, and have less harmful effects. Next, pick whatever is most convenient. If you don’t have peanut butter in your pantry, try the mayonnaise. An upset kid doesn’t want to wait for you to run to the store to get a certain product to clean their hair.
If the natural methods fail, now it’s your choice whether to use specialized shampoos, conditioners or get a haircut.
Conclusion
Slime may be fun for kids to play with, but it takes no time to get you in a mess. It should be removed as soon as it gets entangled in hair. Different natural and artificial products are available to remove slime from hair. However, many of the products mentioned above can cause havoc if used without proper instructions.
Above all, in case of any allergy after using the above methods, immediately contact your dermatologist.
Do your kids like playing with slime? Have you ever had to get slime out of your kid’s hair?
How To Get Slime Out of Hair Without Cutting It: DIY Guide
Has your child ever gotten slime in their hair? If so, you know that it can be a real pain to get out. The good news is that there are some tricks and tips that will help!
How To Get Slime Out of Hair: Step-by-Step DIY Guide
Hey, you! The parent with the kid who just got slime in their hair. We feel your pain. Hair and slime don’t mix – we all know that.
Yet, through an odd series of events, slime sometimes makes its way into our hair. Regardless of how slime got in there, what’s important is what you do now to get it out.
In this article, we’ll be diving into several methods you can use to get slime out of your kid’s hair.
Table of Contents
- 1 How To Get Slime Out of Hair: Step-by-Step DIY Guide
- 2 Wash It Out Thoroughly with Warm Water
- 3 Use Everyday Oils
- 4 Wash Hair with Peanut Butter
- 5 Use a Diluted Vinegar Rinse
- 6 Freeze it with Ice Cubes
- 6.1 Related Articles
Wash It Out Thoroughly with Warm Water
We’ll start with the most effective slime removal method – washing your hair. No other slime removal method comes close.
You may be tempted to wash your hair like you usually would to remove the slime, but that won’t work very well.
When you have slime in your hair, you’ll need to complete a few extra steps, and we will outline every step for you below:
How to Remove Slime from Hair | Kids Curly Wash Day Routine | BEST METHOD!
Watch this video on YouTube
- Use your hands to remove as much slime from your hair as possible. If you jump in the shower with a ton of slime on your hair, you could clog your pipes. So, with your hands and/or a wet towel, part your hair into sections and remove the excess slime.
- After removing as much slime as you can in the previous step, hop in the shower and turn on the hot water. It’s essential to get the water as hot as you can take it because the heat of the water is what’s going to break down the slime. It also helps to turn the shower on high pressure to blast away some of the gunk as well. Note: Warm water is best for a child’s hair, since burning your child with hot water would be parent’s worst nightmare.
- Now, apply a slippery conditioner to your hair and use it to dislodge the slime. Some people find that they need to use their nails to get the slime out, but that’s not good for the hair. Instead, use a wide-tooth comb to get your hair as detangled as possible, and then use a fine-tooth comb to get the rest of the slime out. Don’t skip the conditioner, because it makes your hair slippery, aiding in the removal of the slime.
- Once you feel that you’ve gotten all the slime out, rinse the conditioner and any leftover slime remnants out of your hair. Use hot water for this step as well.
- Apply shampoo to your hair, paying close attention to your scalp. At the last minute, distribute the shampoo to the ends of your hair and then rinse well.
 Note: Warm water is best for a child’s hair, since burning your child with hot water would be parent’s worst nightmare.
Note: If you don’t have shampoo, dish soap or baking soda are reasonable alternatives. Also, if you haven’t already, we recommend watching the video above by YouTuber – Girls with Da Curls washing slime out of her kid’s hair.
Use Everyday Oils
If you want to get rid of slime from your hair naturally, oil can help. Oil breaks down slime, making it much easier to remove with a comb or your hands.
Chances are you’ve got some type of oil lying around your house somewhere. You can use just about any oil, including olive oil, coconut oil, baby oil, cooking oil, vegetable oil, and other oil-based products.
Here are the steps to follow for this method:
- Dispense a generous amount of oil into the palms of your hands and apply the oil to your hair and scalp. Massage the oil into your hair, making sure that all your strands are coated in the oil.
- Leave the oil on your hair for about 5 to 10 minutes. Within this time, the slime will begin to break down and loosen up.
- Use a wide-tooth comb to get the slime out of your hair. Depending on how much slime you have in your hair, this step may take the most time. Be extremely gentle while removing the slime from your hair, as you don’t want to cause damage to your hair.
- At this point, you can wet your hair thoroughly, apply your conditioner, and gently comb through your hair. For this step, you can use a fine-tooth comb (only if your hair is thoroughly detangled).
- Following the conditioning session, apply shampoo to get any leftover gunk out of your hair. If there’s any left over after the first shampoo session, feel free to shampoo again.
 Be extremely gentle while removing the slime from your hair, as you don’t want to cause damage to your hair.
After completing this process, your hair should be slime-free. However, if it is not, repeat the entire process after a couple of days. Sometimes, it takes several sessions to get all of the slime out.
Wash Hair with Peanut Butter
Break out the peanut butter – and not for your sandwich. You may not have been aware, but peanut butter can be used to remove slime from your hair.
Peanut butter is full of oil, which makes it an excellent option for dislodging and dissolving slime.
But it’s important to use the peanut butter correctly to see the best results. If you’re up for a bit of experimentation, we urge you to give this method a try.
In the below section, we will tell you exactly how to use peanut butter to rid your hair of slime:
- Spread smooth peanut butter, not crunchy, on your slime-covered hair.
- Work the peanut butter into your hair, and then hop into a warm shower and wash it all out with shampoo. You’ll be surprised when you see that the slime is washing out with the peanut butter.
- You may need to shampoo twice after putting peanut butter in your hair.
- Follow up the shampoo session with a moisturizing conditioner.
The peanut butter method should only be used if nothing else works. The peanut butter gets really messy (like a sticky goo). And, if possible, avoid using chunky peanut butter.
Not only could the nuts get stuck in your hair, but they could get caught in your drain as you rinse your hair out.
Use a Diluted Vinegar Rinse
If none of the previous tips sound right for you, consider using diluted vinegar. It dissolves slime on contact.
For this method, all you need is apple cider vinegar or white vinegar and water. Here are the steps to follow to remove slime with vinegar:
- Use your hands to remove as much slime as possible from your dry hair. Focus on removing big globs – you’ll remove the others in the following steps.
- Make a vinegar mixture by combining 2 parts vinegar with 1 part water. Combine it in a large container or pot.
- Get in the shower and pour the vinegar mixture all over the slime-covered parts of your hair. Make sure that it completely saturates your hair. As you pour the mixture, gently massage it in to dislodge the slime.
- Rinse out the vinegar mixture after rubbing it in for a couple of minutes. Then apply conditioner and rub it in the same way you did the vinegar mixture. If needed, use a comb to remove the remaining slime.

Freeze it with Ice Cubes
Ice cubes freeze slime and cause it to crack. So, the ice cube method is worth a shot if none of the previous methods were successful.
Just put an ice cube directly onto the slime to freeze it. You should then be able to comb the slime out of your hair.
If your hair is weak or otherwise damaged, we advise against this method. You don’t want your hair to break when the slime cracks.
NOTE: It’s important to know that the slime may not be completely gone after trying a method just one time. So, don’t be discouraged. Try your chosen method more than once for optimum results. Also, we recommend giving your hair a break before repeating any of these methods. This will help preserve the health of your hair.
Related Articles
- How to Get Wax Out of Hair
- How to Get Paint Out of Hair
- How to Get Gum Out of Your Hair Without Cutting It
Slime can be notoriously hard to remove, but with the correct information, you can get rid of it with less work than you think. And with the 5 easy methods mentioned in this article, you’re in a good spot. Good luck with your slime-removal efforts!
How To Get Slime Out Of Hair (WITHOUT Scissors!)
Slime is a lot of fun – right up to the moment it splats into someone’s hair. Most slimes are tacky, sticky stuff made of glue and other chemicals. That’s part of the fun, right? Well, not always. In the worst-case scenario, it might get stuck somewhere it shouldn’t.
When slime gets stuck in your little one’s hair, what do you do? If the idea of taking scissors to their hair (or worse, yours) is enough to make you pull your hair out, don’t fret. We know you might not have time to run out and buy supplies, so we’ll be looking at methods for slime removal that you can do with household ingredients. Keep reading to find out how to get slime out of hair.
How to get slime out of hair with household items
DIY slime recipes are fun to make – and what’s more, fun to play with! Your child will love squishing the stuff between their fingers and rolling it around. Most kids would even argue that getting things stuck in slime is part of the fun. There’s nothing fun about slime being stuck in hair, though. Cleaning up slime has to be one of the most hated cleaning jobs, and cleaning slime stuck in hair takes it to a whole new level.
Before we show you a few different methods, let’s look at the basics of slime removal. To break down the sticky ingredients in slime, an oily substance will work best. The oil dissolves the tacky glue and enables you to comb it out of the hair. Because this is quite a messy process, no matter which method you go for, we recommend removing the slime at bathtime – if you can wait that long! It will be much easier to clean your bathroom afterwards, compared to any other part of the home.
WARNING: If you go with the bathtub, take care and make sure no one slips on the oils and other substances.
1. How to get slime out of hair with a comb
Although it feels backwards, using your comb from the bottom of the hair strands will help you pick apart the clumps better. This method helps get knots and gunk out faster, and by holding the strand in your hand, you protect the scalp from getting pulled and tugged as you comb. All you need is a comb and a source of warm running water.
Method:
- Holding the hair halfway up the strand, set the comb a few inches above the end of the strand.
- Comb down, untangling as you go. If the knots are especially bad, try combing from halfway through or under the knot to unravel them faster.
- Every time you unravel a knot, set your comb higher. Then, if you hit another that won’t come out, just put your comb halfway through again.
2. How to use shampoo and conditioner to get slime out of hair
This is our favourite method because everyone should have this product in the house. While you might think to try shampoo for slime removal, because of its cleaning properties, we’re going to start with conditioner. The slippery nature of the conditioner will help break down the bond between the glue and the hair.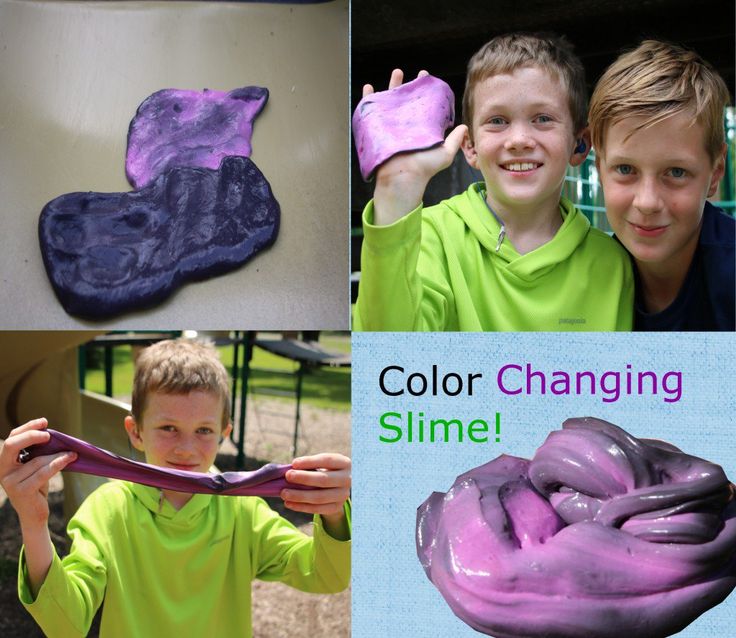 Afterwards, if you have some around, feel free to use a clarifying shampoo to ensure the slime residue is gone.
This method is an essential final step for all the other techniques we will go on to list – they can get pretty messy!
Method:
- Use warm water to rinse your hair.
- Apply conditioner to the wet hair. Massage it into your hair while using the comb to work through tangles and pull more giant clumps of slime out.
- Coat the slime with conditioner. Use your fingers to pull apart the clump and work the conditioner in.
- Finally, wash the conditioner out. If all the slime is gone, use shampoo and wash normally.
How to use cooking oil to get slime out of hair
This trick will use almost any vegetable-based oil: olive, avocado, canola, vegetable, or coconut oil. We always have some to hand, because there are so many other uses for olive oil, too!
Method:
- Pour a few spoonfuls directly onto the clump of slime (if you’re using coconut oil, melt it in your hand first).
- Massage in the direction of hair growth. You’ll feel the slime loosen – use your comb to tease it apart and separate the strands.
- Rinse your comb as you work through the strands to get the clumps out.
- Once the slime has disintegrated, use the conditioner-shampoo method to ensure everything is out before washing.

How to get slime out of the hair using mayonnaise
Mayonaise masks are popular for adding moisture back to hair, but did you know that it’s also great for getting slime out of hair?
Method:
- Put a couple of spoonfuls of mayo on the slime.
- Massage the mayo through the clump, using your fingers and comb to tease it apart. Make sure to clean the comb as you go.
- Finish off with the conditioner before the shampoo method and a clarifying wash to make sure you get the sandwich smell out of your hair!
How to remove slime using peanut butter
Smooth peanut butter will work better for this. You don’t want to add more clumps of stuff to clean out of your hair. Crunchy will still work if you’re stuck, though.
Method:
- Get a chunk of peanut butter as large as the slime in your hair and work the peanut butter into the slime with your fingers.
- Tease apart the slime, working the peanut butter in. Use the comb to untangle any knots and work the peanut butter through.
- Finish off by rewashing your hair conditioner to ensure it’s all out. Then wash normally to make sure the peanut butter smell is gone.
How to remove slime using vinegar
This isn’t the best option, in our opinion. Vinegar strips your hair of natural oils because it’s a mild acid. So, while the acid will eat through the slime without eating through your hair, it will also eat all the good oils your hair needs to look and feel good. We love using vinegar for cleaning, but not so much for hair.
The other things in your house, like oil or even mayonnaise, are beneficial to your hair, so we prefer to remove the slime while nourishing your hair. However, if you don’t have anything else on hand and need that slime out right away, you can use vinegar to remove slime by following the steps below.
Method:
- Dilute the vinegar with water. The ratio is 2:0.5, meaning that if you use half a cup of vinegar, you’ll add 2 cups of water. A dilution keeps the vinegar from being too strong-smelling and harmful to your hair.
- If using this method, make sure to protect the eyes from the solution.
- Either pour the vinegar onto your hair, focusing on the slime, or dip into the mixture.
- Massage the lump, pulling and working the slime apart. You can repeat with the vinegar solution as needed.
- Once you’ve got all the slime out, wash your hair backwards, conditioner first, making sure it’s all out, then wash.
How to use coke to get slime out of hair
You can use coca-cola or any other soda to get slime out of your hair, just like vinegar. However, it’s not recommended. Coca-cola is made with phosphoric acid, making it great for cleaning pennies and rust from cars. There are so many uses for coca-cola, but it may not be something you want pouring over your head. Hair can be pretty sensitive, and putting acid on it can damage your hair.
But, just like vinegar, it’s preferable to use acid than to cut your hair, so as a last resort, this will work.
Method:
- Pour some coke onto the slime. Massage it in, adding more from time to time to keep it moist.
- Use your fingers to tease the lump apart. A comb will help you separate the strands.
- Once all the slime is out, use the conditioner first method to do a final clean, then wash.
We hope these methods have helped! We’re always on the lookout for clever cleaning tips for parents. If the slime isn’t budging, and you’ve no choice but to face the chop, be sure to read our guide on how to cut your own hair at home – it’s surprisingly easy!
Got a real mess on your hands? Find out how to get slime out of clothes next! Better yet, take a look at our ways to keep kids busy at the weekend, and you might just avoid another slime mishap!
You might also find it useful to know how to get gum out of hair and how to get vaseline out of hair, so be sure to head there next.
Q&A
Does vinegar get slime out of hair?
Vinegar, like apple cider or straight white vinegar, can take the slime out of your hair. That said, vinegar will also bring moisture and natural oils out of your hair, so try to use it only as a last resort. (If you have curly hair, avoid using vinegar like the plague. Curly hair needs all the oils and moisture it can get, and vinegar is terrible for it.)
How to remove slime out of hair with coke?
Like vinegar, coca-cola will work to take the slime out of your hair, but we don’t recommend it since they’re both weak acids. As a last resort before scissors, though, it will work. Make sure to deep condition hair afterwards to help your hair bounce back.
How to get slime out of Barbie’s hair?
Luckily, we don’t have to be as gentle with Barbie’s hair. Mix some shampoo and conditioner with water in a container. Soak Barbie’s head for 10-15 minutes. Work the mass out, combing as necessary. If it’s being stubborn, soak it again. The same methods used on human hair will work for Barbie hair, so if the slime sticks in there, try a few suggestions from above.
How to get slime out of cat hair?
Using vegetable oil is a great way to get sticky things out of a cat’s fur. It’s safe for them to ingest, so they’ll still be safe even if they further clean themselves after you’ve already washed them. If you’re concerned about their health, contact your vet to ensure you’re doing the right thing.
We hope we’ve helped to save your little one’s hair! Let us know which method worked for you in the comments below.
How To Get Slime Out Of Hair (With Pictures)
Wondering how to get slime out of hair? You’re not alone. In fact, as parents, we’ve probably all been there. It’s happened to my daughter a time or two (ok, probably around ten times.) My slime rule has always been, “TIE YOUR HAIR!” while my husbands rule is “WHO BOUGHT THE KIDS SLIME?!” But I mean, we are “Fun With Mama”, making slime is part of the ‘job’ says my kids. After the initial shock and frustration, the truth is that getting slime out of hair can be done with a few simple tips. Leave the scissors in the drawer and use a more gentle method instead.
And if the slime is getting everywhere in your house, read more about How To Get Slime Out Of Carpet Easily too! When the kids play with slime, it’s going to get places…but you can get it out!
How To Get Slime Out Of Hair
My children all have different lengths of hair so I’ve used this technique to get slime out of all types. I can attest to the fact that it works, and it works very well. I also love that my kids hair don’t seem very damaged. There’s been moments where my youngest comes to me with that nervous smile on her face and says, “How do you remove slime from hair?” My question is, “How do get slime in hair?” But that’s another story. This time, apparently, Barbie took a slime bath without tying her hair… well, let’s look on the bright side… rather Barbie than my baby!
If your child is worried that they’re going to get in trouble once slime gets in their hair, let them know that you are supermom and know how to get slime out of hair and that it’s a “problem” that you can easily take care of.
How do you get slime out of hair?
If you’re curious, you’ve not alone. And if you’re in this predicament right now, this post is going to help you easily learn how to get slime out of hair. Keep reading below to see the method that I used that really does work!
As a family with children who absolutely adore slime, we’ve had our fair share of slime mishaps. However, our latest slime mishap has really taken the cake when my 7-year-old got slime all over her beautiful long hair. I’ve always loved my daughter’s hair so my anxiety went through the roof This time was different from all the other times… it was intertwined in such a large area of her hair! I was so scared we would have to cut her hair off. We are used to slime getting on our carpets and clothing that we are now total pro’s at getting this out.
If this is a problem you are facing then definitely check out my posts on How To Get Slime Out of Clothes and How To Get Slime Out Of Carpet Easily + Stay Sane! Thankfully, we’ve never had a gum stuck on clothing accident, it’s just been slime disasters here.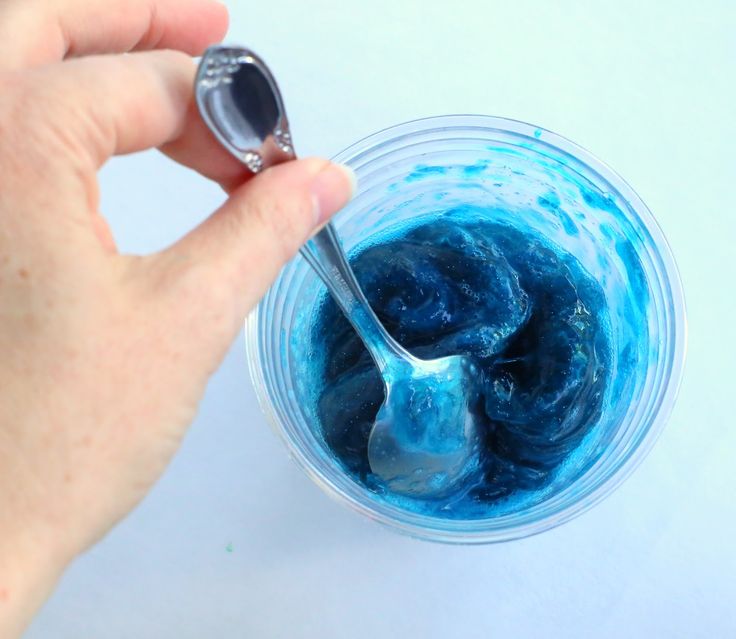
I also always have a slime rule of hair being tied back, but here was that moment where she did not tie her hair back because she wasn’t actively playing with slime, her brother was passing her slime to play with.
Then the ooey gooey slime spread all throughout the lower part of her hair. Getting slime out of carpet and clothing became easy. But how do you get slime out of hair without damaging her precious hair?
My handy dandy fixer upper husband went straight to work while mommy here was panicking. Surprisingly, it was a lot easier than I thought.
How to remove slime from hair
Get slime out of hair with with conditioner
- First wet hair with hot/warm water to dissolve the slime. (You can do this in the shower or use a sink.)
- Start rubbing in some conditioner from the top of your hair to the bottom. Then brush the slime out with your fingers. Conditioner is oilly and this helps remove the slime particles even further. Leave it for a minute then start rinsing the conditioner off. The slime should start coming off until there is nothing left. Keep using your fingers until it’s all gone.
 The slime should start coming off until there is nothing left. Keep using your fingers until it’s all gone.
How to remove slime from hair with pictures
First, we separated the hair that had slime on it from the hair that did not have slime on it. We clipped it aside. Then we used hot water to get the slime out. It seems the hot water dissolved the slime.
Thereafter we used hair conditioner and this removed any remaining slime from her hair. Then it was normal shampoo and conditioning time on clean hair.
How to get slime out of the hair using kitchen items
You don’t need any special products. You can easily get slime out of hair with simple household items you have on hand.
Get slime out of hair with oil
All you need to do is rub on some oil, let it sit for a minute and then use your fingers to remove the slime from your child’s now oilly hair. The oil helps break it down. Make sure to rinse out with water afterwards.
Vinegar, Oil and Peanut Butter
You can use vinegar to get slime out of hair. Pour vinegar on the areas of slime, this helps dissolve it and makes it easier to remove. I am unsure how safe vinegar is on the hair though.
You can also use oil, peanut butter, and even mayonnaise.
Have you had any slime disasters too? Did your child get slime in their hair too?
Here are some of our favorite slime recipes that I think you’ll like as well. And remember, if you get slime in hair, the above tips will help you learn how to get it out with ease!
Slime Recipes:
How to remove dried slime from clothes – effective methods
How to clean dried slime from clothes at home
If slime remains have dried on your favorite thing, do not rush to throw it away. We will tell you how to remove stains without damaging the fabric. First you need to try to remove large parts of the slime. It is easy to do this with the help of it. Just take the slime and roll it on the spot.
What nuances should be taken into account when removing slime from different types of fabrics?
To remove residual mucus from clothes, you need to take into account the composition of the fabric. Never use boiling water on wool/fur and knitwear. They can not only lose their shape, but also sit down or stretch out. In addition, very hot water gradually destroys wool fibers.
Please note that liquids containing acetone may bleach the color. Therefore, to wash colored clothes, use another, more gentle method.
For example, for cotton, denim, and linen, any of the previously listed methods (Cif all-purpose spray, alcohol, hydrogen peroxide, gasoline/kerosene, etc.) may work. The main thing – do not forget about the color of the fabric, it can be lost from exposure to alcohol or gasoline.
For silk, chiffon, satin and synthetic garments, use an ammonia-based product. Freezing or processing with a piece of ice is also great. Do not clean this fabric with hydrogen peroxide or acid solutions based on lemon juice or vinegar.
Even if you are 100% sure that something will last, do a compatibility test before use. Try the product of your choice on an inconspicuous area of the fabric. If no reaction has occurred, then feel free to proceed with the cleaning.
We remove slime from carpets and furs, as well as furniture upholstery
It often happens that the remains of a jelly-like consistency get not only on clothes, but also on carpets or furniture upholstery. But due to the bulkiness, the carpet cannot be washed in the usual way or frozen. Therefore, try to use the mechanical method. That is, use any scraper to clean all parts of the slime that easily move away from the pile.
For greater effectiveness, use the previously described Cif universal spray. The innovative formula will help to cope with any pollution. Spray it on the surface, rub with a sponge, and then rinse with a clean, damp cloth. The tool will remove the slime from the textile upholstery of furniture.
Throws and carpets with long pile will be more difficult to remove slime. The mechanical method is not recommended as it can damage the fibres. The best option is to clear the easily removable parts of the mucus with ice. Freeze the contaminated area well. Alcohol / vinegar or soap solution will help get rid of the residue.
Please note that the carpet and textile cleaner must be applied correctly – from the edges of the stain to the center, in order to exclude the possibility of smearing.
And to deal with stubborn marks, try the following products:
-
Cif.
Powerful formula removes a wide range of stains from textile surfaces. Spray the slime, rub with a cloth or sponge, then rinse or load into the washing machine.
-
Freezer.
Put clothes in it, let it freeze well for a couple of hours.
After the stated time, you need to get the thing and carefully remove the slime with a knife.
-
Ice
Apply it to the problem area, hold until the ice melts, and then gently scrape off the remaining slime.
-
Boiling water.
This method is only effective on the stain left after removing the slime. It is necessary to immerse the affected item in a bowl of boiling water, wait until the water has cooled, and then wash it in the usual way.
-
Compounds containing acetone.
Wipe a cotton pad liberally with acetone or nail polish remover and apply to stain. As a result of exposure to the solution, the slime will lose its sticky properties, and the trace will be fairly easy to wipe off. This method is suitable for fur / wool products.
-
Mixture of edible salt, ammonia and lemon juice.
Take the first ingredients in equal proportions, mix, drip a few drops of juice. Apply the resulting slurry to the stain, hold for 25-35 minutes.
Finally, scrub well with a brush. -
Hydrogen peroxide.
Thoroughly soak a cotton swab or a piece of soft cloth with peroxide, apply to the slime. Rub the product vigorously into the fibers of the fabric. Please be patient as the whole process may take a long time.
-
Laundry soap.
Soak the bar in warm water, rub the remaining slime with soap and leave for 10-15 minutes.
-
Alcohol.
Apply it on a cotton pad and blot the mark. After 15 minutes, the item can be washed.
-
Petrol/kerosene.
Handle only with gloves. Use a cotton swab or lint-free cloth. Wet it with gasoline and apply to the surface. Hold for 20-40 minutes and then rinse with water. During cleaning, it is better to ventilate the room due to the presence of a pungent odor.
 After the stated time, you need to get the thing and carefully remove the slime with a knife.
 Finally, scrub well with a brush.
 After removing stains, be sure to wash clothing thoroughly to remove any remaining cleanser and slime. Choose a washing mode based on the characteristics of the fabric.
Mini-survey
Have any new types of dirt/stains appeared on your clothes during the self-isolation regime?
Yes, I had to deal with new types of spots
0%
There were few new types of spots
0%
No, there were no new types of spots
0%
0 vote(s)
We told you how to clean slime from clothes, carpets and textile surfaces. The main rule is to do it quickly. Well, when he has not yet had time to freeze. If the slime is still hardened, then do not despair. Follow the suggested recommendations, and you can easily get rid of the remnants of mucus.
Originally posted by
HOW TO REMOVE SLICE FROM CARPETS AND CLOTHES – 7 WAYS TO REMOVE SLICE
As a mother of two dirty – creative – Little kids, I’m quite familiar with weird stains and stains on almost every surface in my house. A marker on my light gray couch, a crayon on the walls, apple juice on my new rug – I have a strategy for everyone.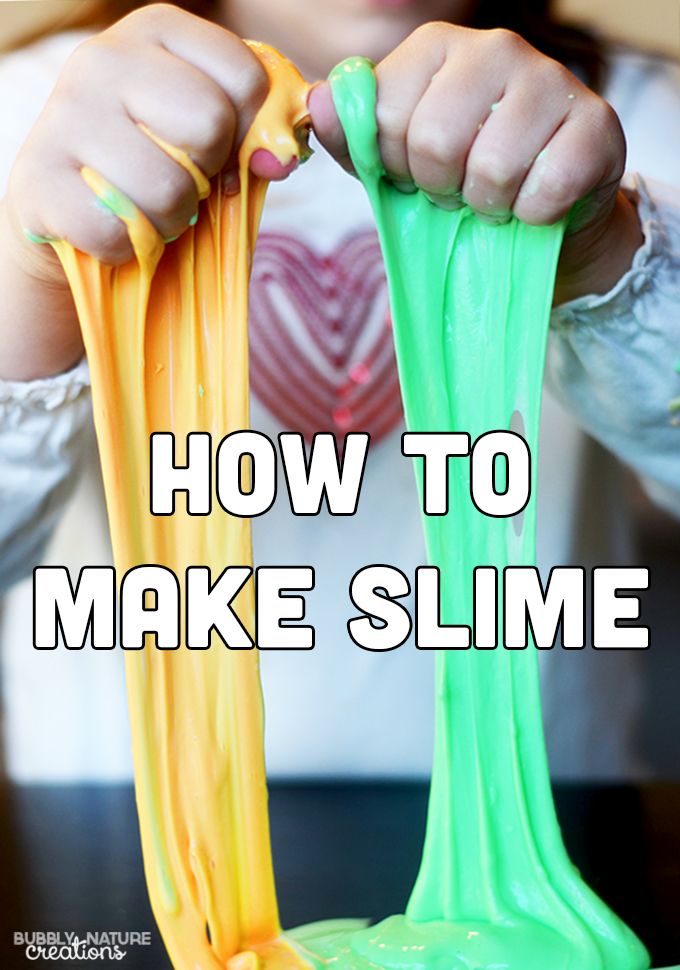 But recently I met my rival when it comes to child riots.
3:33 value
To be honest, it was my idea to bring slime into my house. I heard how slimy textures can be relaxing to play with, so I took a little bit in the kids aisle at Target without thinking about how it might end up. The kids played with it for ten minutes and I never saw the slime again – that is, until we moved our media console away from the wall to paint and my husband noticed it. Suffice it to say, we didn’t have much drawing that day, because my kind and patient husband spent hours holding his face inches from the sticky patch of carpet, smearing it with Goo-Gone and chipping it off with a knife. It’s good that he is under the console.
I’ll need a better strategy next time. So I asked Angela Bell and Georgia Dixon, cleaning experts and grove guides at the Grove Collaborative, for their top tips on how to get slime out of carpet and clothes. That’s what they said.
 youtube.com/embed/vn7gy2Tlydc?modestbranding=1″ allow=”accelerometer; autoplay; encrypted-media; gyroscope; picture-in-picture” allowfullscreen=””>
Save Pin It View More Images of
Credit: Joe Lingeman.
How to remove slime from carpet?
According to Bell, it’s extremely important to get rid of mucus as quickly as possible: fresh splashes come out much easier than something dried or hardened. So if you have kids who play with slime, don’t make the same mistakes I did. Always keep an eye on it and make sure it returns and doesn’t, say, dissolve into your carpet.
To remove fresh slime from carpet or carpets, Dixon and Bell suggest wetting the stain with a couple of drops of dish soap and water, or equal parts vinegar and water. Whichever method you use, be sure to test an inconspicuous area of the carpet first to check for color fastness.
Then dampen the area and cover with a damp cloth. Let the solution and tissue sit on the affected area for an hour or more before attempting to remove it. Scrub it with a strong cleaning brush, and for particularly sticky parts, remove with a butter knife.
How to remove dried slime from carpet?
Dixon and Bell say that if the slime has dried on the carpet, you will probably need to dampen it a bit to remove it completely. Dampen and wring out a washcloth with warm water, then gently blot the slime to soften it. Be careful not to rub the slime into the carpet, and pluck the slime off the carpet fibers with a damp cloth. Use a butter knife if necessary.
How to remove slime from carpet without vinegar?
Vinegar is good at eating slime off carpet, but it’s not the only option. An alternative, according to Dixon and Bell, is an aqueous solution of dish soap. (See instructions above.) You can also try plain soda – the carbonic acid acts as a mild cleanser, dissolving the mucus and making it easier to clean up.
Save Pin It View More Images of
Credit: Joe Lingeman.
How to get rid of mucus from clothes?
First, remove tack. Take a butter knife and carefully scrape off the slime, taking care not to damage the fibers of the object. If there is mucus left, take an ice cube. If you freeze the mucus stains, they will be easier to scrape off.
Once you have removed as much of the mucus residue as possible, deal with potential staining or discoloration caused by any mucus coloration. Dixon and Bell recommend soaking slimy clothing in warm water and a bleaching oxygen mixture – Dixon and Bell swear by an oxygen purifier. Molly’s Suds, which, despite the name, is a color scheme.
After soaking for 30 minutes, use Stain Remover Spray on any remaining slime discoloration, then launder as usual. Repeat the process if necessary to remove excess mucus.
I keep seeing 777
Save Pin It View More Images of
Credit: Joe Lingeman.
How to get rid of mucus from hair?
To get rid of mucus in your hair, try using a gel-based hand sanitizer or dish soap . The gel can be easily applied to the affected hair, rubbed in gently and then washed off. Repeat if necessary to remove all mucus. You can add a good deep shampoo and conditioner to revitalize your hair.
911 is the number of an angel
Save Pin It View More Images of
Credit: Joe Lingeman.
How do I remove slime from upholstered furniture such as a sofa?
The ice scraping method is the best way to remove excess slime from upholstery. If that doesn’t help, you can also use a few drops of club soda or rubbing alcohol to help dissolve the bits of mucus. When it’s damp, lift it up with a spoon or butter knife, then pat it dry with a clean towel.
To keep furniture from discoloring, choose your favorite enzymatic stain remover (and make sure it’s safe for damaged upholstery). After testing the color fastness in an inconspicuous area, spray the stain until it is completely saturated and use a damp microfiber cloth to gently blot the affected area. Repeat if stain remains.
Save Pin It View More Images of
Credit: Joe Lingeman.
How to remove slime from the wall?
Dixon and Bell recommend wiping fresh slime off the wall with a cloth dampened with warm water and a few drops of mild dish soap. If any residue remains, try wiping it off with an abrasive cleaner, such as a paste made up of equal parts baking soda and water, and the clean side of a sponge. Dried slime can be gently scraped off with a spoon or butter knife – just be careful not to damage the wall in the process.
Ashley Abramson
Author
Ashley Abramson is a writer-mom hybrid from Minneapolis, Minnesota. Her writing, mostly on health, psychology, and parenting, has been featured in the Washington Post, New York Times, Allure, and others. She lives in suburban Minneapolis with her husband and two young sons.
Follow Ashley
Infant Reflux: Symptoms and Treatment
Search Support Icon
Search Keywords
Home ›› What is Reflux in Infants?
Home ›› What is reflux in babies?
↑ Top
Signs and what to do
Post-feed regurgitation is a common occurrence in the first few months of life.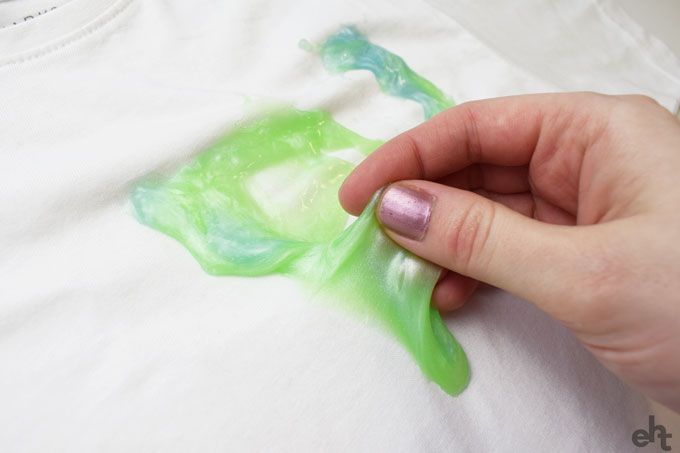 This is usually harmless and completely normal, but parents should read about gastroesophageal reflux (GER) and laryngopharyngeal reflux (LPR) in infants and how long it lasts to give them peace of mind.
We look at signs of reflux in babies, symptoms of different types of reflux, and how to help a child with signs of reflux. If you require further information, always contact your healthcare provider.
What is reflux in babies?
So we know reflux is common, but what causes reflux in babies? Because young children have not yet fully developed the lower esophageal sphincter (LES), that is, the muscle at the bottom of the esophagus that opens and closes to let food into the stomach and keep it there, food can easily pass back up the esophagus.
Acid reflux, also known as gastroesophageal reflux (GER), is a normal reflux that occurs in babies. This type of reflux is considered normal and occurs in 40-65% of babies.
How do I know if my child has acid (gastroesophageal) reflux?
If a baby is spitting up milk after a feed, it is most likely acid reflux. As babies get older, GER usually goes away on its own without any intervention. If a baby has complications beyond just spitting up a small amount of milk (such as feeding difficulties and discomfort), they may have gastroesophageal reflux disease (GERD).
Symptoms of GERD include:
- baby arching during or after feeding;
- crying more than three hours a day for no apparent reason;
- cough;
- gag reflex or difficulty swallowing;
- irritability, restlessness after eating;
- eating little or not eating;
- poor weight gain or loss;
- difficult breathing;
- severe or frequent vomiting.
GERD usually occurs when the muscle tone of the LES is not weakened in time, causing stomach contents to back up into the esophagus.
How do I know if my child has Laryngopharyngeal Reflux?
Another type of reflux, laryngopharyngeal reflux (LPR), also called silent reflux, is when the contents of the baby’s stomach leak back into the larynx, the back of the nasopharynx.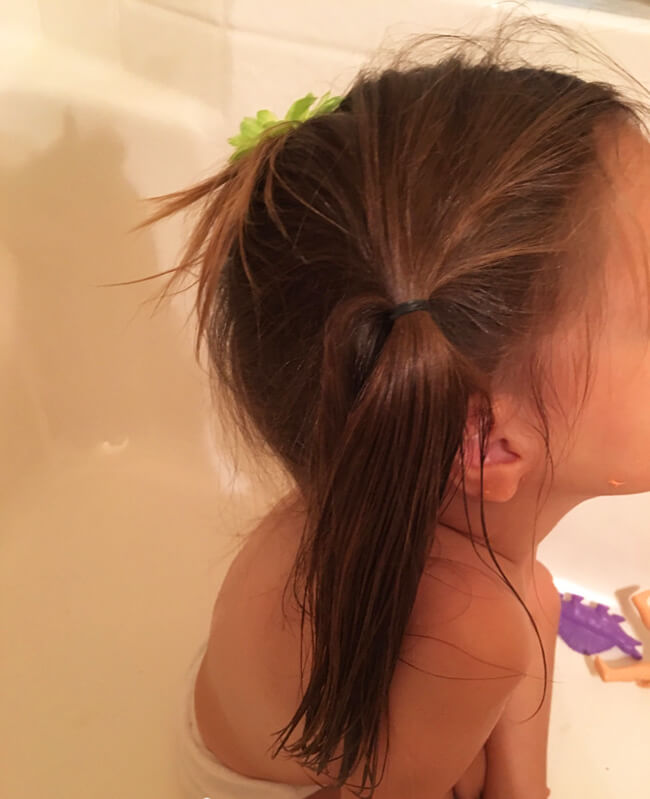 This type of reflux does not always cause external symptoms, which is why it is called “silent”. Babies can have GERD and silent reflux at the same time, but their symptoms are somewhat different.
The following are some of the symptoms of laryngopharyngeal reflux:
- trouble breathing;
- gag reflex;
- chronic cough;
- swallowing problems;
- hoarseness;
- regurgitation;
- poor weight gain or weight loss.
We have looked at the signs of reflux in infants, now we will move on to the treatment and duration of silent reflux in children, as well as the treatment of GERD.
How to deal with laryngopharyngeal reflux in babies while breastfeeding?
Breastfeeding mothers may need to review their diet if their babies show signs of reflux. The American Academy of Pediatrics (AAP) recommends breastfeeding mothers cut eggs and milk from their diet for two to four weeks to see if their baby’s reflux symptoms improve or disappear. It may be worth eliminating acidic foods from your diet.
In most cases, GER and laryngopharyngeal reflux go away on their own. Typically, children outgrow reflux in the first year of life. If a child has persistent symptoms of laryngopharyngeal reflux, parents should consult a doctor. If your baby has severe vomiting, blood in the stool, or any of the symptoms of GERD listed above, parents should contact their pediatrician as soon as possible.
How can I help my child with reflux or GERD?
Reflux symptoms in babies usually go away on their own, but the following tips can help relieve symptoms:
- Thicken food with rice or a special milk thickener.
- Hold the bottle at an angle that fills the nipple completely with milk to reduce the amount of air your baby swallows. This can help prevent colic, gas, and reflux.
- Try the AirFree anti-colic bottle, designed to reduce air swallowing during feeding.

4. Let your baby burp during and after feeding. If the baby is bottle fed, parents can let him burp after every 30-60 ml. If the mother is breastfeeding, she may let the baby burp when changing breasts.
5. Hold baby upright after feeding. As a rule, in order for the milk to remain in the stomach, after feeding the baby, it is necessary to hold it in an upright position for 10-15 minutes. But, if the child has reflux, parents should keep him upright a little longer.
These tips may help relieve symptoms, but they do not replace a doctor’s advice.
Parents should not change their infant formula without first talking to their healthcare provider.
Don’t panic! Reflux is very common in babies during the first three months of life, and most babies outgrow it without any consequences. Although GERD is a slightly more serious condition, there are many treatments, ways to manage it, and help newborns. Feel free to contact your doctor with any questions or concerns you may have.
4 Seattle Children’s Hospital
5 The National Institute of Diabetes and Digestive and Kidney Diseases – Treatment for GER & GERD in Infants
Any links to third party websites that may be included on this site are provided solely as a convenience to you. Philips makes no warranties regarding any third party websites or the information they contain.
I understand
You are about to visit a Philips global content page
You are about to visit the Philips USA website.
How the newborn changes – articles from the specialists of the clinic “Mother and Child”
Babin Evgeny Alexandrovich
Children’s surgeon, Orthopedic traumatologist, Children’s orthopedic surgeon
Clinic “Mother and Child” Southwest, Clinic “Mother and Child” Kuntsevo
The baby was born, and we expect him to look like beautiful and pink babies from advertising pictures. And he is some kind of red, then suddenly turned yellow, on the skin or a rash, or peeling. In addition, the weight is still unstable, the chair is incomprehensible – is the child healthy? Healthy, and all these changes are the so-called transient (transitional) states. Where do they come from, what do they look like and what to do with it all?
The child sat in the mother’s stomach for nine months, swam in the water and received oxygen through the placenta. As soon as the baby was born, his world immediately became different: instead of water around him, air, the ambient temperature dropped from 36.6-37 ° C to 22-25 ° C, plus gravity, sounds, smells, bright light. And now you have to breathe (lungs) yourself, eat differently, and then also remove metabolic products. And just like that, it is not easy for a newborn to immediately switch from one lifestyle to another, it takes time. That is why, from the point of view of physiology, in the first month of life, “something happens all the time” with children, and much more often and brighter than in later life. These are the transitory (transitional, boundary) states. All of them surprise and even frighten young parents, especially since transition states appear and disappear very quickly. But for newborns, they are completely natural. What moms and dads see most often are transitional states of skin, stool, weight, plus or minus a couple more conditions.
How the skin changes
The child was born, and we see that he is all sort of bluish-purple, and then his skin color immediately turns red. On the second day after birth, the baby “blushes” the brightest. Doctors call this redness “erythema simple” and it appears due to the fact that the skin adapts to a new environment. Then the child’s skin turns pale and by the end of the first week of life it becomes the pale pink color we are used to.
But that’s not all. On the third or fifth day of life, the baby’s skin may begin to peel off, especially on the abdomen and chest. What’s this? Does the child lack vitamins, something with nutrition, is the air too dry in the house? No, this is also a transitional state – physiological peeling, and it is also associated with the fact that the skin is adapting to a new life. The skin flakes for about a week, and then everything goes away. You don’t need to do anything with it. Of course, you can treat the skin with various softening lotions and creams, but there will be no significant effect from them. Very soon, the baby’s skin will become smooth and soft on its own.
Most of all, parents are afraid of a rash on the baby’s skin, which does not often, but sometimes still appears in the first week of life. This is the so-called toxic erythema – spots with grayish-yellow seals in the center. The rash is most often located on the extensor surfaces of the arms and legs around the joints, on the chest. Less often, such spots can be on the whole body (except for the palms, feet and mucous membranes). “Maybe it’s chickenpox, rubella, or some other disease?” parents are afraid. No, this is a kind of reaction of the skin of a newly born baby to its environment, especially to hypothermia, overheating, contact with clothes, food. Within one to three days, new spots may appear, but more often two or three days after the onset, they all disappear without a trace. At the same time, the child’s well-being is not disturbed, the body temperature is normal and he does not need any medication. The only thing is that you need to take care of the bubbles on the skin: for example, gently blot them after bathing. And you also need to make sure that the bubbles do not rub and they do not burst (otherwise an infection may join them).
Physiological jaundice
The changes that are visible on the skin do not end there. Very often (in 60-70% of children) on the second or third day of life, the skin turns yellow, the maximum of yellowness occurs on the third or fourth day, and by the end of the first week it disappears. This is how physiological jaundice of a newborn is manifested – a condition in which the amount of bile pigment, bilirubin, increases in a child. In some children, jaundice is similar to a light tan (parents may not notice it), while in others, the skin will turn bright yellow. Very quickly, the level of bilirubin returns to normal and the skin color becomes normal again. If jaundice is mild and passes quickly, then no additional treatment is needed. But if jaundice does not disappear or the skin color is intense yellow, you should consult a doctor.
Weight loss
Do you think the baby will immediately be born well-fed, with folds and cute roundness? No, right after birth, this is still far away. In the first days of life, an already not too well-fed newborn will lose even more weight. Such weight loss is a natural process, the so-called physiological weight loss. Weight decreases because immediately after birth, the baby loses part of the water through the skin, its umbilical cord dries out, meconium (the first feces) and urine are excreted, and also because the baby still eats a small amount of milk. Maximum weight loss usually occurs by the third or fifth day and is normally no more than 6-8% of birth weight. At this time, mother and baby are usually discharged from the hospital, but there is no need to worry. By the seventh or tenth day of life, a healthy baby will restore its previous parameters.
chair changes
On the first or second day, all newborns pass the original stool (meconium): it is thick, viscous and dark green in color. Time passes, the baby begins to receive colostrum, and on the third or fourth day of life, a transitional stool appears. Now areas of dark green color alternate with greenish and yellow ones, and some lumps, mucus are also visible in the stool. It all looks like some kind of intestinal disorder, but it’s not. It’s just that the gastrointestinal tract is moving to a new job, now it’s ready to digest food. By the end of the first week of life, the stool in most children is yellow, similar to gruel, and it will continue to be so.
Warm-cold
A typical fear of all grandmothers is that the child is freezing! Yes, indeed, in newborns, the body temperature regulation processes are still imperfect, so babies easily cool down, but they also overheat just as easily. For example, if a newborn is dressed too warmly or placed next to a heating battery, he will quickly overheat, even if this is the usual temperature in the room.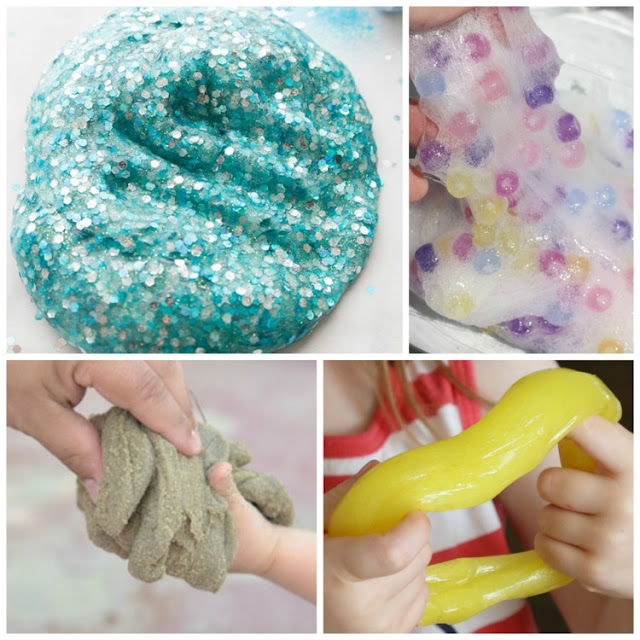 At the same time, the child easily loses heat when he is undressed for a long time or he lies in wet clothes. Therefore, in the room where there is a newborn, the air temperature should be adequate – 20-22 ° C. And if she rises higher, and the child is warmly dressed, then this will also not be good.
Sometimes, very rarely (in 1% of newborns), body temperature on the third or fifth day may temporarily rise to 38–39 °C. There are no other symptoms of the disease, the body temperature quickly returns to normal, but the parents have time to get scared. It’s difficult to figure out what it is – temporary hyperthermia or still a disease – it’s difficult, so it’s better to call a doctor.
Hormonal crisis
An uncommon occurrence, but it also occurs occasionally. In some children, on the third or fourth day of life, the mammary glands become engorged (in both girls and boys). They increase as much as possible by the seventh or eighth day, and liquid discharge may even appear from them. Some girls have very little bloody discharge from the vagina for a very short time. This is the so-called hormonal crisis – it occurs due to the action of maternal hormones – estrogens (they penetrate through the placenta during childbirth). At the peak of estrogen action, the signs of a hormonal crisis are maximum, then the hormones are removed from the body and the symptoms gradually disappear. Therefore, you don’t need to apply a cabbage leaf to your chest, make compresses with camphor or something else: everything will pass by itself.
Usually, all these transitional states are pronounced in the first week of life, less often, but it happens that they drag on for up to three to four weeks. One more thing – it is not necessary that the child will show all transitional states, but almost everyone has physiological weight loss and transitional stools. And many of the transitional states are completely invisible to parents, but they also exist, they can simply be identified only by laboratory methods.
So we are not in a hurry to be frightened, noticing that the child’s skin suddenly began to peel off or he turned slightly yellow. We remember that he must adapt to a new life, that in the first time after birth, the baby has the right to some changes. Especially if, with all this, the baby is cheerful, calm and eats well. Well, if you are still somehow anxious, ask your pediatrician questions. He will definitely be able to put everything in its place.
Inset
The maximum weight loss in a newborn usually occurs by the third or fifth day and normally amounts to no more than 6-8% of body weight at birth.
From the point of view of physiology, in the first month of life, “something happens all the time” with children, and much more often and brighter than in later life. These are the transitory (transitional, boundary) states.
In infants, the body temperature regulation processes are still imperfect, so they easily become overcooled and overheated.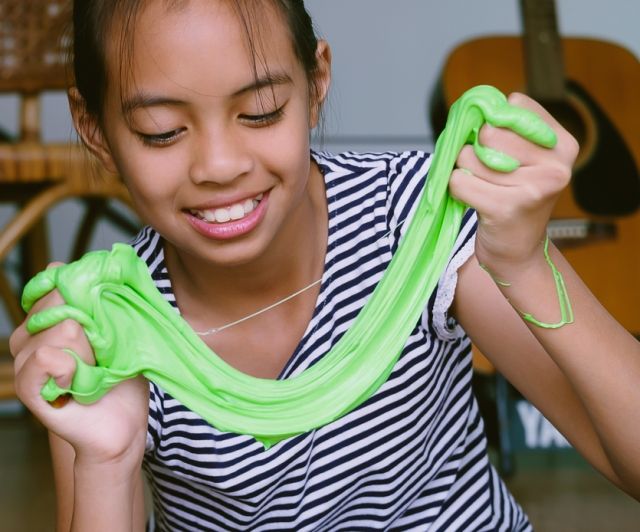 In this regard, in the room where there is a newborn, the air temperature should be about – 20–22 ° C.
Physiological jaundice of the newborn:
- occurs on the 2-3rd day of the baby’s life, reaches a maximum on the 4-5th day, and disappears by the 10th day;
- the general condition of the child does not suffer;
- the level of bilirubin in the blood does not exceed 180 µmol/L.
Make an appointment
to the doctor – Evgeny Alexandrovich Babin
Clinic “Mother and Child” KuntsevoClinic “Mother and Child” Yugo-Zapad0005
By clicking on the send button, I consent to the processing of personal data
Attention! Prices for services in different clinics may vary. To clarify the current cost, select a clinic
Clinical Hospital MD GROUPClinical Hospital Lapino-1 “Mother and Child”Children’s Clinic KG “Lapino” on New Riga (branch)Clinic “Mother and Child” KuntsevoClinic “Mother and Child” SavelovskayaClinic “Mother and Child” South-WestClinic “Mother and Child” » Novogireevo
All directions
01.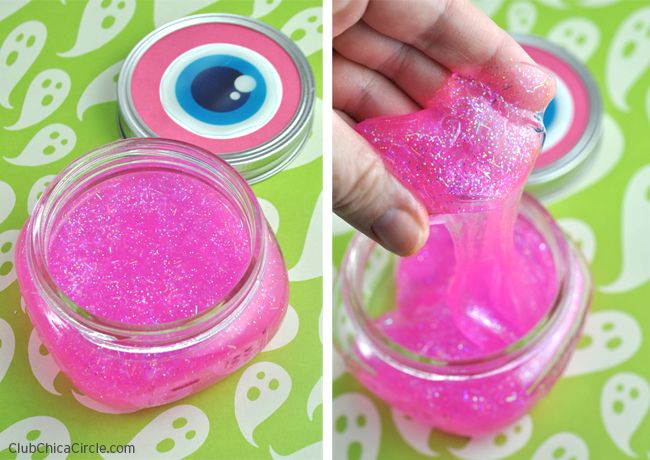
Kinesiotherapy for children
02.
Specialist consultations (adults)
03.
Specialist consultations (children)
04.
Massage/manipulation for children
05.
Therapeutic research
Nothing found
The administration of the clinic takes all measures to timely update the price list posted on the website, however, in order to avoid possible misunderstandings, we advise you to clarify the cost of services and the timing of the tests by calling
Chemical burn: classification, first aid, treatment
Consultation with a specialist:
Causes and symptoms of a chemical burn
A chemical burn is associated with exposure to highly concentrated aggressive compounds on the skin and mucous membranes. The main cause of burn damage to the skin and eyes is accidental or intentional contact with chemicals, non-compliance with safety regulations at home and at work, errors in the choice of means, and the use of chlorine-containing detergents.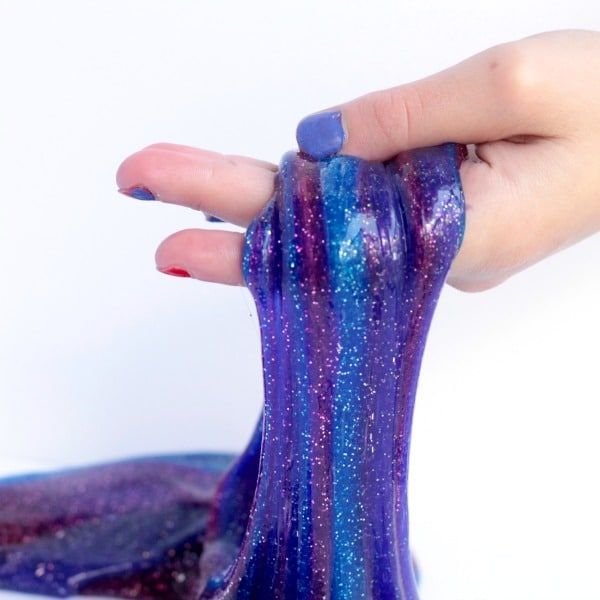
When toxicants come into contact with the skin or eyes, colliquation necrosis develops – the tissue melts, becomes flabby, moist, edema, redness, and purulent infiltrate form around. There is a risk of secondary infection.
At the site of the burn, an area of wet necrosis appears, covered with a white or black crust (scab). After rejection of the scab, an ulcer is formed, then a scar. How long a burn takes to heal depends on the chemical, the area, and the depth of the injury.
Chemical burns of the mucous membranes of the pharynx, larynx, esophagus and stomach occur after inhalation of toxic fumes or ingestion of chemicals. The main reason is the erroneous or deliberate ingestion of toxicants, unconventional treatment, and the intake of alcohol surrogates.
Aggressive components get on the mucous membranes of the oral cavity, pharynx, esophagus, and damage the epithelium, provoke necrobiosis – irreversible cell death.
When exposed to small doses of toxicants, only signs of chemical irritation and mild intoxication appear:
-
soreness in the abdomen,
-
burning and sore throat,
-
feeling of suffocation,
-
nausea and vomiting,
-
rapid breathing,
-
throat swelling.
In severe burns of the pharynx, esophagus, the pathological process affects not only the mucous membranes, but also the submucosal and muscular layers. Chemicals penetrate into the deep layers, destroy red blood cells, and disseminated vascular coagulation (DIC) develops – massive internal bleeding.
Help! Alkalis cause a more pronounced burn of the stomach, acids – the esophagus.
At the stage of recovery and regeneration, necrotic tissue is rejected, a healthy mucous membrane is restored, and a scar is formed at the site of necrosis. With severe burns of internal organs, complete recovery does not occur – stenosis is formed, the patient suffers from chronic inflammatory diseases.
Burning substances
Chemical burns provoked by various chemicals:
-
alkalis: sodium hydroxide, sodium hydroxide, caustic soda;
-
concentrated acids: acetic, hydrochloric, sulfuric;
-
other substances: hydrogen peroxide, iodine, ammonia, acetone, silicate glue, potassium permanganate, phenol;
-
household cleaners;
-
substitute for alcohol.

More than 85% of chemical damage to the pharynx and esophagus in adults is caused by the intake of acetic acid, in children – potassium permanganate.
Reference! Most patients with esophageal burns are children under 10 years of age. The intake of toxicants occurs unintentionally, but because of the distraction of children, natural curiosity, carelessness of parents.
Call now
+7 (495) 215-56-90
Sign up
Classification of chemical burns
Taking into account the depth of chemical damage, the clinical picture is divided into three degrees of skin burns:
-
I degree. Incomplete damage to the skin or surface layer of the epithelium caused by a short-term or weak intensity of the active substance. Local signs are limited swelling, redness of the skin, burning sensation and local pain. Healing occurs on 3-5 knocks on its own without scarring.
-
II degree. Accompanied by damage to the epidermis, with the formation of blisters filled with liquid transparent contents. After 2-3 days, the liquid becomes thick and jelly-like. Pain, swelling and redness at the site of injury are more pronounced. Tissue repair continues for 12–15 days. The risk of infection is growing.
-
III degree. Determined for damage to the lower and superficial layers of the skin. There are two types: III degree A – the cells of the deepest basal layer are preserved, III degree B – necrosis of the entire thickness of the skin and the inner layer occurs. At the site of the burn, an area of wet necrosis is formed, covered with a crust. Rejection of the crusts occurs after 10–15 days, and complete healing of the burn injury takes 1–2 months. A rough scar is formed at the site of damage to the skin.
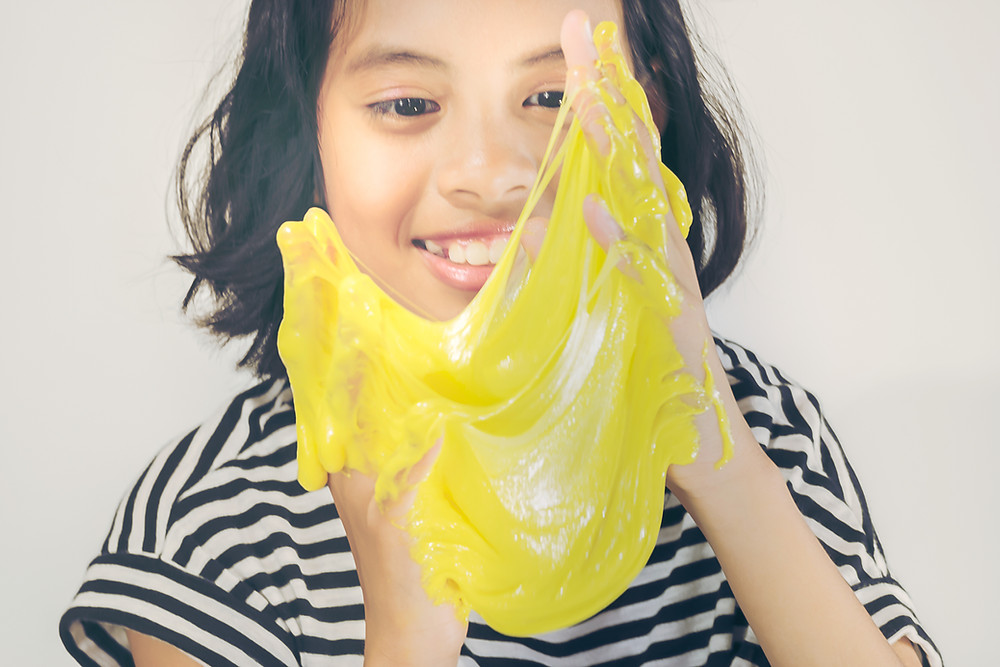
With chemical damage to the mucous membranes of the organs of the respiratory and digestive systems, three degrees of severity are also distinguished:
-
light – damage to the surface layer of the epithelium;
-
medium – defeat to the level of the mucous layer;
-
severe – injury to the mucous membrane and underlying tissues at different depths.
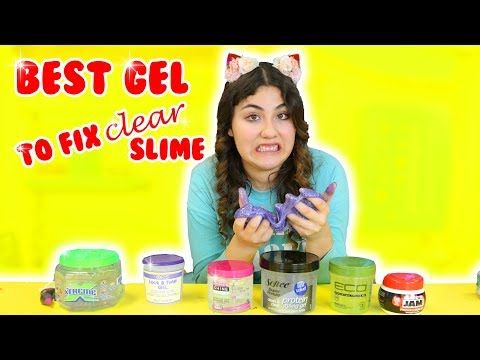
Depending on the spread of the pathological process, burns are isolated and combined.
Complications of chemical burns
Extensive and deep local burn injuries lead to the development of burn disease, which is accompanied by a violation of the water-salt balance, circulatory disorders, exhaustion of the immune system, and intoxication.
There are various complications associated with progressive burns:
-
intestinal paresis – paralysis of the muscles of the intestinal wall;
-
myocarditis – inflammation in the muscular membrane of the heart;
-
pericarditis – inflammation of the outer lining of the heart;
-
pneumonia;
-
bronchitis;
-
pulmonary edema;
-
pleurisy;
-
glomerulonephritis is an immunoinflammatory disease of the kidneys,
-
pyelitis – inflammation in the renal pelvis.
The defeat of deep tissues is aggravated by the formation of limited or diffuse purulent-inflammatory changes in the muscles, subcutaneous fat, the occurrence of sepsis, arthritis. The undesirable consequences of burns include the formation of coarse inelastic scars.
Help! Exposure to any physical or chemical factor that in an adult causes incomplete damage to the surface layer of the skin, in children leads to deep trauma.
Burns of the eyes, esophagus, respiratory tract are more severe, disrupt important vital functions.
Among the complications of chemical damage to the respiratory and digestive organs, the most common are:
-
swelling of the larynx and pharynx,
-
stenosis of the larynx – narrowing of the lumen,
-
respiratory failure,
-
neck phlegmon,
-
chronic pharyngitis,
-
perforation of the esophagus.
With chemical damage to the deep layers of the mucous and submucosal membranes, toxic substances enter the systemic circulation and cause damage to the liver, kidneys, and brain.
The outcomes of severe eye burns include a decrease in visual function, atrophy of the eyeball, and the formation of a thorn.
First aid for chemical burns
The further prognosis of a burn injury depends on how timely and competently measures of emergency assistance were provided to the victim.
How to provide emergency care:
-
Limit human contact with the chemical.
-
Rinse the burned area with plenty of water, a weakly concentrated solution of soda or citric acid.
-
A fresh wound should not be treated with ointment, cream, spray, vegetable oil, and blisters should not be opened on their own.
-
For shallow burns limited to a small area, carefully remove clothing, apply a sterile dressing or bandage.
-
In case of burns of the 3rd degree, wrap the victim in a clean sheet, give painkillers, call emergency help or take him to a specialized medical facility on his own.

Before the ambulance arrives, it is important to solder with warm water to prevent dehydration.
Eye burn
First aid for a chemical eye burn is important to provide on the spot.
Urgent measures:
-
Rinse the conjunctiva with water or saline.
-
Remove pus and mucus, chemical residues.
-
Rinse the nasolacrimal canal with saline.
-
Drop or apply an antiseptic preparation into the conjunctival cavity.
It is strictly contraindicated to use neutralizing solutions on your own, since it is difficult to predict the reaction of substances to damaged tissue.
Burn of the esophagus and pharynx
First aid is provided at the prehospital stage or in the intensive care unit. To neutralize acids, a soda solution is used, alkalis – a weakly concentrated solution of acetic acid with oil. If the exact toxicant is not known, the oral cavity is washed with a large amount of clean water at room temperature, two glasses of milk are given to drink.
Important! Washing is performed only in the first 5-6 hours after the burn, then the procedure is not advisable.
What not to do with a chemical burn
When swallowing aggressive chemical compounds, it is strictly forbidden to induce vomiting, as the risk of rupture of the esophagus increases. Do not give activated charcoal – solid tablets additionally injure the esophagus.
It is not necessary to completely lay the victim down so as not to provoke gastroesophageal reflux disease – the reverse reflux of stomach contents. The optimal position is semi-sitting.
Chemical burn treatment
How to treat a chemical burn depends on the depth and area of the injury. 1st-2nd degree burns are superficial and may heal on their own. With progressive tissue damage, qualified medical care is needed, removal of dead tissue, followed by correction of scars. Burns are treated in special burn wards.
At the first stage, the burn surface is treated to prevent infection from entering the body:
-
Treat the skin around the burn surface with an antiseptic.
-
They remove impurities, the remnants of toxicants, open and empty large blisters, pour a peroxide solution on the wound, and dry it.
-
Apply an ointment, cream or spray on top.
-
With extensive and deep lesions, the treatment of burn wounds is performed under anesthesia.
-
The wound surface is protected with a bandage or left open.
At the first stages of tissue repair, ointments, solutions and aerosols with analgesic, cooling and healing effects are used.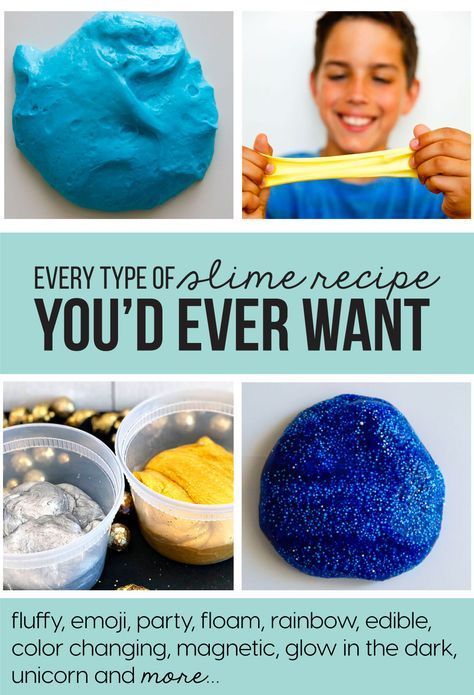 In the presence of a scab, it is not removed, left until self-rejection. Solutions with wax and paraffin are applied to the wound surface so as not to damage the growing epithelium during dressings. Salicylic ointment and proteases break down the dry crust formed during severe burns.
At the second and third stages, drugs are prescribed to activate metabolism, improve blood circulation, and protect against infections.
With deep burns and large areas of tissue damage, a person loses a lot of fluid and salts. To compensate for the loss of protein and water, to prevent dehydration, to normalize the acid-base balance, nutrient solutions, glucose, and sodium chloride are administered through a dropper.
Esophageal burn treatment
To remove the irritating substance, a gastric tube treated with petroleum jelly is installed, and the stomach is washed with an antidote – water, soda solution, a non-concentrated solution of vinegar and oil. Preliminary anesthesia is carried out.
An antibiotic is given to prevent infection. Further, taking into account the patient’s condition, analgesic, anti-shock, detoxification therapy is prescribed.
In the subacute phase, after 7–10 days, bougienage of the esophagus is performed daily – expansion of the lumen using an endoscopic device. The procedure allows you to normalize the patency of the body, reduce scarring. With stenosis and complete obstruction of the esophagus, the formation of rough scars, surgical treatment is carried out in a planned manner.
Eye burn treatment
In the hospital, the patient is injected with anticholinergic drops into the conjunctival cavity. They are well anesthetized, minimize the risk of adhesions. Antibacterial ointments or drops are used to prevent infection. Antioxidants are administered intramuscularly. With increased intraocular pressure, antihypertensive drugs are prescribed.
In case of severe eye burns, hormonal therapy is connected – subconjunctival injections (in the area of the transitional fold of the conjunctiva) and parabulbar (through the skin of the lower eyelid to the edge of the orbit).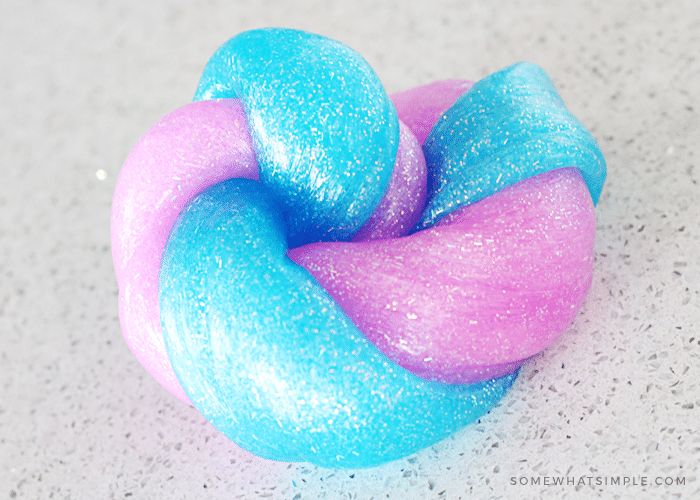
In combination with pharmacotherapy, eyelid massage and physiotherapy have a good effect. With the threat of loss of vision in the early period, surgical treatment is performed on the eyelids, eyeball, conjunctiva, cornea.
Call right now
+7 (495) 215-56-90
Sign up
Memo on discharge from maternity hospital
Memo on discharge from maternity hospital
. He now has a different environment and a different diet. You and your little one are getting used to each other again. We hope that our memo will help you during this period. You will succeed! Love works wonders. We wish you success!
Feed the baby on demand, and if the baby does not wake up for more than 3 hours, you can try to wake him up for feeding, including at night. Keep your baby on your chest for at least 20 minutes. Do not give your child any drink or food or food other than your own milk unless your pediatrician has specifically prescribed it for you.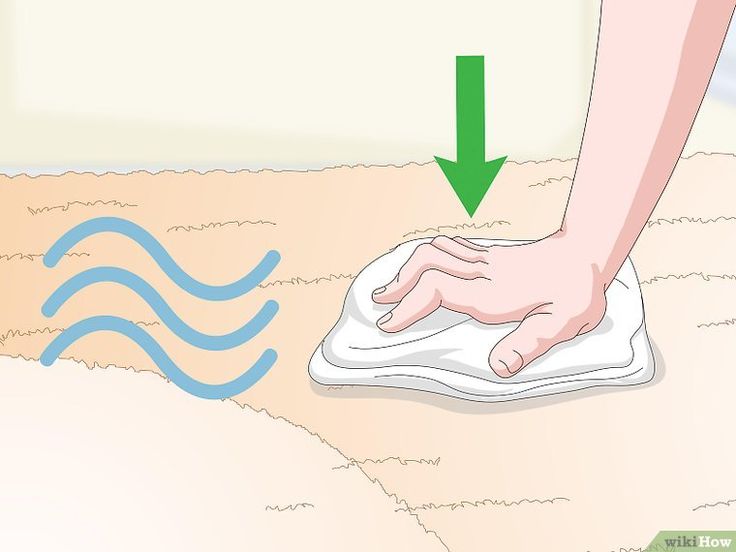 There is no need to express milk, just give the baby the opportunity to completely empty the breast, and then there will be as much milk as necessary. If, in your opinion, the child is not full, you can offer him another breast, but on the next feeding, start with the breast from which you finished feeding.
The temperature in the room where the baby is located should be 22 – 25 degrees (if your baby weighs more than 3 kg). At this temperature, the baby can be dressed in a diaper, sliders, a blouse with a long sleeve. If his feet are cold, then you can wear socks. You don’t need to wear a hat. Short air baths are useful for strengthening the child’s immunity. They are carried out during dressing, leaving him naked for 5-7 minutes. Do not swaddle your baby in diapers. For many months he was able to move freely, and when he became too crowded, he was born to find a new freedom. You need to change the vest at least 2 times a day (in the morning and in the evening after bathing), and sliders as they get dirty.
Ventilate the room at least 3 times a day. During airing, take the baby to another room or dress a little warmer (put on a hat, cover with a blanket).
It is possible to bathe a child even if the umbilical cord has not fallen off. Just dry the umbilical cord after bathing. Wash your child every time after a bowel movement. If the child has only urinated, there is no need to wash. Wash the girl from front to back. Do not allow your child to be in a soiled diaper. It is not necessary to boil water. Potassium permanganate should not be added to water – it “dries the skin” and kills not only “harmful”, but also “beneficial” microbes for our blood. Not more than 2 times a week, you can add a decoction of the children’s bathing collection to the water. With soap, crumbs should be washed only once a week. The temperature of the water for bathing is 36 – 37 ° C, and for rinsing after bathing is 35 – 36 ° C. Water should be poured so much that the baby’s body is completely covered with water.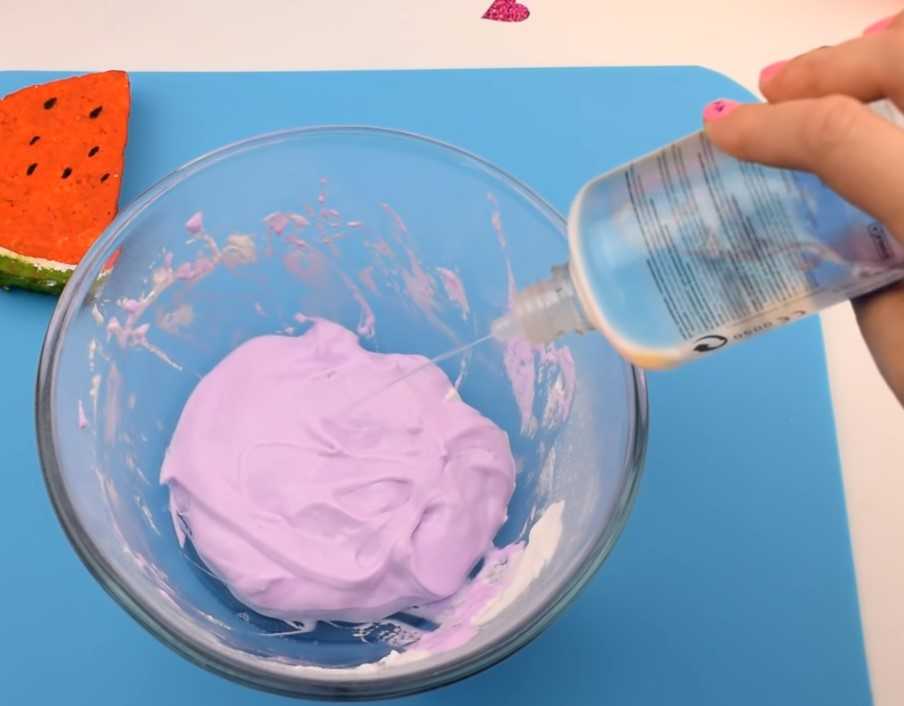 Do not be afraid that water will get into the ears (child up to 9lived in the water for months, and, as an adult, he will swim and dive) just dry them after bathing and put on a hat until your hair is dry. Where you bathe, the air temperature should be at least 22 ° C. If you bathe in a room, do not forget to cover the window.
After bathing, pat dry with a soft towel. Do not rub the skin, it is very delicate. Treat the folds with vaseline (or baby) oil. First behind the ears, then the neck, armpits, elbow creases, popliteal, inguinal and buttocks. When using disposable diapers, lubricate the skin of the buttocks with a special diaper cream.
If the umbilical cord hasn’t fallen off, don’t worry. By 2 weeks of age, shedding usually occurs on its own. If this does not happen, your pediatric health visitor or your local pediatrician will advise you.
The most important thing is to keep the cord clean and dry. If the umbilical cord has fallen off, then the so-called umbilical wound is formed. It can be treated with a 0.5% alcohol solution of chlorhexidine, it can be treated with an alcohol solution of brilliant green. Stretch the edges of the umbilical wound well with a cotton swab moistened with one of the listed solutions, treat the wound in a circle from the inside out. If the umbilical wound is dry and clean throughout the day, the skin around the normal color after bathing, simply dry it with a clean cotton swab. If the skin around the umbilical wound is reddened or pus or cloudy whitish discharge comes out of the wound, seek medical attention immediately.
Wash your child in the morning using cotton wool soaked in boiled water, and when the child grows up, wash under running water, just as you wash yourself. Washing your baby’s eyes is only necessary if it is specifically recommended by your doctor. If necessary, you can clean the baby’s nose (because if nasal breathing is difficult, the baby cannot suckle the breast). Remember that when cleaning the auditory and nasal passages, do not use hard objects. Twist the cotton flagellum between your fingers or palms, moisten it with vaseline oil and clean the nasal passages in turn with rotational movements. Sometimes 3 to 4 drops of saline in each nasal passage can help. The ear canals do not need to be cleared. You can only clean the auricle (for example, if the child burped up and milk got into the ear). If you think that the ear canal still needs to be cleaned, then seek the help of medical professionals. Never drip your milk into your baby’s nose, eyes, or ears. It is a breeding ground for microbes.
Trim your nails very carefully with special scissors. First, treat the scissors and nails with alcohol, then carefully trim the nails.
Never leave your child on a table, bed or sofa unattended (even if you think he cannot roll over). In general, do not leave the child alone for a long time! Co-sleeping in the same bed with parents (and with other children) is not safe from the point of view of possible asphyxia. Co-sleeping can be a risk factor for suffocation of the baby.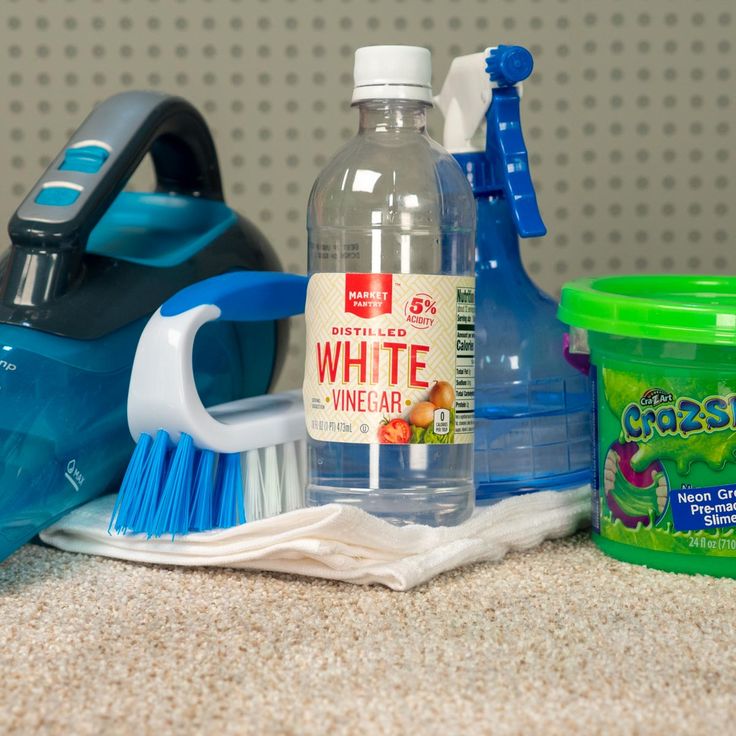 Sleeping in the parent’s bedroom is optimal, but not in the parent’s bed. Place the crib next to yours, lower the side rail. On the one hand, this will ensure the safety of the baby, on the other hand, you will be in close proximity to your child and you will not have to jump up several times at night. It will be convenient for you to feed the baby at night, and then, without getting up, shift it to the crib.
We wish you and your baby health and happiness and are always ready to help you. If you have any difficulties, you can consult by phone about breastfeeding or the child’s condition.
Contact number of the breastfeeding support group: 8(8443)31-71-43, 8(8443)31-01-89
Conditions requiring urgent consultation with the local doctor:
esophagus and genus) of milk that has just been eaten, but not yet digested in the stomach. Regurgitation may occur during or immediately after feeding. If the number of regurgitations per day is more than 5, they are plentiful and come out like a fountain, while the child slowly gains or loses weight, is restless, does not sleep well and often cries – these are reasons for immediate medical attention.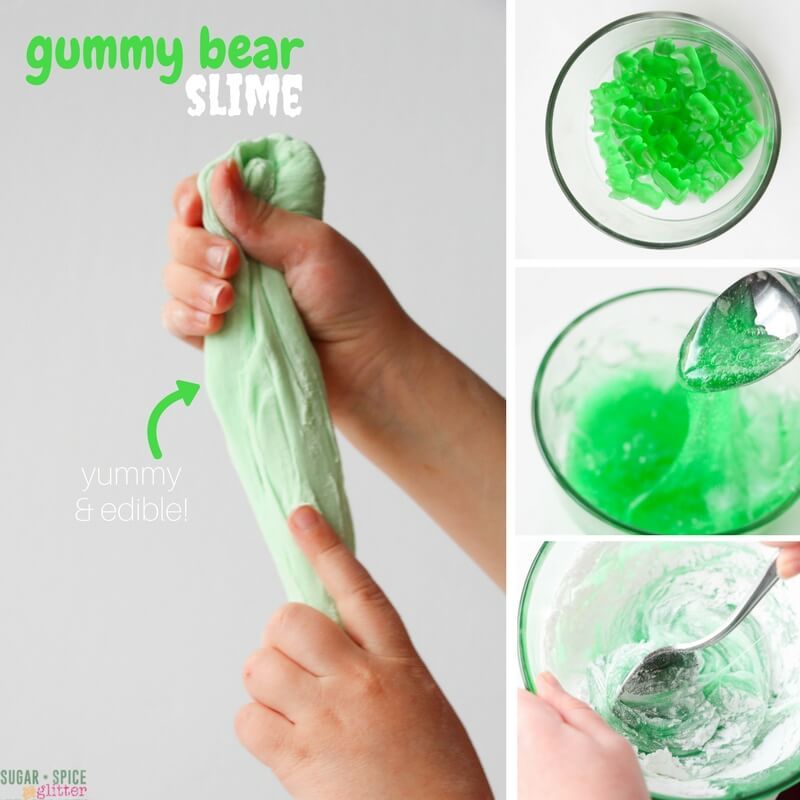
2. Colic is a bout of irritability, excitement or crying in children associated with pain in the intestines due to excessive gas formation. Often, colic occurs during feeding: the child suddenly screams, behaves restlessly, draws his legs. Episodes of anxiety lasting more than 3 hours a day and at least 3 days a week require medical attention.
3. The stool of a newborn should be homogeneous, mushy, free of blood and mucus. If the child’s intestines are emptied less than 1 time in 2 days and there is anxiety, bloating, decreased appetite, and the presence of frequent watery stools, a consultation is required.
4. A healthy baby sleeps 18 to 22 hours a day. He wakes up, asks for breasts, begins to suck, and here at the breast again falls asleep, having completed the meal. Reduced activity and lethargy during the day are indications for examining a child.
5. The appearance and intensification of jaundice after 3 days (jaundice is a condition in which the level of bilirubin in the blood rises, which is deposited in the tissues, gives the skin, mucous membranes and eyeball proteins a tint from lemon to orange), pallor, marbling, cyanosis – indications for visiting a doctor.